


If you want your engine to start strong next season and avoid expensive cold-weather damage, you need to winterize boat engine systems the right way. This guide is for recreational boaters, fishing boat owners, workboat operators, and DIY marine maintenance beginners who want a process that’s clear and easy to follow without overthinking it. No guesswork.
When it’s done properly, winterization helps protect internal engine parts, fuel quality, cooling passages, and gearcase components while the boat is in storage. It also gives owners a good chance to catch small problems before they turn into spring repair bills, which happens a lot. That matters even more right now because the marine industry saw a 12.36% year-over-year decline in November 2025. More owners are focused on protecting the equipment they already have instead of replacing it, and that’s usually a smart move.
In the steps below, you’ll learn what to gather, how to prepare the engine, what to inspect, and how to make sure the job is actually finished. You’ll also see where owners often make mistakes, especially with fuel stabilizer, engine flush steps, fogging, and lower-unit checks. So this guide brings the main prep items, key inspection points, and final checks into one place. If a broader systems overview would help first, that’s covered here: Winterize Boat Engine Systems: Essential Steps.
Before You Start
What you need will depend on your engine type and owner’s manual, but most boat owners will probably want to gather these items before they begin, it usually makes the whole job easier:
- Owner’s manual for your exact engine model
- Fuel stabilizer
- Correct engine oil and oil filter
- Correct gear lube for the lower unit or drive
- Fogging oil or storage seal product, if your engine requires it
- Engine flush attachment or muffs, if approved for your setup
- Marine antifreeze, if your engine or raw-water side requires it
- Basic hand tools, plus a drain pan, gloves, rags, and safety glasses
- Grease gun and marine grease, if your manual calls for grease points
- Battery charger or maintainer
Tip: It’s best not to assume every engine follows the same winterization process. Outboards and inboards can be different, and sterndrives, 2-strokes, and 4-strokes often need different steps too, which is an important detail. So checking the manual first is usually worth it, because it shows what your engine actually needs before you start. Good to know.
Step 1: Confirm Your Engine Type and Storage Plan
Before you grab a wrench, it helps to know exactly what you’re winterizing. Start by checking the engine brand, model, horsepower, stroke type, and cooling setup. Then check where the boat will stay for the winter: outside, under a cover, in dry storage, or in heated storage. That choice changes how much freeze protection you really need, especially if the boat will be sitting outside in below-freezing weather.
BoatUS recommends following the manufacturer’s instructions for flushing, fuel prep, oil service, and draining water systems. Mercury Marine also puts a lot of focus on engine-specific steps, especially when comparing outboards and inboards, or carbureted engines and fuel-injected ones. Those differences often change the process more than people expect.
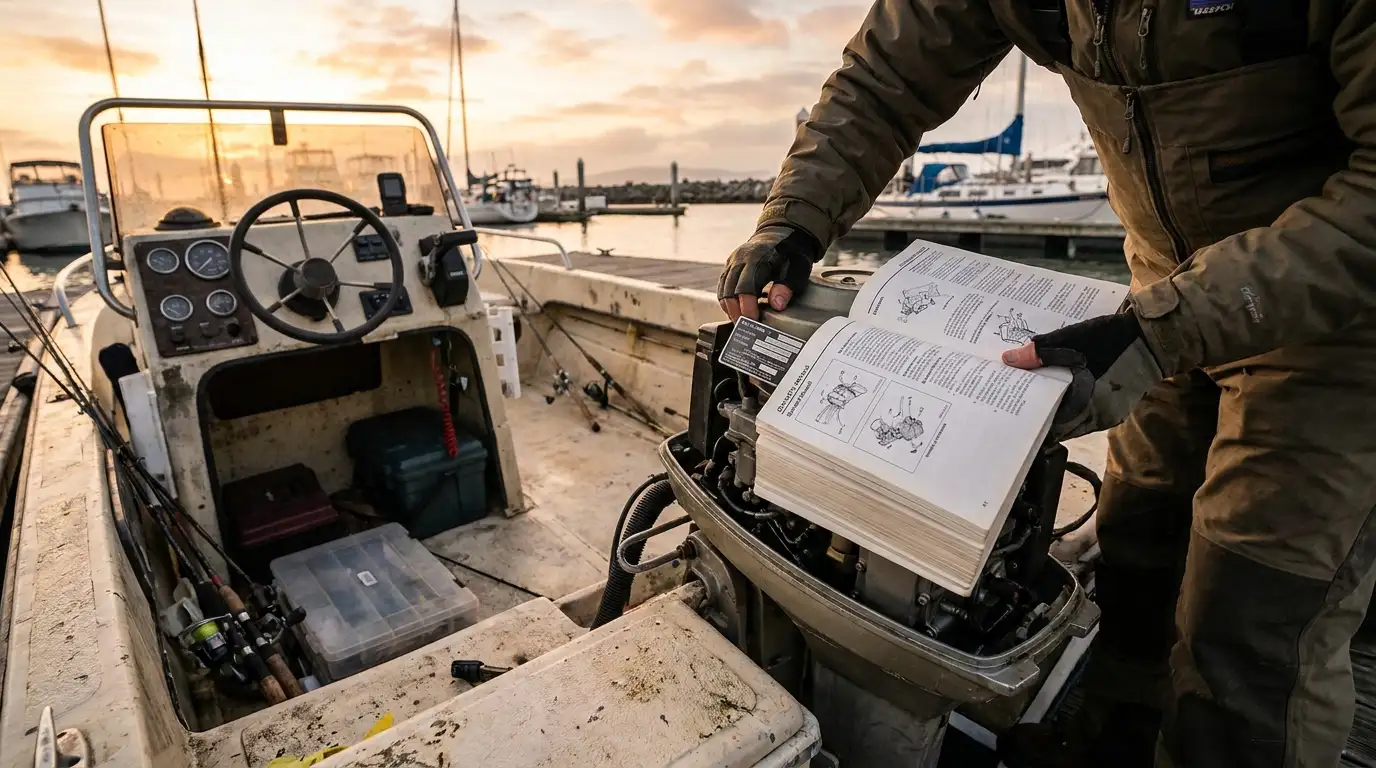
One practical rule applies here: general winterization advice is usually just a starting point, while the manual has the final word. So if the manual says to stabilize fuel and run the engine for 10 minutes, follow that order exactly. If it says to drain a certain system or avoid a certain flush method, do that instead of following broader advice.
Common mistake: buying products before checking engine requirements. That’s easy to do, but it can lead to the wrong oil, the wrong fogging method, or missed drain points that still need attention.
Step 2: Stabilize the Fuel and Run the Engine
Fuel problems are a very common reason a boat runs poorly after storage. Add the correct amount of marine fuel stabilizer to the tank by following the product label. After that, either fill the tank if your engine setup and manual call for full-tank storage, or follow your manual if draining the tank is the better option. It depends on the setup. BoatUS says fuel should either be filled and stabilized or drained fully, based on the setup and the manufacturer’s guidance.
Then run the engine long enough for the treated fuel to move through the fuel lines, pump, and into the injectors or carburetor. The goal is simple, but it usually makes a real difference. Use the run time listed in the stabilizer directions or your manual. If no exact time is given, many owners use about 10 to 15 minutes while keeping an eye on water flow and temperature, since that is often a good sign everything is moving the way it should.
If you’re unsure which treatment fits, that was covered in Fuel Stabilizer Explained: Year-Round Boat Engine Care, which helps match the product to the job. That is often the easiest way to narrow down what works for a specific engine and fuel setup.
Tip: Label the tank with the treatment date and fuel type. It’s a small step, but in spring it helps you know what is in the system instead of guessing.
Troubleshooting: If the engine stumbles while running treated fuel, check the tank vent and fuel filter. It also helps to look at the primer bulb before assuming there is a deeper engine problem.
Step 3: Flush the Cooling System the Right Way
Flushing helps remove salt, silt, and debris that may have been sitting in the cooling passages all winter, which is pretty common. The safest way is to use the exact flushing method approved by the engine maker. On many outboards, that usually means a hose attachment or flush muffs with strong water flow at the lower unit. With inboards and sterndrives, though, the process may include a flushing setup, open drains, and antifreeze steps on the raw-water side.
BoatUS guidance says engines should be flushed according to manufacturer instructions before storage. Here, that usually matters because flushing does more than clean things out. It can also help lower corrosion risk and give you a better chance to spot weak water flow, leaks, or thermostat issues before winter storage, when the boat may sit for months.
Need more detail on when flushing is enough and when a bigger cooling inspection makes sense? That is covered in Engine Flush vs Cooling Service: When a Flush Isn’t Enough.
Common mistake: Running the engine without enough water supply can damage the impeller and cause the exact problem this step is meant to prevent.
Tip: Watch for a steady telltale or proper water discharge. Weak flow is usually a warning sign, so it is worth checking before storage.
Step 4: Change the Engine Oil and Filter While the Oil Is Warm
Old oil can hold acids, moisture, and other contaminants, and those can sit on engine parts all winter, which usually is not good for the engine. That is why BoatUS recommends changing the engine oil and filter before winter storage, then briefly running the engine so the fresh oil moves through the system.
With the oil still warm, drain it into a pan. Replace the filter, then refill with the exact oil grade and specification listed in your manual. After that, start the engine for a short time so fresh oil circulates and so you can confirm proper oil pressure. Then shut it down and recheck the level once the oil has settled for a minute or two. In most cases, that quick check helps you catch a problem early instead of later.
If choosing the right formula feels unclear, First Choice Marine carries marine maintenance products and parts. There is also more on this in Choosing the Right Oil for Boat Engines: A Full Guide, and it can probably help prevent a mismatch if you are not completely sure.
Tip: Write the service date and engine hours on a tag or in your maintenance log. You will probably be glad you did later.
Common mistake: Waiting until spring to change the oil. That usually is the riskier move. Dirty oil sitting all winter is harder on the engine, while fresh oil sitting all winter is generally much easier on it.
Step 5: Fog the Engine and Protect Internal Metal Surfaces
If your engine needs fogging, do it while the engine is warm and follow the manual exactly. Seriously, this is not the step to improvise. Mercury service guidance says to fog the engine and treat the cylinders with storage seal or fogging oil when needed. That usually helps coat internal metal surfaces and, in most cases, reduces rust while the engine sits in storage.
With carbureted engines, this usually means spraying fogging oil into the intake while the engine is running, until the smoke increases and the engine starts to load up. It’s pretty straightforward. Fuel-injected engines can be different, though, and that can catch people off guard. Some newer engines also may not need traditional fogging at all. The manual is still what decides.
When we are winterizing engines, we might see things that are wrong with them that our customers might not catch. It could be something minor, like a throttle or shift cable out of adjustment, but that can affect how the motor performs. We’ll also check for bigger issues, like loose transom bolts or a bent propshaft, which can cause real trouble down the road.
That quote points to an important part of winterization: protecting the engine during storage while it’s not being used. It often does more than that, too, since you’re already there and can inspect hoses and other visible parts at the same time.
Common mistake: Fogging an engine that doesn’t call for it, or applying the product in the wrong place.
Step 6: Service the Lower Unit or Drive and Check for Water Intrusion
Next, move your attention below the powerhead. Drain and inspect the lubricant in the lower unit or drive. If the old lube looks milky, gray, or foamy, water has probably entered through a bad seal. That is something to fix before freezing weather arrives and before the first launch of next season, since it is usually better to catch it early.
Refill with the correct marine gear lube. If your drive uses that method, start at the bottom fill point and work upward. Replace sealing washers when needed. You will also want to check the propeller area, including any fishing line behind the prop. Small problems here often turn into bigger ones later. Look for damaged blades, and check for any shaft movement so it is easier to notice when something feels off.
Tip: Remove the prop and check for wrapped line. Even a small amount can damage a seal and let water into the gearcase, which is easy to miss when someone is moving fast.
Troubleshooting: If metal flakes show up on the drain screw magnet, keep an eye on it and compare what you find with the service history. Heavy metal debris, though, usually means it is time for a professional diagnosis because that points to internal wear that should not be ignored.
Step 7: Drain Water, Add Antifreeze Where Required, and Prep the Battery
Freeze damage often happens when water stays trapped in freshwater tanks, hoses, or raw-water passages, not just when the main engine block gets missed. BoatUS guidance also tells owners to drain freshwater tanks and hoses, since those areas are easy to miss and can still cause freeze damage. For the engine, drain every required raw-water point and add marine antifreeze anywhere the engine design calls for it. It’s basic, but it matters. Use only marine antifreeze rated for the expected conditions, and never guess at drain locations.
If the boat will be sitting for a while, disconnect the battery, clean the terminals, and use a maintenance charger when recommended. A weak battery in storage can sulfate and fail before spring, which is usually a rough way to start the season.
It’s also a good time to wipe down the engine, spray corrosion inhibitor on approved external metal parts, and give hoses, clamps, belts, steering movement, and visible wiring a quick check. Here, small steps often help catch problems early.
Common mistake: Assuming heated daytime storage means there’s no freeze risk. One cold night can still crack a component if water is trapped inside.
Step 8: Finish Storage Prep and Create a Spring-Start Checklist
The last step is pretty simple, but it still matters. If your storage setup allows it, lower the outboard all the way so water can drain from the bottom of the engine, since that’s an easy thing to miss. Cover the engine properly. If it’s safe, seal any clear gaps or openings where rodents could get in. It also helps to keep service notes, spare filters, used part numbers, and similar records together in one place, because that usually makes spring startup much easier.
A lot of shops now combine winterization with storage, shrink wrap, and off-season inspections. That approach often makes sense, since a full layup plan can catch small problems early, before they turn into bigger headaches by launch day or spring. Still, a careful DIY owner can do this well too, especially by writing each step down and staying organized. It’s all pretty basic stuff.
Write down:
- The date winterization was completed
- Engine hours
- Oil type and quantity used
- Which gear lube you used
- Fuel treatment added
- Battery condition
- Any issues to fix before launch
You can also use the parts and maintenance selection at First Choice Marine to get what you need in one place, such as filters, gear lube, and fuel treatment, so you are not rushing around when the season ends.
Frequently Asked Questions
When should you winterize a boat engine?
You should winterize before the first hard freeze in your area and ideally right after your last trip of the season. Do not wait until temperatures are already dropping below freezing at night.
Do you need to winterize a boat engine in a mild climate?
Yes, often you do. Even in mild areas, fuel can age, internal corrosion can build, and one unexpected cold snap can damage water-filled parts. Your storage time matters as much as your climate.
Can you winterize a boat engine yourself?
Yes, if you have the owner’s manual, the right products, and enough time to follow each step carefully. DIY works best when you stay within manufacturer procedures and do not skip oil, fuel, cooling, or gearcase checks.
What happens if you skip fuel stabilizer?
Fuel can break down during storage and leave varnish or deposits in the system. That can lead to hard starts, clogged passages, rough idle, and extra spring cleanup.
What products do you need to winterize boat engine systems properly?
Most owners need fuel stabilizer, engine oil, an oil filter, lower-unit gear lube, fogging oil if required, corrosion inhibitor, and sometimes marine antifreeze. First Choice Marine is a practical source for those routine engine-care items when you want marine-specific products instead of guessing with automotive substitutes.
How do you know winterization was done correctly?
You should have fresh oil installed, treated fuel circulated, the cooling system flushed, gear lube checked or replaced, required water drained, and the battery secured for storage. Keeping a written checklist or sourcing your maintenance supplies from a dedicated marine parts retailer like a marine parts and maintenance store also makes it easier to confirm nothing was missed.
How to Verify Success and What to Do Next
A properly winterized engine should be clean, dry where it needs to be, protected by fresh fluids, and marked down for spring without anything complicated. Pretty basic, really. One more check against the owner’s manual is usually a smart way to make sure everything is covered. Make sure the oil and gear lube are at the correct level, the fuel has been treated as needed, drain points were taken care of, and the battery plan is set.
You can usually tell the job went well by going through a few simple questions. Did you use the right products? Was the engine run after fuel treatment and fresh oil service where required? Did you protect it from trapped water and internal corrosion? Did you make a note of repairs to handle before launch? That last step is often the easiest to miss, even though it can save problems later.
The next step is simple: store the checklist with the boat paperwork and set a calendar reminder for a spring recommissioning inspection. If damaged seals, weak water flow, or suspicious gear lube showed up, deal with those issues before launch day. Winterization is not just a shutdown task. In many cases, it is an ongoing part of boat care, like checking fluids, tracking issues, and fixing wear before the season starts. That usually helps protect performance, reliability, and the boat’s value over time.
