


If your marine bilge pumps quit, things can get serious fast. This guide walks through common marine bilge pump problems step by step for boat owners, anglers, DIY marine maintenance readers, and commercial operators who want a clear process they can follow without second-guessing.
You’ll learn how to check power, test the float switch, clear clogs, spot backflow, respond to alarms, and make sure the system is working again. Nothing fancy. The article stays focused on diagnosis and repair instead of pump sizing or selection, so the steps stay practical and easy to follow. If you want help choosing a unit later, you can read The Best Marine Bilge Pumps: Selection and Maintenance Guide.
Flooding happens more than a lot of people realize. In 2024, the U.S. Coast Guard reported 3,887 recreational boating incidents, 556 deaths, 2,170 injuries, and about $88 million in property damage. Serious numbers. ABYC-related accident data also shows that flooding or swamping, along with machinery failure, still causes major trouble. A pump can look fine at a glance and still fail because wiring has corroded, the switch has stuck, the hose runs the wrong way, or debris has built up in the bilge.
Before you start with marine bilge pumps
You will need:
- A digital multimeter
- A flashlight or headlamp
- Screwdrivers and pliers
- A spare fuse of the correct rating
- Clean rags or paper towels
- A small bucket or hose for test water
- Contact cleaner and dielectric grease
- Zip ties and heat-shrink marine connectors if wiring repair is needed
- Your boat’s wiring diagram, if available
Before touching any wiring, turn off shore power and use the battery switch if needed. If there are fuel fumes in the bilge, stop. Ventilate the area first. Do not create sparks, especially in a contaminated bilge.
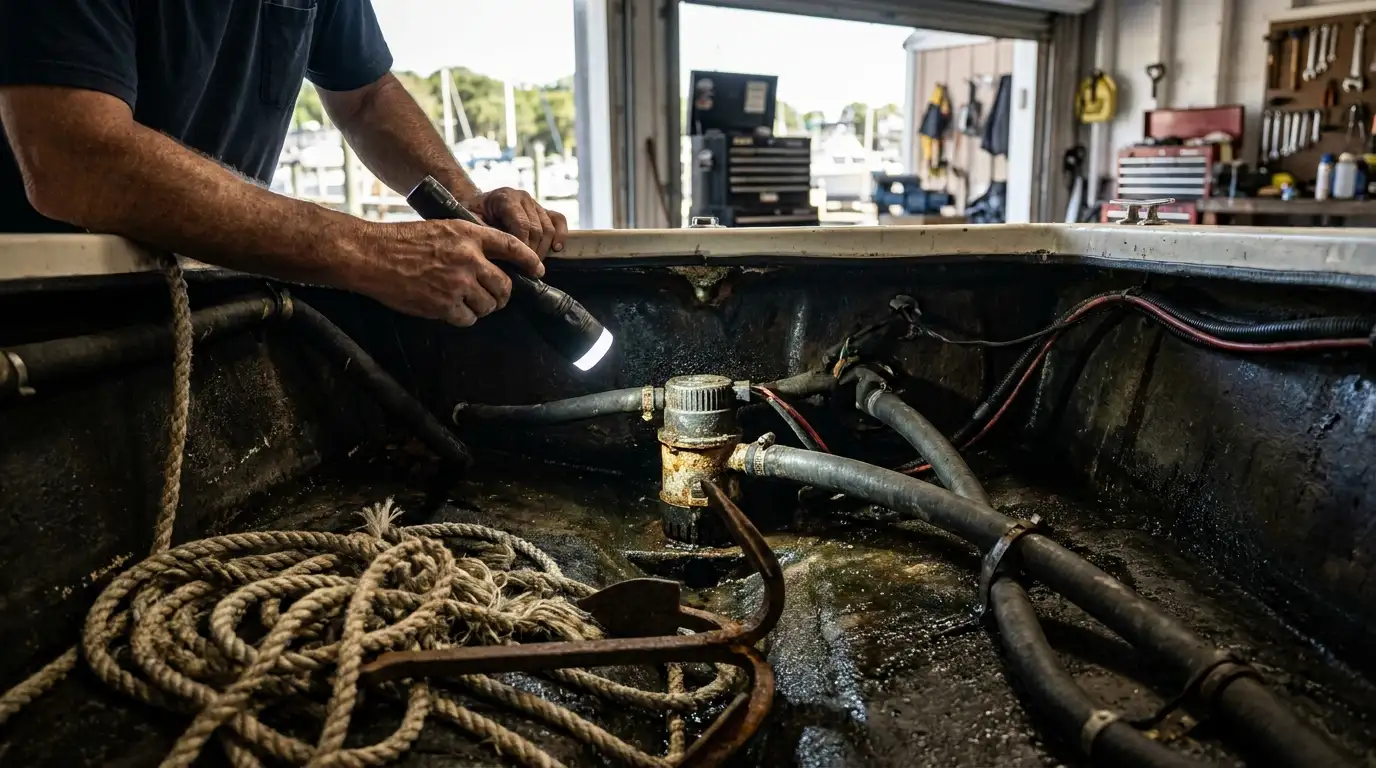
Step 1: Confirm the exact symptom on marine bilge pumps first
Before taking anything apart, do a quick test. Move the helm or panel switch to manual. Then check the automatic side by lifting the float switch by hand or by adding a small amount of clean water to the bilge.
Write down what matches:
- Pump doesn’t run in manual or auto
- Pump runs in manual but not in auto
- Pump runs but barely moves water
- Pump cycles on and off too much
- High-water alarm sounds
Each symptom points in a different direction. If the pump fails in both modes, the issue generally comes back to power or the pump itself. If it works in manual but not auto, the float switch or its wiring moves to the top of the list. Weak discharge puts the focus on the hose and intake.
Regularly (at least weekly) test the bilge pumps and bilge system.
This advice helps catch problems before they turn into emergencies. Official guidance also says bilge alarms should be tested daily in the fishing-vessel context. Still, that habit makes sense for any serious operator.
Step 2: Check battery voltage, fuse, and breaker
If the pump doesn’t run at all, start with the power supply. Set the multimeter to DC volts and measure battery voltage at the battery terminals first. On a 12-volt system, you’ll often see about 12.6 volts when the battery is fully charged and at rest. If the reading is low, charge the battery before moving on.
Next, check the pump fuse and breaker. Replace a blown fuse only with one that has the same amperage rating. Reset a tripped breaker once, and only once. If it trips again, stop and look for a short or a seized pump.
Then measure voltage at the pump’s positive and negative leads with the switch set to manual. If you see voltage close to battery voltage at the pump and it still doesn’t run, the pump motor has likely failed or is jammed. No voltage there? Check farther upstream at the wiring, switch, fuse holder, or breaker.
ABYC-oriented guidance gives you a useful installation benchmark: place the fuse within 7 inches of the power source. Use tinned marine wire as well, and keep electrical connections above the maximum bilge water level. That helps reduce corrosion and voltage drop over time.
| Safety or maintenance point | Value | Context |
|---|---|---|
| U.S. recreational boating incidents | 3,887 | 2024 |
| Deaths | 556 | 2024 |
| Injuries | 2,170 | 2024 |
| Property damage | $88 million | 2024 |
| Flooding/swamping share | 6.8% | ABYC memo data |
| Machinery failure share | 6.1% | ABYC memo data |
If the readings seem inconsistent, clean the fuse clips and terminals. Corrosion can look minor and still keep the circuit from carrying a real load.
Step 3: Test the manual switch and wiring path
If the fuse is good but the pump still seems dead, or only works now and then, test the switch circuit. Remove the switch panel if needed and inspect the back. Look for green corrosion, loose spade terminals, heat damage, or a broken crimp.
Turn the manual switch on and check for voltage going into the switch and coming out. If power goes in but doesn’t come out, the switch is bad. Replace it with a marine-rated switch with the same function.
If power leaves the switch but never gets to the pump, inspect the wire run. Pay close attention to:
- Butt connectors near the bilge
- Wires sitting in standing water
- Chafe points where the wire passes through bulkheads
- Ground connections that look dark, loose, or crusty
A common mistake is replacing the pump before confirming the wiring is sound. This happens a lot. People blame many marine bilge pumps for problems that actually come from bad wiring. Wire damaged by moisture can look fine in a quick visual check and still fail under load.
For a closer look at wiring layouts and safety checks, see Submersible Bilge Pumps: Selection, Wiring & Safety Checks.
Tip: when repairing a connection, use heat-shrink marine connectors and support the wire so vibration doesn’t tug on the crimp.
Step 4: Diagnose a pump that works manually but not automatically
When a bilge pump runs in manual mode but not in auto, the float switch is often the issue. In many cases, the switch is stuck, dirty, blocked, or has failed electrically.
Start with a physical inspection. Clear away leaves, zip tie ends, fishing line, sludge, oil residue, and any loose debris around the float. Then lift the float by hand. It should move freely through its full range without rubbing the pump body or the hose. It should move smoothly.
Next, test the switch electrically. Disconnect the switch leads if your setup allows it safely. With the float down, continuity should be open. Raise the float and continuity should close. If the reading does not change, replace the switch.
Check the wiring too. Problems can sit between the float switch and the pump. Many systems use separate feeds for automatic and manual operation. That means a pump can run fine on manual and still fail in auto if the float-switch circuit has lost power or ground.
Current guidance and field experience point to the same failure areas: debris trapped under float switches, corrosion, oil and sludge buildup, and physical damage during servicing. Since these issues come up again and again, many owners switch to integrated automatic pump systems or add monitoring.
A common mistake is testing auto mode only by waiting for rainwater. Do not do that. Trigger the switch directly instead so you can confirm the circuit actually works.
Step 5: Fix weak pumping or poor discharge
If the pump runs but water still is not leaving the boat well, the problem is more likely mechanical than electrical. Start with the intake. Clean the strainer, then remove hair, sludge, scale, or other soft debris that has built up around the base.
Next, inspect the discharge hose that runs from the pump to the through-hull. Look for:
- Kinks
- Sharp bends
- Crushed sections
- Loose hose clamps
- Blockage at the outlet
- Low spots that trap water and create an airlock
Bad hose routing is a common cause. A hose that sags can hold water, slow priming, and reduce flow, so many guides recommend keeping low spots out of the discharge line. It is easy to overlook.
Once the hose is clear, compare the pump’s performance with how it worked before. A worn motor or damage around the impeller area can slowly reduce output over time. Check the outlet too. If it sits submerged in a way that allows backflow after the pump stops, water can run back and make the whole system seem weaker than it is.
If water keeps draining back into the bilge, check the hose routing again before adding extra parts. A check valve installed in the wrong place can create its own restriction. In some setups, it may not be the right fix.
For a broader maintenance routine after repairs, read Bilge Pumps Maintenance Checklist for Boat Safety.
Step 6: Stop a pump that cycles too often
If a bilge pump turns on too often, treat it as a warning about incoming water or a control issue. Don’t ignore it.
First, dry the bilge as much as you can. Then keep watching for new water coming in through shaft seals, hoses, fittings, livewell plumbing, packing glands, deck drains, or washdown systems, because even a tiny leak can make the pump run over and over. A small leak is a big clue.
If no water seems to be coming in, inspect the float switch. A sticky float can stay partly raised and cause nuisance cycling. Check the discharge too. Water may drain back into the bilge after shutdown, and poor hose routing or bad outlet placement may be the reason.
Commercial and inspected-vessel rules point in a clear direction. Under 46 CFR 119.530, certain spaces need visual and audible high-water alarms at the operating station, and the rule also requires a visual indicator showing when an automatic bilge pump is running. Even if your boat isn’t covered by that rule, the idea still helps. Don’t rely only on hearing the pump. Add a visible indicator and a warning alarm.
Step 7: Respond the right way when the high-water alarm sounds
When the alarm goes off, treat it as urgent. Don’t assume the pump will catch up.
Always investigate immediately the cause of high level bilge alarms.
Take these actions in order:
- Find where the flooding is coming from.
- Put the pump on manual if needed.
- Start any backup pump.
- Reduce speed if that helps the crew get to and control the problem safely.
- Check hoses, seacocks, strainers and discharge flow.
- Get dewatering gear ready and prepare an emergency response if the water keeps rising.
Fishing-vessel data shows the risk. The MAIB received 230 reports of fishing-vessel flooding from 2013 to 2022, and 78 of those reports ended in loss of vessel. These are serious numbers. That doesn’t mean your boat is doomed when an alarm sounds, but acting early can make a real difference.
Every fishing vessel should have a pre-planned and well-drilled response to a flood. This should involve everybody on board knowing how to start the bilge pumps...
Step 8: Add backup protection after the repair
After fixing the immediate issue, improve the system so one failure doesn’t turn into a crisis. Bilge safety works best in layers: a pump, an alarm, an indicator, a manual override, and a backup pump.
Good next upgrades include:
- A second pump mounted slightly higher
- A separate float switch for the backup pump
- A high-water alarm
- A clear pump-run indicator at the helm
- Labeled manual override controls
If you’re shopping for replacement parts or accessories, First Choice Marine is a practical source for marine maintenance gear and bilge system parts. Keep the setup simple enough to test regularly.
Another smart move is to put the test schedule in writing. Official guidance suggests checking bilge pumps and related systems at least once a week, with alarms tested daily in higher-risk operations. Recreational boaters can benefit from the same habit, especially because a simple routine helps catch problems early.
For more on backup system layouts and failure planning, read Automatic Bilge Pumps vs Manual: Real Failure Scenarios & Redundant Design.
Frequently Asked Questions
Why does my bilge pump work on manual but not on auto?
That usually points to the float switch or the auto-mode wiring. Start by clearing debris around the float, then test for continuity as you lift it. If the switch does not close electrically, replace it.
How often should you test marine bilge pumps?
A good rule is to test the pump and bilge system at least weekly and check alarms very often, especially on boats that stay in the water. Quick testing catches stuck floats, dead batteries, and corroded wiring before they become emergencies.
Can a bilge pump run and still not remove water well?
Yes. The pump may be powered, but the intake can be clogged, the hose can be kinked, or the discharge line can have an airlock or blockage. Weak flow is often a plumbing problem, not a switch problem.
Should I replace the float switch or the whole pump?
Replace only the failed part if the other parts test good and are in solid condition. But if the pump is old, output is weak, wiring is tired, or the switch and pump are both showing wear, replacing the full assembly may save time and future trouble. First Choice Marine can help you compare parts when you are ready to refresh the system.
Is a high-water alarm really necessary on a small recreational boat?
It is not just for large commercial vessels. An alarm gives you an early warning that water is rising faster than the pump can handle, or that the pump is not keeping up at all. That extra notice can buy you critical time.
Where should I buy parts for marine bilge pumps and wiring repairs?
Look for marine-rated parts, tinned wire, proper fuse protection, and components meant for wet environments. A dedicated marine parts retailer like an online retailer for marine parts and maintenance solutions is useful because the parts are geared toward real onboard conditions rather than general household electrical work.
Make sure your repair actually worked
Before you trust the boat again, do one last full-system test. Fill the bilge with enough clean water to trigger the automatic side, then make sure the pump starts, discharges strongly, shuts off as it should, and doesn’t kick back on a minute later from backflow. Then test manual mode at the panel. If the boat has an alarm or indicator, test those too.
Then clean the bilge so dirt doesn’t cause the same problem again. Secure wires above the normal water level, replace any corroded connectors, and keep the float switch area clear. If the pump passed every test, add the inspection to your regular routine and check it again before every trip. Marine bilge pumps can stay out of mind when they’re working, but they still need attention before the day they matter.
