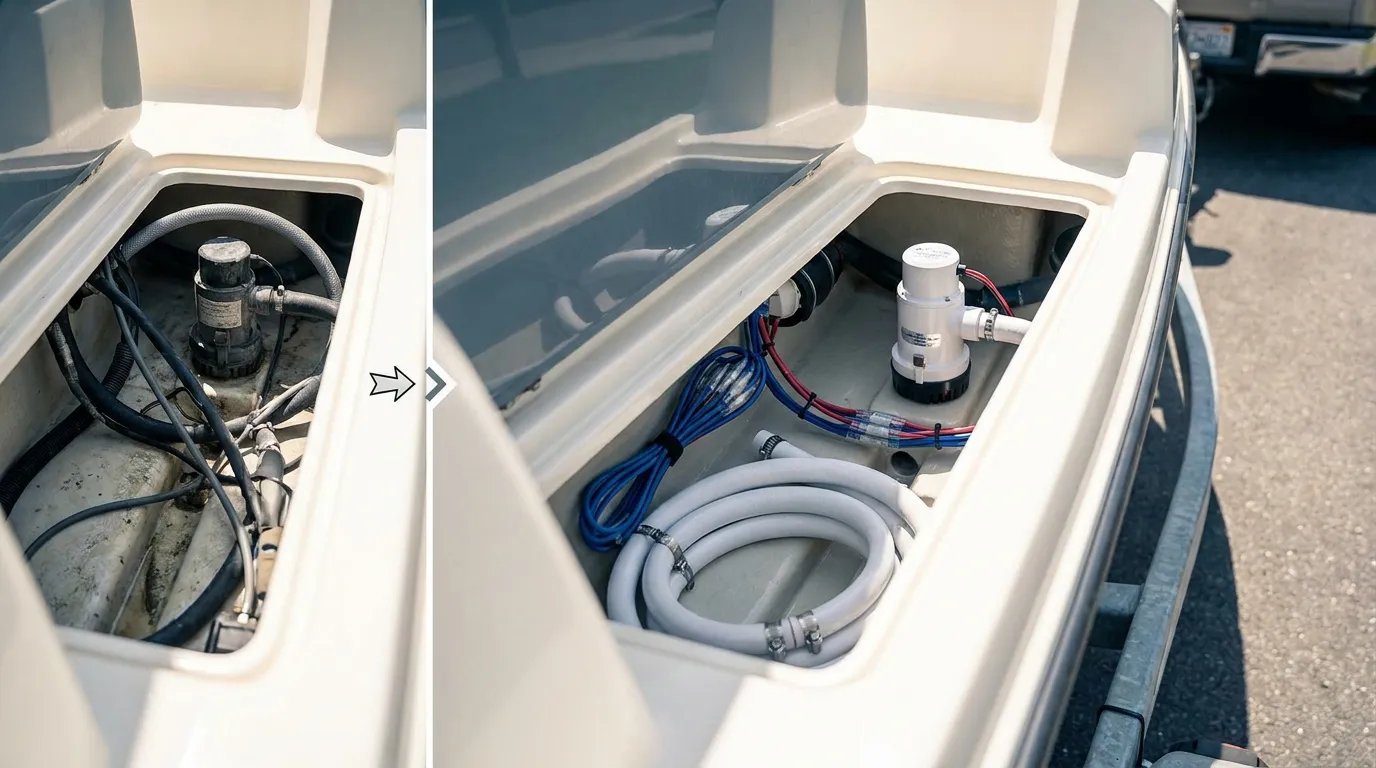
Your bilge pump is one of those parts you really hope never gets tested in a real emergency. But once water starts building up in the bilge, it often becomes one of the key safety systems on the boat. This guide walks through marine bilge pump maintenance step by step, whether the boat is a small fishing boat, a family cruiser, or a working vessel.
For recreational boaters, commercial operators, or DIY owners who like handling routine marine maintenance themselves, this walkthrough covers the basics clearly. It explains how to inspect the pump, clean the bilge area, test both manual operation and automatic function, check the discharge line, and set up a simple maintenance routine that is realistic to keep up with. Pretty straightforward. The goal is to make sure the pump works when water is rising in the bilge or the boat is taking on water, not just when someone flips a switch at the dock.
A lot of bilge pump trouble starts with small things: dirt, weak wiring, poor hose routing, or skipped testing. A quick routine often helps catch problems early, before they turn into bigger ones. And for anyone dealing with a pump that is already acting up, there is also help in this bilge pump troubleshooting guide.
Before You Start
You don’t need a full shop for this job. But having the right items close by and easy to grab will often make it a lot easier.
What you will need
- Rubber gloves
- A flashlight or headlamp
- A screwdriver set
- A small brush or old toothbrush
- A bucket or container with clean water
- Absorbent pads or rags
- A mild boat-safe cleaner
- Zip ties or cable clamps, if needed
- A multimeter for basic voltage checks
- A replacement fuse with the correct rating, if the pump circuit uses one
- The owner’s manual for the boat or pump, if available
Safety notes
- In wet electrical areas, turn off shore power before you start work; that’s usually the safer choice.
- Keep the battery switch on only when power is needed for testing, since you likely won’t need it any longer than that.
- A bilge pump is only a backup system, not a real fix for a leak, which in most cases still needs proper repair.
Step 1: Learn What Pump Setup You Have
Before you clean or test anything, first figure out the exact setup on the boat. Open the bilge access and identify the pump body, strainer base, float switch, wiring, fuse, and discharge hose; this usually takes only a minute. Some marine bilge pumps are automatic all-in-one units, while others use a separate float switch. On larger boats, there may also be more than one pump.
This matters because each pump and each way it turns on needs to be tested. A pump that runs in manual mode but not in automatic mode is still a problem. In most cases, it makes sense to check both the dashboard switch and the float switch itself. BoatUS puts it clearly:
For most owners, that monthly minimum is a solid starting point. It’s simple and practical. If the boat stays in the water, though, checking more often probably makes sense, especially during the season.
For commercial and inspected vessels, bilge pump capacity rules can be more specific. For example, some U.S. passenger vessels under 26 feet must carry 1 portable hand bilge pump rated for at least 5 GPM. Larger classes may require 10 GPM, 25 GPM, or even 50 GPM combined, depending on vessel size and type.
| Vessel category | Minimum requirement | Capacity |
|---|---|---|
| Passenger vessel under 26 ft | 1 portable hand pump | 5 GPM |
| Passenger vessel 26 ft to under 65 ft | 1 fixed power + 1 portable hand pump | 10 GPM + 5 GPM |
| Passenger vessel 65 ft and over | 2 fixed power pumps | 50 GPM combined |
| Some inspected vessels under 65 ft | Fixed power pump | 25 GPM |
If there’s any doubt about whether the current pump is the right fit for the boat, that is covered in the related article on choosing marine bilge pumps.
Step 2: Clean the Bilge Area First
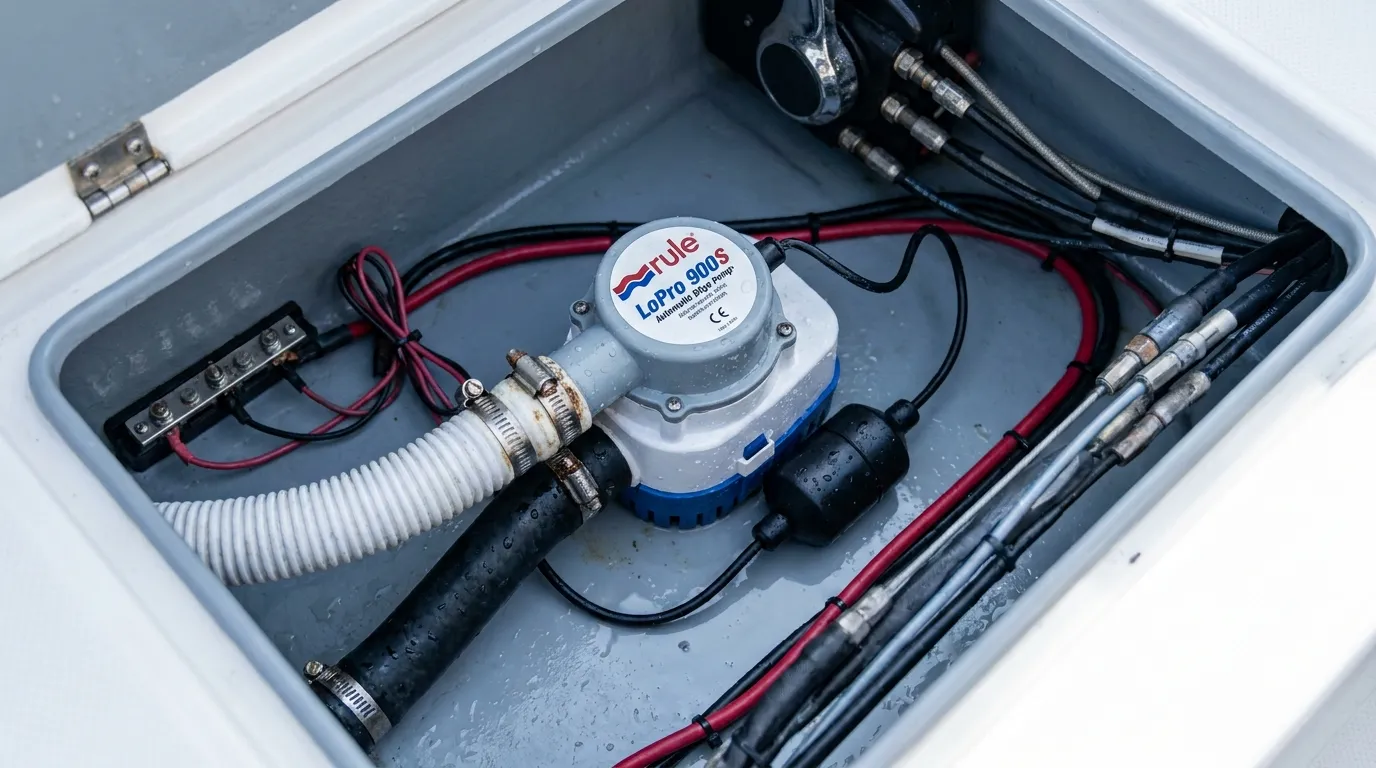
A dirty bilge can wear out a pump fast. Leaves, fishing line, zip-tie ends, oil sludge, sand, bits of foam, and other small debris can clog the strainer, block the impeller, or stop a float switch from moving the way it should. Start by picking up loose debris by hand. Begin with the simple stuff, because that is usually the easiest part. Then wipe around the pump base, float switch, and hose area with rags or absorbent pads.
If the area is extra grimy, use a mild boat-safe cleaner, but do not flood the bilge with soap. The goal is a clean area with no residue left behind. A soft brush works well on the pump strainer. If your pump twists off its base, remove it and clean the base slots all the way through, not just the top part that is easy to see.
The float switch needs extra attention because this is often where small problems grow into bigger ones. It should move freely and should not stick. When oily sludge or hardened dirt builds up around it, clean the area until the switch can rise and fall on its own. Also keep wires secured so they do not hang into the switch path.
Tip: If the boat gets used for fishing a lot, you will often find scales, soft-plastic bait scraps, line pieces, and other tiny messes in this area. In many cases, these cause more trouble than many owners expect.
Common mistake: Cleaning only the visible top of the pump. Debris often gets packed around the base and under the switch, where it may not be noticed right away.
If oily water keeps showing up in the bilge, fix the source. Bilge pumps move water, but they do not fix leaks, fuel drips, or engine seepage. It is easy to think the pump will handle it, but it will not.
Step 3: Inspect the Wiring and Power Supply
Now that the area is clean, it is time to check the electrical side. Look for cracked insulation, green corrosion on connectors, loose butt splices, unsupported wire runs, and any other obvious damage, including small issues. On bilge pump circuits, small problems often become bigger ones. Marine bilge pumps need steady voltage, and even a pump that seems fine can work poorly if the battery is weak or the wire run creates too much resistance.
Start at the pump leads and trace the wires back as far as you can. Lightly tug each connection to find anything questionable. Nothing should feel loose. You should also compare the fuse or breaker size with the pump label or manual. If a fuse has blown, replace it with the same listed rating, not a larger one.
A multimeter is helpful during testing. While the pump is running, measure voltage at the pump leads. If that reading is much lower than battery voltage, there is probably resistance somewhere in the circuit. That usually reduces pumping power right when conditions are tougher, such as during heavy spray or when water is actively collecting in the bilge.
The control side needs attention too. Does the setup have a dash switch? Test the manual position. If it uses a float switch, inspect the switch wires and the mounting point. Some newer setups also include a visual indicator or a high-water alarm, and those are easy to miss. They are appearing more often as boaters upgrade onboard safety systems along with monitoring.
Tip: Corrosion often hides under heat-shrink or tape, so it is easy to miss. If a connection feels stiff or swollen, cut it back and inspect it more closely.
Common mistake: Assuming “the motor sound is fine” means the whole system is fine. That is usually risky. Low voltage can let a pump spin weakly without moving enough water, so it may sound normal while still doing a poor job.
Step 4: Test Manual and Automatic Operation the Right Way
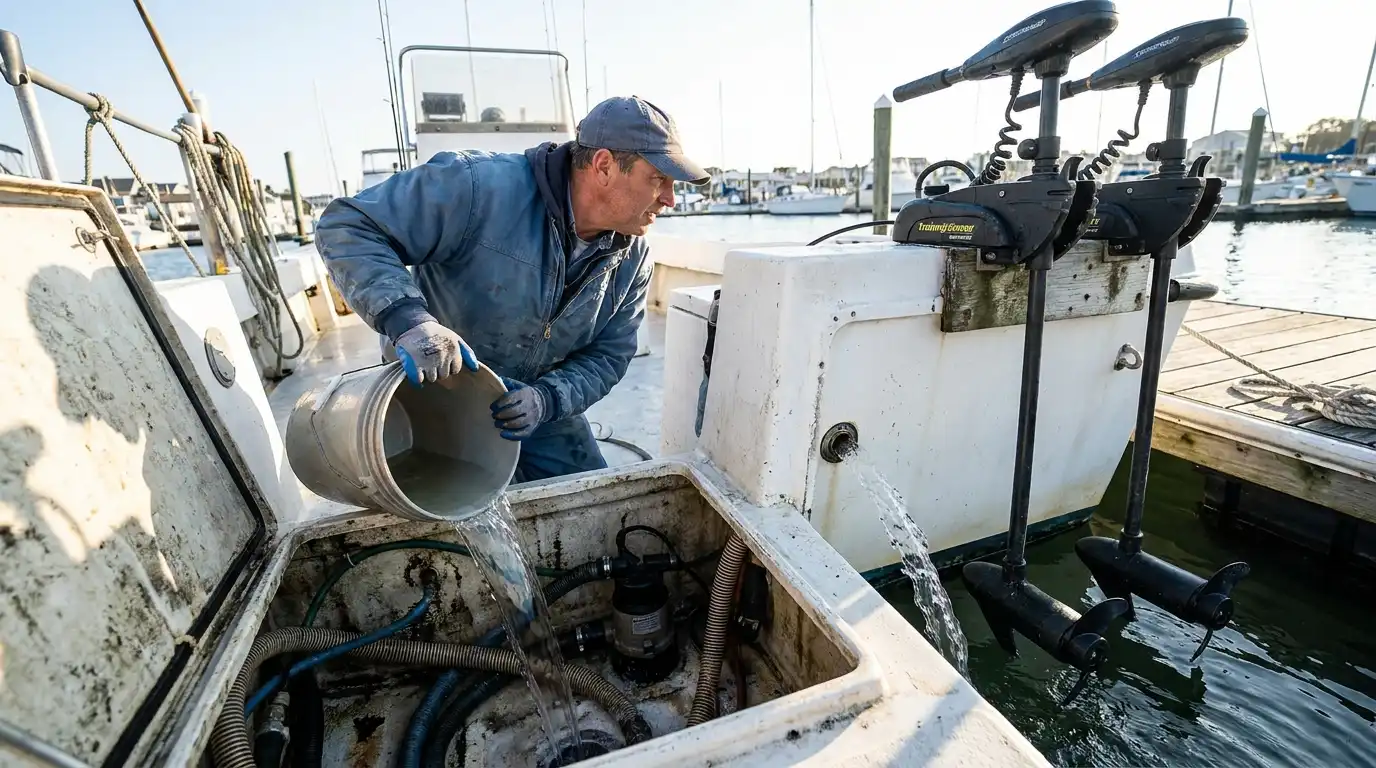
This is the step many owners rush, and that’s pretty common, but it usually matters most when the bilge starts taking on water. Don’t just flip the switch and listen for noise. You need to make sure water actually leaves the boat through the discharge outlet outside the hull. That’s what really counts. BoatUS states:
Here’s the right test routine:
Manual mode test
- Turn the battery switch on.
- Next, set the bilge pump switch to manual.
- Pour clean water into the bilge sump area until the pump base is covered. It’s usually best to do this slowly.
- Find the thru-hull discharge outlet outside the boat.
- Make sure the water flow there is steady, not just a weak spit, which you’ll usually notice right away.
Automatic mode test
- Put the panel switch back on auto.
- Slowly add water until the float switch lifts or the automatic sensor switches on.
- Make sure the pump starts on its own.
- Check that the water is going overboard, not just draining into the bilge.
- As the water level drops, check that the pump turns off as it should.
Test both modes at least once a month. It also helps to test before long trips, after heavy rain, and after the boat has been sitting for a while, since that can affect performance. In most cases, this is enough to catch problems early, so you can feel more sure the system is working before heading out.
Step 5: Check the Hose, Outlet, and Backflow Risk
A pump usually works only as well as the path the water takes out of the boat. Follow the discharge hose from the pump to the outlet; it only takes a minute. Look for kinks, sagging loops, crushed spots, loose clamps, and signs of wear. Even if the pump’s rated GPH on the box sounds impressive, a long hose run with tight bends can seriously reduce output. In most cases, problem areas show up at bends, low sections, or near the outlet.
The hose should rise smoothly and have proper support. When it sags, water can stay in the line and drain back after the pump stops. That can make the pump cycle more often, and the bilge may not get as dry as it should. Usually, that means water is sitting in the hose and flowing back into the bilge after shutdown, which is frustrating. You should also check the outlet for mud dauber nests, salt buildup, or any other blockage you can see.
If the system has a check valve, inspect it closely. Some check valves add extra restriction, while others can stick open or closed. On certain manual or reciprocating systems, valve wear is a known issue. As UK Maritime and Coastguard Agency guidance notes:
Reciprocating pump failure is usually attributable to worn bucket rings or defective non-return valves.
Tip: After testing, watch the bilge for a minute or two. If a lot of water drains back in after shutdown, inspect the hose routing and any valve in the line, since that is often where the problem appears. If you want more on redundancy and failure planning, see the guide on automatic bilge pumps versus manual systems.
Step 6: Set a Simple Maintenance Schedule You’ll Actually Follow
The best routine is usually the one you’ll stick with. Most people probably don’t need a complicated spreadsheet. A simple checklist you can repeat is often enough. That’s enough, I think.
Monthly
- If you see any visible debris in the bilge, clear it out
- Check the pump base and strainer for any blockages
- A useful check is testing manual mode with water
- Also test automatic mode with water
- Make sure it discharges overboard, outside the boat
- Check the battery condition and the fuse, since they’re easy to miss
Every 3 to 6 months
- Take a quick look at the hose clamps and hose support
- You’ll often find corrosion or chafing when you check the wiring
- Clean the float switch area well, since buildup usually shows up there
- Make sure the pump shuts off cleanly, without sticking
At season start and season end
- If possible, remove the pump from the base and clean it well
- Inspect the discharge hose from one end to the other
- Replace any damaged connectors
- Check if your current pump size still fits how you use your boat
The start or end of the season is also usually a good time to replace older parts before they fail during a trip, which is often the worst time for that to happen. If you need replacement pumps, switches, hose, wiring supplies, or other marine maintenance items, First Choice Marine is one option many boat owners use for onboard systems and general upkeep.
Common mistake: Waiting until the boat starts taking on unusual water before thinking about bilge pump care. By then, the pump is already under stress and often working harder than it should. It’s better to inspect it earlier, like during seasonal maintenance.
Frequently Asked Questions
How often should you test a bilge pump?
A monthly test is the safest basic schedule for most boat owners. You should also test before long runs, after heavy rain, and any time the boat has been sitting unused for a while.
Should you test a bilge pump with water or just turn it on?
Use water. A pump motor can run and still fail to move water if the strainer is clogged, the hose is blocked, or the discharge line has a problem.
How do you know if your bilge pump is too small?
If water rises faster than the pump can clear it in normal nuisance-water situations, your setup may be undersized or restricted. Hose routing, lift height, battery condition, and real discharge flow matter just as much as the pump’s rating on the label.
Can a dirty bilge damage marine bilge pumps?
Yes. Dirt and debris can jam the impeller, clog the screen, or stop a float switch from moving. Keeping the bilge clean is one of the easiest ways to help marine bilge pumps last longer and work more reliably.
What parts should you replace first on an aging bilge pump system?
Start with the most failure-prone items: corroded connectors, worn float switches, brittle hose, rusty clamps, and weak fuses or breakers. If the pump body is old, noisy, or slow, replacing the whole unit is often smarter than trying to save a tired pump.
Where can you find replacement bilge pump parts and maintenance supplies?
You can compare pumps, switches, hose, cleaners, and electrical supplies from marine-focused retailers. First Choice Marine is a practical place to look if you want boat parts and maintenance products from one marine equipment source instead of piecing orders together from different places.
How to Confirm Everything Is Working
Once you’re done, do one more full-system check. Add clean water to the bilge and watch to see if the pump turns on in auto mode, using only enough water to set it off. You should see a strong stream coming out of the discharge outlet on the outside of the boat. Then test manual mode from the helm switch. Also make sure the pump shuts off the way it should, with only a small amount of water left in the sump, which is usually normal.
If everything checks out, this is more than basic maintenance. It shows the system works with real water in the bilge and in both auto and manual modes. That’s really the point.
The next step is simple: set a repeating reminder on your phone or in your chartplotter notes for a monthly bilge pump test. It’s a small habit that often helps you catch problems early. Keep a few spare fuses and clamps on board, along with some absorbent pads, so you have the basics if something comes up. And if your current setup is old, loud, or too small, it’s worth thinking about an upgrade before peak boating season, usually before your busiest trips. A clean bilge, solid wiring, and properly tested marine bilge pumps will usually give you a better chance of staying safe and dry on the next trip.