

An anchor windlass often seems simple at first. Press a button, the anchor goes up or down, and that feels like the whole story. What many boaters don’t see is what’s happening behind that switch. A windlass is often one of the heaviest electrical loads on the boat. When the system isn’t planned well, problems usually show up fast. The anchor may lift more slowly, especially when it’s under real load. Cables can heat up, sometimes to an uncomfortable level. Breakers may trip with little warning. In the worst cases, the motor fails and leaves the boat stuck, which is high on most boaters’ list of bad scenarios.
Many people install a new windlass and assume the existing wiring will handle it. Others switch to a heavier anchor or chain and don’t think about the electrical side. That’s often where trouble starts. Windlasses pull large bursts of current. If the system isn’t sized for that demand, voltage drops and heat builds up inside cables and connections you can’t see. That hidden strain often shortens the life of the equipment.
This guide explains anchor windlass electrical load planning in clear, practical terms. It looks at real power needs, how voltage drop affects performance, and why heat becomes a quiet problem. It also shows why windlass wiring often matters more than almost any other onboard circuit. You’ll learn how to size cables correctly, protect motors, reduce breaker trips, and avoid costly repairs, whether you’re running a small fishing boat or a working commercial vessel.
Why Anchor Windlasses Demand Special Electrical Planning
An anchor windlass isn’t in the same group as cabin lights or a fish finder. It’s a high‑load piece of equipment that works in short, intense bursts. Those bursts may not look dramatic, but they can put real strain on a boat’s electrical system. When the windlass is lifting the anchor and chain, the motor often needs a large surge of current, especially at the moment the anchor breaks free from the bottom.
Most electric windlasses draw anywhere from 35 to 200 amps, depending on the size of the unit and how load and voltage behave in real conditions. That wide range surprises many boat owners and often explains why issues seem to appear without warning. A long pull with heavy chain can push the motor close to stall current, which is when heat buildup and voltage drop start causing problems fast.
| Windlass Factor | Typical Range | Why It Matters |
|---|---|---|
| Current draw | 35, 200 amps | High current stresses wiring and batteries |
| Preferred voltage drop | ≤3% | Keeps motor torque and speed |
| Absolute max voltage drop | <10% | Beyond this causes heat and failure |
Voltage drop is usually the quiet problem behind the scenes. There are no warning lights, so it’s easy to miss. When cables are too small or the battery run to the bow is too long, less voltage reaches the motor. The motor slows down, pulls more current to make up for it, and that extra draw creates heat. Over time, this can damage wiring, stress solenoids, and shorten motor life.
According to ABYC guidance, windlasses are classified as high‑load intermittent devices. In real terms, this means heavier cables than many people expect, clean and tight connections, and circuit protection that can handle short, high‑amp spikes, usually right as the anchor comes up. These steps are straightforward, but they help a lot, especially when paired with solid marine electrical maintenance basics covered in Marine Electrical System Maintenance: 2025 Boater Guide.
Understanding Anchor Windlass Electrical Load and Voltage Drop
The first thing to look at is how much demand the system is handling at any given moment. Marine electrical load is just the total draw on the batteries and wiring right then, nothing complicated. A windlass usually sits high on that list and is often one of the three biggest power users onboard. The toughest moment is startup. That short surge can move through the system right away, and other electronics often feel it.
Voltage drop shows up once resistance starts stealing usable power. Long cable runs make this more noticeable, like when batteries in the stern feed a windlass up at the bow. Every extra foot of wire adds a little resistance. Corroded terminals add another small loss. On their own, these issues seem minor, but together they can add up faster than most people expect.
The outcome is easy to predict. When less voltage reaches the motor, torque falls. To keep working, the motor has to push harder. That extra effort usually turns into heat, and heat speeds up wear instead of helping.
| Cable Issue | Effect | Real-World Result |
|---|---|---|
| Undersized wire gauge | High resistance | Hot cables and slow windlass |
| Long cable runs | Voltage loss | Motor strain under load |
| Corroded terminals | Extra resistance | Solenoid and motor damage |
ABYC recommends keeping voltage drop close to 3% for windlass circuits. You’ll often hear that 10% is acceptable, which is generally true. From experience, though, systems that stay near that upper edge tend to show trouble after repeated use.
Battery condition is a smart place to start. Weak batteries make voltage drop look worse than it already is. If battery health is questionable, checking load performance first, covered in Marine Batteries Load Testing: Detect Hidden Power Loss, can save time before pointing the finger at the windlass.
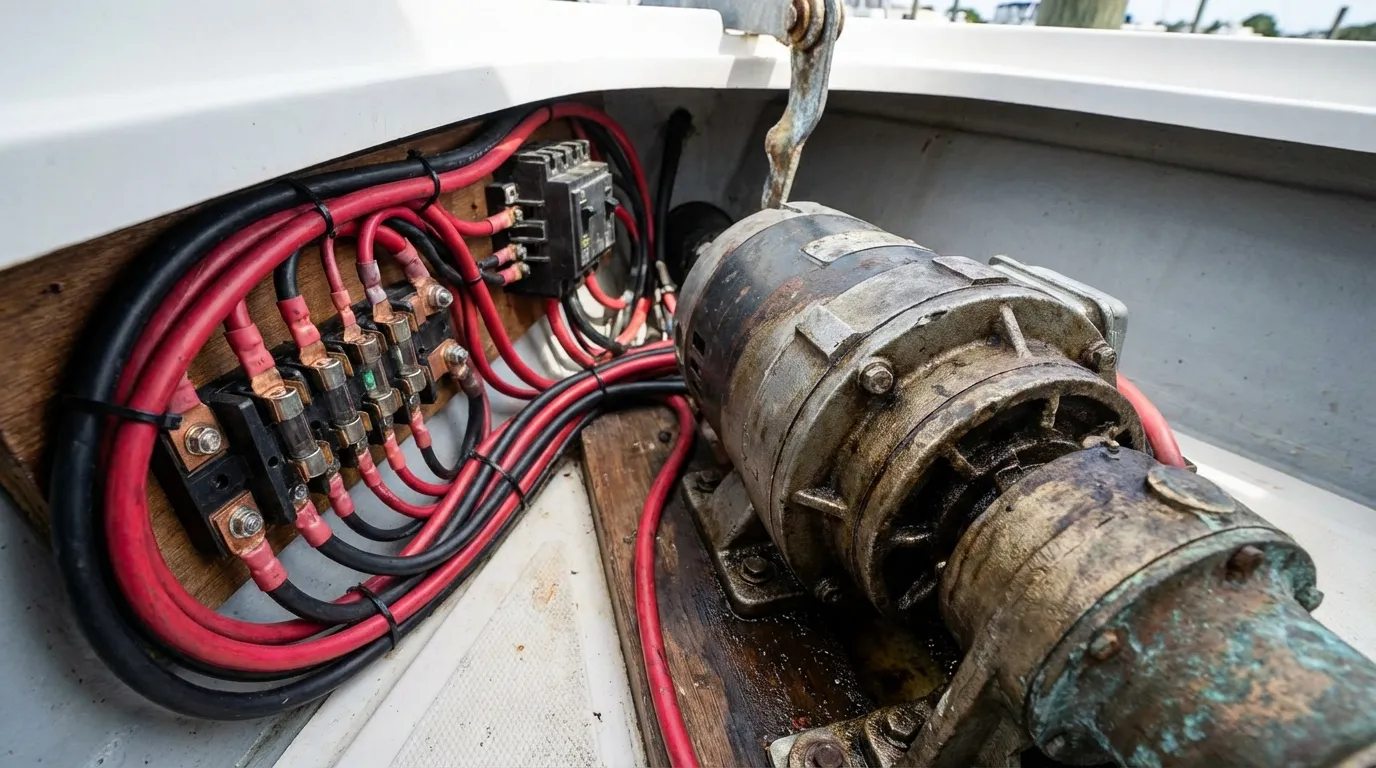
Windlass Wiring: Cable Sizing, Routing, and Protection
What surprises most installers is cable size. Bigger usually works better, even if it feels like too much at first. Once real loads and voltage drop come into play, the math adds up quickly. On many boats, 1/0 or even 2/0 AWG cable is normal, and it often avoids trouble later. That extra copper usually means smoother pulls and less heat when the windlass is working hard.
Size isn’t the only thing that matters. Cable length can be just as important. Moving the battery bank closer to the bow often cuts voltage drop more than almost any other single change. On boats over 30 feet, this is why dedicated windlass batteries are common. Early layout choices shape how reliable the system is over time.
Protection matters just as much. Every windlass circuit should have:
- A correctly sized breaker or fuse, plus heavy-duty solenoids rated for the full current
- Clean, sealed connections using marine-grade lugs
| Component | Best Practice | Why It Helps |
|---|---|---|
| Breaker | Thermal or magnetic rated for load | Protects motor and wiring |
| Solenoid | Continuous-duty marine type | Prevents contact welding |
| Connections | Crimped and sealed | Stops corrosion |
What about routing? It’s easy to miss. Avoid sharp bends, keep cables clear of engines or exhaust heat, and support long runs so vibration doesn’t loosen terminals. Skip these details, and fixes usually come later.
Preventing Anchor Windlass Overheating and Motor Burnout in Real Use
Heat builds up fastest right when the anchor breaks free, and that part is normal. Problems usually start with how long the motor keeps running after that moment. Even with perfect wiring, everyday habits still matter, and many windlass failures come from real use, not from how the system was installed. If you’ve owned a boat for a while, this likely sounds familiar.
One helpful thing to remember is that a windlass is made to lift, not to pull a boat through wind or current. Using it to drag the boat forward is the most common mistake, and that’s often where issues begin. When retrieving, motor toward the anchor and let the windlass take a straight vertical load, nothing more.
Short pulls with pauses let heat escape, while long nonstop runs slowly overheat the motor. Small breaks help a lot, often more than people expect.
| User Action | Electrical Impact | Better Practice |
|---|---|---|
| Pulling boat with windlass | Extreme current draw | Motor forward instead |
| Long continuous runs | Heat buildup | Use short bursts |
| Ignoring slow speed | Hidden voltage drop | Stop and inspect |
You’ll often notice early warning signs before real damage happens. Slower retrieval, hot cables, or clicking solenoids usually mean it’s time to stop and let things cool, like pausing between pulls instead of forcing one long run.
Advanced Planning: 12V vs 24V and Future-Proofing
One thing many people notice right away is how a 24V setup is often easier on the system over time. A 24V anchor windlass draws about half the current of a similar 12V model, which usually makes voltage drop easier to control. With less current flowing, wires stay cooler as the years go by, and that lower strain is something most owners feel sooner or later.
That’s why many larger boats and workboats end up using 24V systems. The upfront cost is higher, but reliability often gets better once everything is installed and sorted out after a few test runs. Cable sizes can often be smaller, which makes routing simpler, and heat problems tend to disappear, which is a nice extra.
You’ll also see better protection used more often. Soft-start controllers ease the initial load, and thermal breakers shut things down when they’re pushed too hard, usually during heavy use. When planning upgrades, thinking ahead usually pays off. Spending a bit more on larger wiring now can be cheaper than replacing a motor later, and it leaves space for future gear like heavier anchors or all-chain rodes. In this case, having that flexibility really counts.
Practical Tools and Setup Tips for DIY Boaters
Planning windlass load often doesn’t mean you need an electrician, even if it feels a bit intimidating at first. With a few basic tools, the job is usually easier and much less frustrating than you might expect:
- Voltage drop calculators
- Clamp-on ammeters
A helpful method is to measure voltage at the battery, then check it again at the windlass while it’s running. Many times, a big difference points straight to where power is being lost. Wondering about cable heat? After a pull, a careful touch can say a lot. Cables are normally warm, but cables that feel hot often mean a problem.
A simple maintenance routine pays off over time: clean terminals, check lug torque, inspect breakers each year, and take a close look at the solenoids. More detailed instructions appear in Mastering Marine Electrical Wiring: DIY Guide 2025.
Common Questions People Have
How much power does a windlass use?
Planning for worst‑case current makes sense, because most electric anchor windlasses pull between 35 and 200 amps, depending on size and real‑world load (it varies). During breakout, peak draw often jumps, and you can notice it.
What causes voltage drop in windlass circuits?
Long cable runs, small-gauge wire, weak batteries, and corroded connections usually cause most windlass voltage-drop issues. Each one adds resistance, which can pull voltage away from the motor when it’s under load.
Should I install a dedicated battery for my windlass?
On many boats over 30 feet, the answer is usually yes. Putting the battery in the bow means shorter cables up front, often cutting voltage drop and working more reliably.
Can I use the windlass to pull my boat forward?
Usually, no, the windlass is for lifting the anchor and rode, not dragging the boat forward. Most boaters use the engine to ease ahead while bringing it in as the anchor comes up.
Is my windlass wiring overheating?
If it runs slowly, shows hot‑cable warnings, or trips breakers, that’s usually trouble after use. Not good. After you run it, it’s common to check cable and motor temperatures, and an infrared thermometer makes that quick and easy.
Put Smart Planning Into Practice
Anchor windlass electrical load planning isn’t exciting or flashy, but it often ends up being one of the smartest safety investments on the water (yes, the unglamorous stuff). The payoff shows up when proper wiring keeps voltage drop low and good habits reduce strain. That kind of protection usually matters more than people expect once motors and batteries are working hard under load.
It helps to review the whole system before problems appear. Simple measurements and close inspections can show what needs upgrading, and it’s usually worth taking the extra time. Planning for future gear, not just what you have today, often means larger wire, better protection, and healthy batteries that pay off every time you drop the hook.
With careful planning and quality parts, First Choice Marine supports systems in rough current.