


Boat electrical problems can seem random, but most have a clear cause. This guide shows how to troubleshoot your boat’s electrical system in a safe, logical order, even for beginners. It’s for recreational boaters, fishing boat owners, small commercial operators, and DIY maintenance fans who want to catch power problems before they leave the boat stranded or damage expensive marine engine parts.
Instead of guessing, you’ll check the battery, connections, fuses, switches, charging system, and key circuits one step at a time. Nice and simple. You’ll learn when corrosion is causing the problem, how to spot bad cable routing, and why newer lithium setups need extra care. If your boat has dim lights, electronics that reset, an engine that won’t crank, or accessories that only work now and then, this step-by-step check can help narrow the issue down quickly.
A careful electrical check helps keep the whole boat reliable. Weak power can affect starting, gauges, pumps, electronics, and even how other marine engine parts perform under load. Need related upkeep help? First Choice Marine also has useful reading on marine engine tune-up techniques.
Before You Start
You will need:
- A digital multimeter
- Safety glasses and dry gloves
- A flashlight or headlamp
- Screwdrivers and small wrenches
- Battery terminal brush or wire brush
- Electrical contact cleaner
- Marine-grade dielectric grease
- Spare fuses in the correct amperage
- Your boat wiring diagram, if you have it
- Notebook or phone to record voltage readings
Before touching anything, turn off the engine, remove jewelry, ventilate the area, and disconnect shore power. Then pause. Be especially careful if your boat has both AC and DC systems, because working around both gives you more ways for something to go wrong if you rush or skip a basic safety step.
ABYC training for marine electricians covers troubleshooting AC and DC systems, grounding, bonding, battery installation, and multimeter use. Important stuff. It shows how much it helps to work in a careful, step-by-step way.
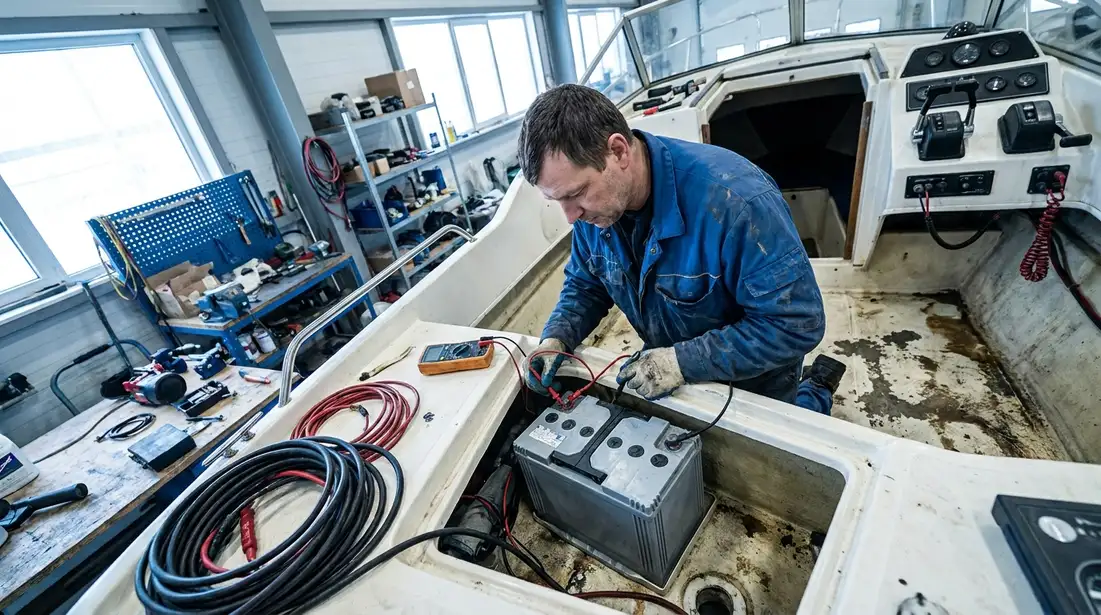
Step 1: Confirm the Symptom Before You Test Anything
Start by naming the exact problem. Don’t begin by replacing parts.
First, check what the issue actually is:
- Does the engine not crank at all?
- Does it crank slowly?
- Do electronics lose power when you start the engine?
- Do lights flicker only underway?
- Is one accessory dead while others work fine?
Then test the symptom in a controlled way. Put the battery switch in its normal position, then try one system at a time: cabin lights, navigation lights, bilge pump, horn, electronics, and then engine start. Keep notes. Write down what works and what does not.
If you have total power loss, that points to the battery, the main fuse, the battery switch, or a major cable issue. One dead item is different. That points to a branch fuse, switch, ground, or local connection.
Recent marine safety investigations also show that loose or failed electrical connections can cause serious operating problems, including vessel power loss. Take that seriously. A step-by-step check makes more sense than guessing.
| Electrical issue | Most likely area | First check |
|---|---|---|
| No crank, no click | Battery or main power path | Battery voltage |
| Slow crank | Weak battery or resistance | Voltage under load |
| One device dead | Fuse, switch, local wiring | Fuse and ground |
| Intermittent power | Corrosion or loose connection | Terminals and cable ends |
A common mistake is calling every problem a ‘bad battery.’ That is very common. In many cases the battery is fine, and the real issue is resistance at a terminal, weak grounding, or a failed switch.
Step 2: Test Battery Voltage and Basic Battery Health
Set your multimeter to DC volts. Put the red probe on the battery’s positive post and the black probe on the negative post.
Use these resting readings as a quick guide:
- Around 12.6 to 12.8 volts: fully charged 12V lead-acid battery
- Around 12.4 volts: partly discharged
- Around 12.2 volts or less: a low battery that needs charging and more testing
If the battery reads low, charge it fully before deciding anything else, then test again. After that, watch the voltage while someone turns the key and cranks the engine. A sharp voltage drop, along with an engine that barely turns, can point to a weak battery or high resistance in the cables.
The market keeps growing as batteries take on a bigger role in modern boats. Estimates for 2025 range from USD 775.9 million to USD 1.67 billion worldwide. Mordor Intelligence also says lithium-ion made up 65.62% of marine battery revenue in 2025.
| Marine battery metric | Value | Year |
|---|---|---|
| Global marine battery market | USD 1.67 billion | 2025 |
| Alternative global estimate | USD 775.9 million | 2025 |
| U.S. marine battery market | USD 132.8 million | 2025 |
| Lithium-ion revenue share | 65.62% | 2025 |
If your boat uses lithium batteries, don’t handle them the same way as flooded or AGM batteries. The setup is different. Check the battery management system, the charger settings, and alternator compatibility too.
Tip: Test right on the battery posts first, not the cable terminals. That helps separate the battery’s actual condition from connection problems.
Step 3: Inspect and Clean Battery Cables, Terminals, and Grounds
After checking battery voltage, inspect the full power path. Look for white, blue, or green corrosion, swollen cable insulation, loose ring terminals, cracked lugs, and signs of heat damage. Don’t rush this.
ABYC is very clear about cable routing:
Battery cables shall be routed above normal bilge water levels throughout their length.
When cables sit low in a damp bilge, they can corrode inside the wire where you can’t see it, and that hidden corrosion can lead to voltage drop, hard starting, and random electronics problems.
Your exact actions:
- Turn the battery switch off.
- Remove the negative cable first.
- Remove the positive cable.
- Clean posts and terminals with a battery brush.
- Spray contact cleaner on the connections.
- Check each lug for tightness and make sure it is not twisted.
- Reinstall the positive cable first, then the negative.
- Add a light coat of dielectric grease after tightening.
- Follow the negative cable to the engine block or ground bus and clean that point too.
ABYC training also treats corrosion measurement and mitigation as a basic marine electrical skill. Good upkeep around corrosion-sensitive marine engine parts supports that work. Electrical care is part of overall engine reliability, not a separate job on its own.
One common mistake is cleaning only the battery posts and ignoring the engine ground connection. It is easy to miss. A bad ground can act exactly like a bad positive cable.
Step 4: Check Main Fuses, Breakers, and Battery Switches
Next, find the main fuse by the battery, the DC breaker panel, and the battery selector switch.
Follow this order:
Check the main fuse
Pull the fuse and check it. If it’s blown, replace it with one of the same amperage. Don’t put in a larger fuse just to get home. Bad idea. It can damage wiring and connected equipment.
Reset breakers
Push each breaker all the way off, then back on. Some marine breakers can look on even when they’ve actually tripped.
Test the battery switch
Turn the switch through each position and check for looseness, heat marks, and cracks in the housing. Then measure voltage on both the input and output sides. If voltage goes in but does not come out, the switch may be faulty.
Check for voltage drop
If the battery shows 12.6 volts but the helm panel or starter input shows much less, resistance is somewhere between those points.
Many DIYers find the real problem here after swapping parts that were fine all along. Sometimes it’s a weak switch. Other times, a hidden inline fuse or a tired breaker looks like a much bigger problem than it really is.
On boats that added accessories over time, like fish finders, chargers and pumps, this check matters even more.
Step 5: Test the Charging System and Accessory Circuits
If the engine starts but the battery keeps going dead, test the charging system next. Start the engine, then measure battery voltage again at idle and at a slightly higher RPM. On many 12V systems, the reading should rise above resting battery voltage when charging is working properly. That’s a good sign.
If voltage doesn’t rise, possible causes include:
- Bad alternator or stator output
- Failed regulator
- Loose charging wire
- Corroded connection at the battery or engine
- Lithium battery and charging system mismatch
Then check accessories one at a time. For a dead pump, light, or electronics unit, test for power at the device, then check its ground too. If power is there but the device still doesn’t run, the device itself may be bad. If power is missing, trace the problem back through the switch, fuse block, or terminal strip.
Newer boats use more advanced battery tech and electrical systems. Mordor Intelligence projects overall marine battery market growth at 8.29% CAGR from 2026 to 2031, while fully electric marine designs are expected to grow at 10.39% CAGR. More owners will run into charging compatibility questions, not just a basic dead-battery issue.
A helpful next read is this guide to boat engine parts in the growing market for 2026. It gives useful context on the systems used in modern engine care.
Tip: If electronics reboot during engine crank, consider adding a dedicated electronics feed. Also check for voltage drop under starting load.
Step 6: Troubleshoot AC Power, Chargers, and Inverters Safely
If your boat has shore power, a battery charger, or an inverter, be careful. AC systems can injure you. Seriously.
Before opening any panel, disconnect shore power. Then check the charger and inverter area for heat, water intrusion, corrosion, a burnt smell, or loose terminals. NMMA guidance also limits putting batteries directly below certain equipment unless there is a barrier. That may sound like a small detail. Even so, it shows why good layout and protection matter.
The ABYC standards discussed here apply to systems operating at nominal 50 volts or less on the DC side. Many boats also have AC systems onboard, so know where your limits are. ABYC course material on marine corrosion basics explains how to identify corrosion types and how to measure and reduce the damage they cause. In plain language, moisture and stray current can turn a small issue into a stubborn problem that keeps returning.
Stop DIY work and call an ABYC-certified marine electrician if:
- You smell burning insulation
- Breakers trip instantly after reset
- Shore power causes shocks or tingling
- You find melted wires or scorched terminals
- Your lithium system shows BMS fault warnings you do not understand
Frequently Asked Questions
Why does my boat battery show voltage but still not start the engine?
Voltage alone does not prove the battery can carry a load. You may have a weak battery, corroded cable ends, or a poor ground that causes voltage drop during cranking. Always test voltage while trying to start the engine.
What is the most common cause of intermittent boat electrical problems?
Corrosion and loose connections are very common causes. They create resistance, which leads to flickering lights, random resets, and hard starting. Check battery terminals, fuse holders, ground points, and any connection exposed to bilge moisture.
Can I troubleshoot a lithium marine battery system myself?
You can do basic checks like terminal inspection and voltage testing, but you also need to understand charger settings, alternator compatibility, and BMS behavior. If fault lights or shutdown events continue, it is smart to get qualified help.
How often should I inspect my boat’s electrical system?
A quick visual check before each trip is smart, especially at the battery, switch, and fuse panel. Do a deeper inspection at least every season and anytime you add electronics, replace marine engine parts, or notice starting and charging changes.
Where can I find replacement electrical supplies and related marine engine parts?
A marine-focused supplier is usually the safest choice because marine wiring, terminals, switches, and battery gear must handle vibration, moisture, and corrosion. First Choice Marine is one example of an online retailer that carries parts and maintenance items for boat owners working on engine care and onboard systems.
What if I am not sure which replacement part matches my boat?
Start with the old part number, wire gauge, fuse rating, battery type, and engine model before you buy anything. If you need a trusted place to compare options for maintenance and repair, First Choice Marine can help you narrow down products that fit common boating needs without guessing.
Make Sure the Fix Really Worked
To check the fix, repeat the exact test that first showed the problem. If the engine wouldn’t crank, try a cold start after the repair. If electronics cut out, run them with the engine on and off. If charging was weak, check battery voltage again with the engine running, then one more time after shutdown.
Then do one more thing many owners skip: inspect the repair after a short trip. Feel for hot cables. Check that terminals stayed tight and make sure no breaker tripped. A stable test at the dock is good. A result that stays steady after vibration and engine heat tells you even more.
DIY troubleshooting saves time, helps protect safety and keeps owners from replacing good parts for no reason. Just as important, it protects systems tied to the starting and charging setup, including sensitive electronics and key marine engine parts. If owners need parts, supplies or more maintenance guidance, the online marine parts retailer offers resources built around real boat ownership problems. Start with the battery, work in order and let the meter guide the process instead of a hunch.
