


Last Updated: October 25, 2026
Quick Summary
Bring a marine battery back to life by first identifying your battery type, testing it with a multimeter and load test, then charging slowly at roughly 10% of capacity for 24-48 hours using the correct charger mode. Recovery works best for deeply discharged batteries that hold voltage under load and show no physical damage.
- Test resting voltage with a multimeter; readings between 10.5-12.0V indicate deep discharge that may be recoverable.
- Use a charger mode matching your battery chemistry: flooded, AGM, gel, or lithium profiles are not interchangeable.
- Charge at approximately 10 amps for a 100 Ah battery and plan 24-48 hours for full recovery.
- Replace the battery if it reads near 0V, fails a load test by dropping below 9.6 volts, or shows cracks, leaks, or swelling.
- After recovery, use a battery maintainer during idle periods and check electrolyte monthly on flooded batteries.
Table of Contents
- Understanding Your Marine Battery Type
- How to Test a Boat Battery Before Attempting Recovery
- Diagnosing the Problem: Sulfation, Deep Discharge, and Other Issues
- How to Charge a Marine Battery for Recovery
- Marine Battery Voltage Chart and State of Charge Reference
- How Long to Charge a Marine Battery Back to Full Capacity
- When to Replace Instead of Revive Your Marine Battery
- Preparing Your Battery for Long-Term Health
- Frequently Asked Questions
Understanding Your Marine Battery Type
Before you attempt to bring a marine battery back to life, identify what you're working with.
Marine batteries fall into three main categories: flooded lead-acid, AGM (absorbed glass mat), and sealed gel batteries. Each responds differently to charging and maintenance.
Flooded lead-acid batteries have removable cell caps and allow you to check and refill the electrolyte.
Check your battery's label or your boat's manual to identify the type.
According to U.S.
How to Test a Boat Battery Before Attempting Recovery
Testing tells you whether recovery is worth attempting or replacement is smarter.
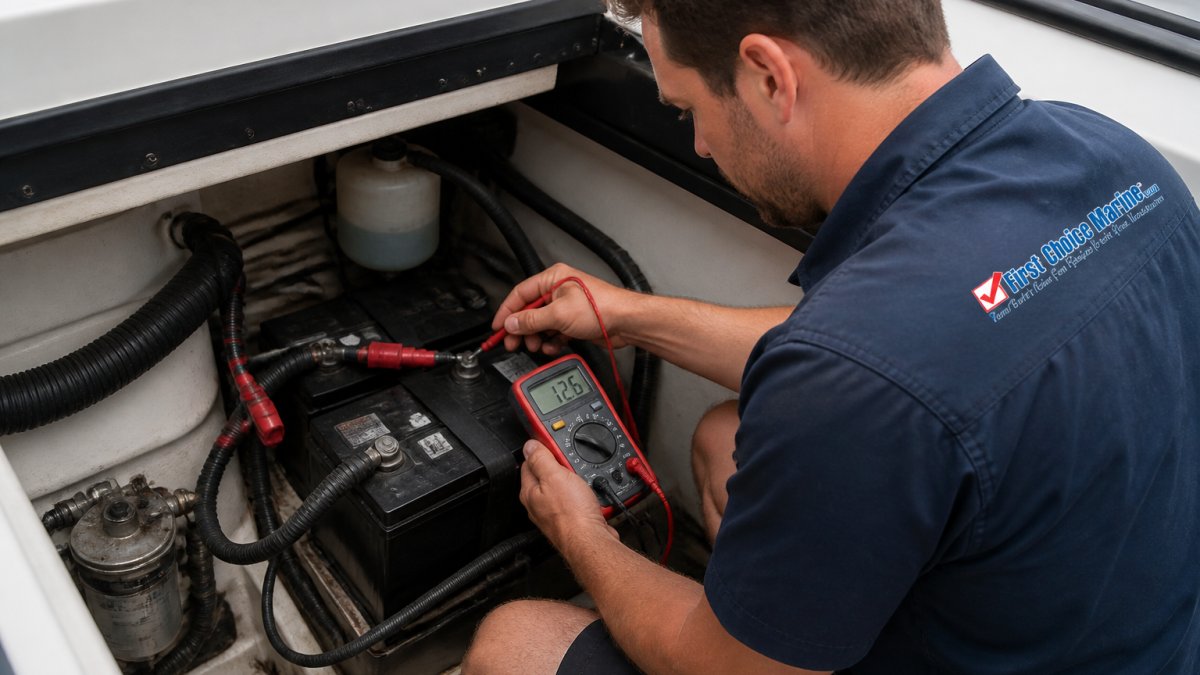
Set a digital multimeter to DC voltage and connect the red probe to positive, black to negative.
Next, perform a load test, many auto parts stores offer this free.
Check physical condition: cracks, leaks, or corrosion (white, blue, or green crusty buildup) around terminals. Fluid leaking means recovery is impossible, replace it.
You can learn more about thorough testing methods by reviewing our step-by-step guide to testing a boat battery, which covers diagnostic procedures in greater detail.
Diagnosing the Problem: Sulfation, Deep Discharge, and Other Issues
Knowing why the battery died determines whether recovery is worth attempting. Work through a short sequence, inspect, measure resting voltage, then load-test, to narrow the likely cause.
Step 1: Visual inspection
Look at the case, terminals, and (for flooded batteries) the electrolyte.
- Swelling, bulging, or a warped case: Stop. A swollen battery has internal damage and is a safety hazard. Replace it.
- Cracks or leaks: Stop. Leaking electrolyte cannot be restored and is hazardous.
- Frozen case: A battery that froze has likely cracked internally. Let it thaw fully before any handling, and do not charge it.
Step 2: Resting voltage
Let the battery rest, disconnected, for several hours (overnight is ideal) so surface charge dissipates, then measure with a multimeter.
| Resting Voltage | What It Suggests |
|---|---|
| 12.6V or higher | Not deeply discharged; the problem may be elsewhere (connections, charger, parasitic load) |
| 12.0-12.5V | Partially discharged; likely recoverable with a full charge |
| 10.5-12.0V | Deeply discharged; recovery is plausible but sulfation may be present |
| Below 10.5V | Severely discharged; recovery is uncertain and depends on age and chemistry |
| Near 0V | Internal damage or a completely failed cell; replacement is likely |
A battery that reads a healthy voltage at rest but collapses under load is a different problem from one that reads low at rest.
Step 3: Load or conductance test
A load test applies a controlled draw and measures how voltage holds; many auto parts stores offer it free. A conductance test is a faster alternative estimating internal resistance without a heavy draw. Either distinguishes a merely discharged battery from one that has lost capacity.
- Holds voltage under load: The battery is likely recoverable; proceed to charging.
- Drops below about 9.6 volts under load: Significant capacity is gone. Recovery is unlikely and replacement is the practical choice.
Matching the symptom to the cause
- Sat unused for months, reads low at rest, recovers slowly: Sulfation is the likely cause. Early-stage sulfation often responds to a slow charge and, for flooded batteries, a carefully limited equalization.
- Drained suddenly during use, reads low but holds voltage under load after charging: Deep discharge. A deep-cycle battery usually recovers; a starting battery may not.
- Never holds a charge even after a full charge, and voltage drops overnight with nothing connected: Chronic undercharging or a parasitic load. Test for a draw with everything switched off before blaming the battery.
For a deeper walkthrough of the testing steps, see our step-by-step guide to testing a boat battery.
How to Charge a Marine Battery for Recovery
Charging is where most recovery attempts succeed or fail. Before connecting anything, confirm the battery's chemistry (from the label) and that your charger has a matching mode. You can explore smart boat battery chargers and top picks to find equipment matched to your battery type. The wrong profile can overcharge a sealed battery or undercharge a flooded one.
Match the charger mode to the chemistry
- Flooded lead-acid: Use a standard flooded or lead-acid mode. These batteries tolerate equalization and can be charged at a higher current relative to capacity. If your charger has an equalization mode, reserve it for after the battery reaches full charge and use it sparingly.
- AGM: Select the AGM profile. AGM batteries accept charge faster than gel but are sensitive to overvoltage, so avoid equalization unless the manufacturer explicitly permits it. Many AGM makers void coverage if equalization is used.
- Gel: Select the gel profile, which uses a lower absorption voltage. Gel batteries are the least forgiving of overcharging and can be permanently damaged by a flooded or AGM profile.
If your charger has only a single lead-acid mode and you own a gel or lithium battery, do not improvise. Use a charger rated for that chemistry.
Choose the current and set expectations
As a rule of thumb, charge at roughly 10% of the battery's amp-hour capacity, about 10 amps for a 100 Ah battery. A 2-5 amp trickle is fine for maintenance but slow for a deeply discharged battery. Plan on 24-48 hours, most of it in absorption and float stages.
If the charger won't recognize the battery
A common failure mode is a charger that refuses to start because it reads the battery as too low to be a valid 12-volt battery. Many smart chargers need to see a minimum voltage before they will begin. Options that practitioners commonly use:
- Use a charger with a forced or manual mode. Some models include a supply or repair mode that bypasses the recognition check. Read your charger's manual before using it.
- Parallel-tie a known-good battery briefly. Connecting a charged battery in parallel for a short period can lift the voltage enough for the charger to recognize the pack. This is a workaround, not a fix, and should be done only with correct polarity and appropriate cables.
- Charge in stages. Bring the battery up slowly with a low-current charger first, then move to a higher-current charger once it holds a reading.
Monitor the charge
Watch the charger's display and check voltage periodically with a multimeter. A battery climbing toward 12.6 volts and holding is recovering; one that plateaus well below full charge or heats up while accepting little current is likely sulfated beyond recovery.
If you need to match a charger to your boat's setup, our guide to the best marine battery chargers for longevity covers multi-bank and chemistry-selectable options.
Sterling Power Pro Charge Ultra 32v 20a Battery Charge #PCU3220PLUS →
Marine Battery Voltage Chart and State of Charge Reference
Voltage tells you how much charge is left. Use this chart to interpret your multimeter reading.
| Voltage Reading | State of Charge | Battery Condition |
|---|---|---|
| 12.6V or higher | 100% | Fully charged |
| 12.4-12.6V | 75-100% | Good condition |
| 12.2-12.4V | 50-75% | Acceptable |
| 12.0-12.2V | 25-50% | Discharged |
| Below 10.5V | Less than 25% | Deeply discharged |
| Below 9.6V under load | Critical | Likely permanent damage |
Readings vary slightly by chemistry and temperature, a gel battery may read lower than lead-acid at the same state of charge.
If your battery reads in the "deeply discharged" range, recovery is possible. If it reads in the "critical" range, especially under load, replacement is more practical than recovery.
How Long to Charge a Marine Battery Back to Full Capacity
Charging time depends on battery capacity (amp-hours) and charger output (amps).
A basic formula: charging time equals capacity divided by charger output, so a 100 Ah battery at 10 amps takes roughly 10 hours. This is rough, multi-stage chargers charge faster initially and slow as the battery approaches full.
For a marine battery back to life recovery, plan on 24-48 hours of slow charging.
Most modern chargers show when the battery reaches full charge. At 100%, switch to maintenance mode to keep it charged without overcharging.
Temperature affects charging time. Cold batteries charge more slowly. If you're recovering a battery in winter, add 20-30% to your estimated charging time.
When to Replace Instead of Revive Your Marine Battery
Not every dead battery is worth recovering, sometimes replacement is smarter.
Replace a battery more than 5-7 years old. Marine batteries degrade regardless of care, and one that's failed once will likely fail again soon.
Replace the battery if it shows physical damage, cracks, leaks, or severely corroded terminals. Damaged batteries are safety hazards and cannot be reliably restored.
Replace the battery if it fails a load test by dropping below 9.6 volts. This indicates internal damage that charging alone cannot fix. You can learn more about when replacement makes sense by reviewing our guide to deep-cycle marine battery lifespan.
Replace the battery if you've attempted recovery once and it failed to hold a charge.
Preparing Your Battery for Long-Term Health
Once you've brought your marine battery back to life, protect your investment by preventing future problems.
Keep your battery charged, a partially discharged battery will sulfate and weaken. The Digital Yacht BM100 Battery Monitoring Solution ($414.47) provides real-time state-of-charge monitoring and discharge history so you catch problems early.

Check your boat's charging system. A faulty alternator or regulator won't fully recharge your battery while the engine runs.
Clean terminals regularly, corrosion blocks current flow and forces the battery to work harder.
For flooded batteries, check electrolyte monthly during boating season and top off with distilled water if levels drop below the plates.
You can strengthen your battery maintenance routine by reviewing our guide to preventing boat battery terminal corrosion, which covers protective strategies in detail.
Bringing a marine battery back to life is achievable when you understand your battery type, diagnose the problem correctly, and use the right charging method. Our ProMariner and Sterling Power chargers feature automatic multi-stage charging and battery-type selection, so your recovery attempt succeeds without guesswork.

Frequently Asked Questions
Can you bring a dead marine battery back to life?
A dead marine battery can sometimes be revived if the failure is due to sulfation or chronic undercharging. Recovery depends on the battery's age, type, and condition. Flooded lead-acid batteries respond better to recovery efforts than sealed AGM batteries. However, recovery is not guaranteed. If the battery is older than 5 years or shows signs of physical damage, replacement may be more practical than attempting revival.
How do you safely test a marine battery before charging it?
Use a digital multimeter to measure voltage at the battery terminals. A healthy fully charged marine battery reads 12.6 volts or higher. Below 10.5 volts indicates deep discharge. Check electrolyte levels in flooded batteries by removing cell caps and looking for fluid covering the lead plates. Inspect terminals for corrosion and clean them if needed. Never attempt charging if the battery is visibly cracked, leaking, or swollen, as this signals internal failure.
How long does it take to recharge a marine battery?
Charging time depends on the charger's amperage and battery capacity. A slow trickle charge (5-10 amps) takes 12-24 hours for a deeply discharged battery. Faster chargers (15-20 amps) may complete charging in 4-8 hours. The ProMariner ProSportHD 15 Gen 4 uses a 5-stage automatic charging process that optimizes charge time while protecting battery health. Always follow the charger manufacturer's recommendations and monitor voltage to avoid overcharging.
What causes a marine battery to lose capacity and fail?
Sulfation occurs when lead sulfate crystals build up on battery plates due to prolonged undercharging or deep discharge cycles. Chronic undercharging, overcharging, old age, and corrosion of terminals also reduce capacity. Keeping a marine battery's state of charge above 50% and using equalization charging about once monthly on deep-cycle lead-acid batteries helps extend life and prevent failure.

