


A good marine engine tune-up helps your engine start easier, run smoother, use less fuel, and catch small problems before they turn into expensive failures. Simple stuff, really. This guide is for recreational boaters, fishing hobbyists, DIY owners, and small commercial crews who want a clear routine they can follow at home or right at the dock. It shows how to inspect, service, clean, and protect your engine in a logical order, with extra focus on engine corrosion protection.
In 2025, U.S. outboard sales were 267,000 units, down 3.9% from the year before, while the average retail price rose to $13,081. That means a lot of owners are keeping the engines they already have for longer. Machinery failure is still a major marine risk. In 2025, 1,505 vessel machinery casualties were reported, and machinery damage or failure made up 53% of incidents in that data set. A careful marine engine tune up is one of the simplest ways to protect both your time on the water and your budget.
Before you start, check your engine maker’s service manual for exact specs. Then use this tutorial as a practical guide, matching plugs, fluids, torque values, and filter part numbers to your specific engine model. If you need maintenance supplies, parts, and general boating gear, First Choice Marine is a useful place to begin when comparing marine care products.
Before you start: What you’ll need
Get everything together before you begin so you do not have to stop halfway through. It makes the work a lot easier.
- Your engine service manual
- Basic hand tools: socket set, screwdrivers, spark plug socket and pliers
- Torque wrench
- Clean rags and nitrile gloves
- Marine engine oil and the correct oil filter
- Fuel filter or water-separating filter
- New spark plugs, if they are due
- Marine grease and anti-corrosion spray
- Dielectric grease for electrical connections
- Cooling system parts if needed, such as an impeller or gaskets
- Drain pan and safe containers for used fluids
- Fresh water supply or flushing muffs for outboards
- Flashlight and inspection mirror
Tip: Do the tune-up with a cool engine and the battery switch off. Also remove the safety lanyard, and make sure the boat stays well ventilated. Be safe.
Step 1: Inspect the engine and make a marine engine tune up checklist
Start with a full visual inspection before taking anything apart. Open the engine cover or engine compartment and look for loose wires, fuel stains, oil leaks, cracked hoses, rust streaks, white salt buildup, and swollen belts. Check the clamps, mounting bolts, and the prop area too. Then turn the steering and throttle slowly to make sure the controls move freely.
Next, use the common service intervals to build the checklist. Oil changes are due every 100 to 250 hours in many cases, while fuel filters are commonly changed every 200 to 300 hours. Cooling system service happens annually. Sacrificial anodes should be replaced when they’re about 50% consumed.
| Service item | Typical interval | What to check |
|---|---|---|
| Engine oil and filter | 100-250 hours | Dirty oil, low level, metal flakes |
| Fuel filter | 200-300 hours | Water, debris, slow starting |
| Cooling system | Annually | Weak tell-tale, overheating, old impeller |
| Sacrificial anodes | At about 50% wear | Heavy loss, scaling, missing material |
That wider inspection saves time. It shows what needs service now and what can wait. It also makes it easier to order parts in one go instead of piecing things together later. For boat owners in salt water, a corrosion check should be part of every service. According to R&D Marine and other maintenance guidance, layered protection works best. Flushing, coatings, anodes, and regular inspection all need to work together.
A common mistake is going straight to the spark plugs and missing a leaking fuel line or a corroded battery terminal. That’s easy to do. The tune-up should begin with that broader inspection, because those issues can matter more right away.
Step 2: Change the oil and oil filter
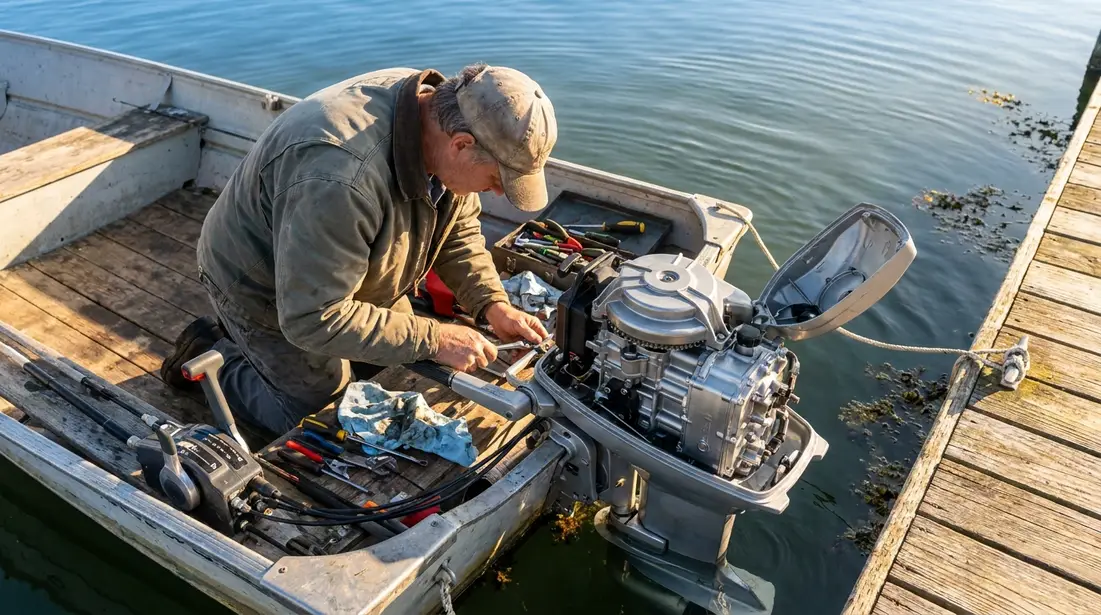
For a four-stroke engine or an inboard with crankcase oil, warm the engine for a few minutes so the oil drains more easily, then shut it off. Put a drain pan under the drain point, or use an oil extractor through the dipstick tube if your setup allows. Let the oil drain fully. Remove the old filter, wipe the mounting surface clean, and lightly oil the gasket on the new filter before installing it. Then tighten it to the spec in your manual or follow the filter instructions.
Refill with the exact oil grade and amount listed in your manual. Don’t guess. Start the engine briefly and check for leaks. Shut it down, then check the dipstick again after the oil has had time to settle.
Clean oil helps carry heat away and protects bearings, cam surfaces, and other internal moving parts. Over time, old oil breaks down and can hold moisture or contaminants, especially if the boat sits for long stretches.
Tip: Mark the engine hours and date on a tag or in your phone right after the oil change.
Troubleshooting:
- Oil looks milky: water may be getting into the system. Don’t ignore it.
- Metal glitter in oil: internal wear is possible. Get it checked further.
- Oil level rises after service: fuel dilution is possible.
If you want a cleaner setup for the job, a guide on Marine Oil Change Kit Guide: Clean, Easy Engine Servicing can help you pick the right tools and make future service easier.
Step 3: Replace spark plugs and inspect ignition parts
Work on one plug wire or coil at a time on the ignition side so nothing gets mixed up. Remove the old plug and compare it with the others. A light tan tip is normal in most cases. Black, oily, wet, or heavily white deposits can point to fuel, oil, or heat problems.
Use the exact plug type listed by the engine maker. Set the gap only if the manual says to and the plug is not pre-gapped. Start the threads by hand so the plug does not cross-thread. Then tighten it with a torque wrench to the right spec.
While everything is still easy to reach, inspect the plug boots, coils, and ignition leads for cracks or corrosion. Spray a small amount of moisture-displacing protectant on exposed metal, but keep sprays away from plug tips and air intakes.
Fresh plugs can improve starting, idle quality, and throttle response. They can also help reveal hidden problems. If one plug looks very different from the rest, that may point to a single-cylinder issue. That gives you a clearer place to check next.
Common mistakes to avoid:
- Over-tightening plugs in aluminum heads
- Mixing up plug wires
- Installing automotive plugs instead of marine-rated parts
- Ignoring boot corrosion in humid or saltwater storage
If the engine still misses after new plugs are installed, check compression, ignition coils, and fuel delivery. Do not assume the marine engine tune up failed.
Step 4: Service the fuel system and protect against ethanol trouble
Fuel problems show up a lot after storage, and they can also appear during hot, humid months. Replace the water-separating fuel filter or inline fuel filter if it’s due. Then drain a sample from the old filter into a clear container and check it. Look for water, dirt, or phase-separated fuel, and inspect the fuel lines for cracks, softness, or a strong fuel smell.
If the engine has a primer bulb, squeeze it and make sure it gets firm. If it stays soft, check for air leaks or weak check valves. On carbureted engines, look for varnish and sticky parts. On fuel-injected engines, pay closer attention to clean filters and fresh fuel.
Ethanol-blended fuel can pull in moisture. Use fresh fuel and a marine-safe treatment when the engine maker recommends it. This matters most when the boat sits between trips or during off-season storage. For more detail, read about Ethanol Treatment for Marine Engines That Works.
Real-world note: fuel contamination causes a lot of rough-idle complaints. In most cases, major engine damage isn’t the issue. A fresh filter and clean fuel fix many of them, so it’s worth checking there first. That can save time before moving on to bigger repairs.
Troubleshooting:
- Engine starts then dies: clogged filter, bad fuel, or a vent issue
- Loss of top-end power: restricted fuel flow
- Hard starting after storage: stale fuel or moisture in the system
Step 5: Flush and inspect the cooling system
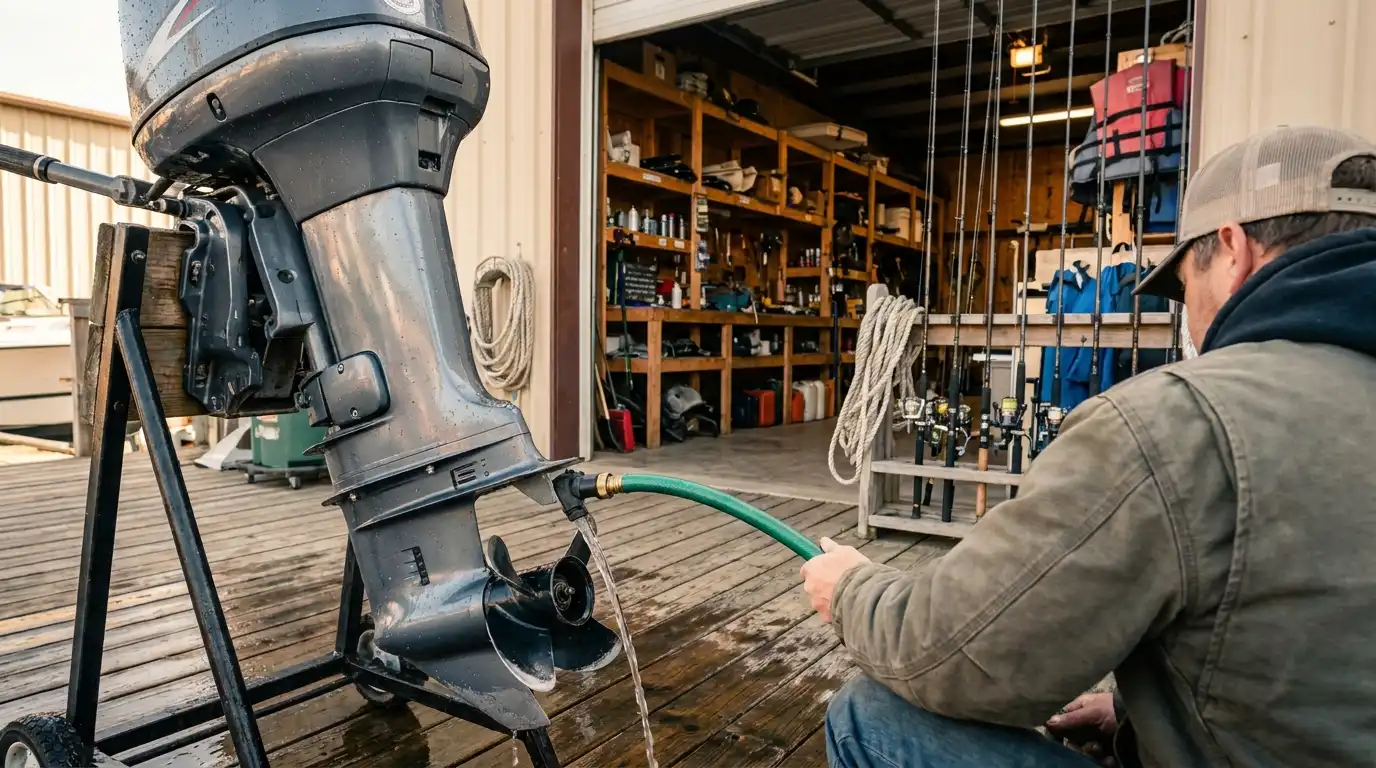
Next, check the cooling system. If you run in salt water, flush the engine with fresh water after every trip. For this marine engine tune up, inspect the cooling system carefully as well. On an outboard, connect flushing muffs or use the built-in flush port if your engine is designed for it. Then run fresh water as the manual directs. Watch for a steady tell-tale stream and a normal temperature.
Yearly cooling service is smart preventive maintenance. Check the hoses, clamps, thermostat housing, and the water pump service interval. If your engine is due, replace the impeller and any worn pump parts. Don’t wait. On inboards, check the strainers, seacocks, and the raw-water pump too.
Salt, sand, and scale can restrict flow and cause overheating. Over ten years, machinery damage and failure caused 12,991 incidents, or 45% of reported casualties in the data reviewed by Lloyd’s List Intelligence and cited by gCaptain. A lot of that risk can start here. Cooling problems account for a big share of it.
According to maintenance guidance from Adria Yachts, engines used in salt water should be flushed after every trip. The same guidance says anodes should be checked during haul-outs and replaced when they’re more than half consumed. Simple but important.
A common mistake is assuming a good tell-tale means the whole cooling system is healthy. It doesn’t. A weak impeller, a blocked passage, or a bad thermostat can still cause trouble.
Step 6: Apply engine corrosion protection the right way
A lot of owners hurry through this step, but giving it a bit more time really pays off. Corrosion gets expensive in a hurry. NACE International estimated the global cost of corrosion at $2.5 trillion annually, or about 3.4% of global GDP. It also found that proper control practices could reduce 15% to 35% of corrosion-related costs.
By using available corrosion control practices, it is estimated that savings of between 15 and 35% of the cost of corrosion could be realized.
Start by rinsing salt residue off the exterior, then dry the engine fully. Apply anti-corrosion spray to exposed metal parts, linkages, fasteners, and external electrical points, unless the manual says to avoid a certain area. Keep it focused. Use dielectric grease on battery terminals and protected electrical connectors. Then add marine grease to approved pivot points and fittings.
Inspect sacrificial anodes closely and replace them at about 50% consumption. Do not paint them. Make sure they have clean metal contact so they can continue doing their job.
For a more detailed breakdown of engine corrosion protection methods, read Marine Corrosion Prevention: Protecting Your Investment 2026.
Common mistakes:
- Spraying belts or air intake openings
- Painting over anodes
- Using household grease instead of marine-grade grease
- Leaving salt deposits inside the cowling or bilge space
Step 7: Check belts, battery, controls, and electrical connections
A tune-up isn’t complete until these support systems are checked. Start with the battery. Clean the terminals, tighten the connections, and test the voltage. Corroded battery ends can cause slow cranking and may even trigger false fault symptoms. Also check the main ground cable and engine harness plugs for green or white corrosion.
Then check the belts and controls. Press the belts to check tension, if your engine uses them, and look for glazing or cracks. Make sure the shift and throttle cables move freely without binding, then grease the points listed in the manual.
Boats today depend much more on sensors, gauges, and monitoring systems than older setups did, so preventive electrical care should be part of standard engine service instead of treated as a separate extra job. That small change can make a big difference. Many owners also pair annual tune-ups with quick checks before each trip, and that habit can catch minor problems before they turn into bigger ones on the water.
Tip: If your starter sounds weak but the battery tests good, check for hidden corrosion under the cable insulation or at the ground points.
If you need a wider checklist for terminals, fuse protection, and wiring condition, the plain-language resources at the online marine parts and maintenance retailer can help you match supplies to your boat’s system. You can also review the Marine Electrical Protection Guide 2026: Fuses & Breakers for more detail on protecting electrical systems in harsh marine environments.
Step 8: Test the engine and record the results
After all service items are done, test the engine on the hose, in a test tank, or out on the water when it’s safe. Start at idle. Listen closely and watch for a smooth idle, steady cooling water flow, normal charging voltage, and clean throttle response. Check the gauges too: oil pressure, temperature, and alarms.
Run through these checks:
- Stable idle quality
- No fuel, water, or oil leaks
- Crisp shift engagement
- Normal temperature
- Battery charging
- No warning tones or fault lights
Then record the engine hours, the date, the parts used, and any issues noticed. A good service history helps later with troubleshooting and can also support resale value.
A common mistake is finishing the job without doing a test run. Many problems only show up once the engine is actually running.

Frequently Asked Questions
How often should you do a marine engine tune up?
A good rule is every 100 hours or annually, whichever comes first, then adjust for heavy use, saltwater exposure, towing, or long storage periods. Some items, like flushing and visual checks, should happen much more often.
What is included in a basic marine engine tune up?
A basic service usually includes inspection, oil and filter change if applicable, spark plug replacement, fuel filter service, cooling system check, battery and cable inspection, and engine corrosion protection. The exact list depends on whether you have an outboard, inboard, two-stroke, or four-stroke engine.
What is the best way to handle engine corrosion protection?
Use a layered approach. Flush with fresh water after saltwater use, replace anodes at about 50% wear, apply anti-corrosion spray to exposed metal, use dielectric grease on protected electrical connections, and keep salt residue from building up. No single product does it all.
Can you do a marine engine tune up yourself?
Yes, many owners can handle routine service if they have the correct manual, tools, and parts. If you are working on major fuel issues, internal engine damage, or advanced diagnostics, it is safer to bring in a qualified marine technician.
What parts should you buy before starting the job?
At minimum, have the correct oil, oil filter, spark plugs, fuel filter, grease, and corrosion inhibitor on hand, plus any cooling system parts due by schedule. First Choice Marine can be a practical place to compare common maintenance items, especially if you want to gather tune-up supplies in one order.
How do you know if the tune-up worked?
The engine should start easier, idle smoother, accelerate cleanly, and show normal cooling and charging readings. If rough running, overheating, or alarms continue, the problem may be deeper than routine maintenance and should be diagnosed further.
Keep your engine ready for the next trip
Keeping a marine engine in good shape comes down to a bunch of small, smart steps done in the right order. Start with an inspection. Change the oil and filters on time. Replace worn plugs. Keep the fuel clean. Flush the cooling system. Don’t ignore engine corrosion protection. Then finish with a careful test run and written service notes.
The payoff is simple: fewer breakdowns, longer engine life and more confidence every time you leave the dock. Weekend anglers, family boaters and commercial operators all see the difference. It matters financially too. Engine prices are high, corrosion repairs cost real money and that makes preventive care one of the best values a boat owner can get.
Use a service checklist for the exact engine model, gather the right parts and do one complete tune-up from start to finish. Later, maintenance gets faster because the owner already knows the engine’s weak points and what normal condition looks like. Keep at it. The boat will give back better reliability.
