


If your bilge pump isn’t working right, it helps to have a clear process you can move through fast. This guide is for boat owners, fishing boat crews, DIY marine maintenance users, and really anyone who wants to find the problem without guessing. It keeps things simple and direct, which is usually exactly what you want when time matters. You’ll learn how to troubleshoot common bilge pump problems step by step, with extra focus on the bilge pump switch, wiring, discharge flow, and alarm checks.
At first, bilge pump trouble can seem obvious. The pump won’t turn on. Or it runs, but the water level stays the same. A lot of the time, though, the motor isn’t the real problem. The issue is often in the switch, the wiring, the hose, or a stuck float. That’s easy to miss, and it happens pretty often. This matters because missing a switch problem can leave your boat without protection when water starts rising in the bilge.
The safety risk is real. U.S. Coast Guard data reported 3,887 recreational boating incidents, 556 deaths, 2,170 injuries, and about $88 million in property damage in 2024. Not all of those incidents involved bilge systems, of course. Still, the numbers show why onboard safety equipment needs to work when it’s needed most, especially when water is coming in and the pump has to switch on. In this tutorial, you’ll test each part in order, confirm real overboard discharge through the outlet, and figure out whether you need a repair, a replacement bilge pump switch, or even a backup system, which is often a smart thing to consider.
Before you start
You’ll need:
- A fully charged boat battery that’s connected
- A flashlight or headlamp
- A screwdriver set, plus a multimeter or 12V test light
- A clean rag or some paper towels
- A small bucket or hose to add test water
- Contact cleaner that’s safe for marine electrical use
- A spare fuse with the correct rating, if you have one
- Gloves
Before you begin, switch off any other nonessential loads, since that usually makes troubleshooting easier. Make sure the boat is stable and the area has good ventilation before you do any work. And if there’s any chance of fuel vapors nearby, stop right there and make the area safe first, because that step should never be skipped.
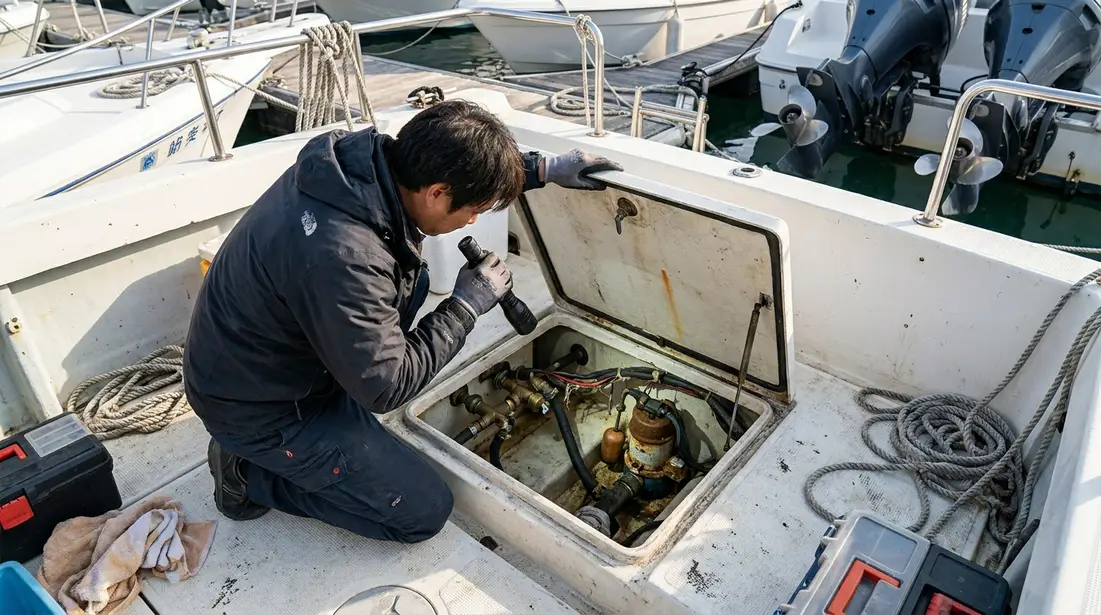
Step 1: Identify the exact symptom first
Before pulling parts at random, figure out what the system is actually doing.
Which of these sounds like the problem?
- Pump does not run in auto mode
- Pump does not run in manual mode
- Pump runs but no water comes out
- Pump cycles on and off too often
- Pump runs continuously
- High-water alarm sounds, but the pump does not clear water
Even though this seems basic, it usually points troubleshooting in the right direction. Different symptoms often lead back to different parts of the system. For example, if the pump works in manual mode but not in automatic mode, the bilge pump switch or float switch is probably the first thing to check. If it will not run in either mode, the better place to focus is the power supply, the fuse, the ground, and the pump motor.
Practical Sailor says bilge pump systems should be tested at least twice annually. Many marine safety sources also recommend testing before departure, and that is often an easy habit to build. It gives boaters a chance to catch issues at the dock instead of finding them offshore while trying to figure out the problem.
One common mistake is assuming everything is fine just because the motor can be heard. That does not tell the whole story. The system still needs to move water out through the discharge line and out of the hull. This bilge pump switch guide already covered switch types and what they do, so it helps to compare what is happening now with how the switch should actually behave.
Step 2: Check battery power, fuse, and breaker
It’s usually quickest to start with the simplest electrical checks.
Go to the battery switch and make sure the right bank is on. You’ll also want to check the bilge pump fuse or breaker. It’s simple stuff, really. Only replace a blown fuse with one that has the same amperage rating. If the new fuse blows right away, stop there and check for a short, a seized pump, or a damaged wire, since that’s often the real problem.
Use a multimeter or test light:
At the fuse or breaker
- Put the black lead on a known good ground, since that really matters.
- Then touch the red lead to the supply side of the fuse or breaker.
- On a resting 12V system, you should usually see battery voltage, around 12.4 to 12.8 volts. It’s pretty straightforward.
- You’ll probably also want to check the load side.
At the pump circuit
- Start by checking for voltage at the manual switch input.
- In manual mode, also check whether voltage is coming out of the switch.
- A good next place to check is the pump positive lead.
- If the pump still is not running, check the ground at the pump too.
If power is getting into the switch but not coming out, the switch is probably bad, and that is pretty common. If there is power at the pump positive lead and the pump still will not run, the ground is often the next thing to check.
Tip: Corrosion at terminals is a very common hidden problem in marine electrical systems. Green, white, or powdery buildup can add enough resistance to keep a pump from starting. It looks small, but it can still shut the whole setup down and is easy to miss.
Step 3: Test the manual side of the bilge pump switch
The helm or panel switch is the next thing to test. On many boats, it has three positions: AUTO, OFF, and either MANUAL or ON.
Set the switch to manual and see what happens. If the pump, wiring, fuse, and ground are all working properly, the pump should turn on right away. When it runs in manual mode but not in auto, that usually points to the float switch or another automatic sensing issue. In that case, the problem is often there, not in the pump itself.
Maritime New Zealand guidance points to the need for a real manual override:
It should be able to placed in the manual ‘on’ position and remain there unaided should the bilge pump need to be activated manually.
That means the switch should stay in the manual position long enough to dewater the bilge without someone having to keep holding it. This is especially useful when water needs to be cleared fast. If the switch springs back, sticks, or just feels loose, which is more common than many people expect, it deserves a closer look.
Common mistakes:
- Leaving the switch in
OFFwhen it should be inAUTO - Assuming a lighted panel means the circuit is healthy
- Testing the switch without checking whether the pump actually discharges overboard through the outlet
If the setup feels hard to follow, or an upgrade is already on the list, First Choice Marine is one place many boat owners check for marine parts and onboard system components.
Step 4: Test the automatic float switch or sensor
If manual mode works, the automatic side is usually the next thing to check.
Near the pump, you’ll find the float switch or electronic sensor. Clean off slime, oil residue, zip ties, fishing line, leaves, and any other debris stuck there. Once it’s clear, test the switch or sensor.
For a mechanical float switch
- A quick check is to lift the float by hand.
- You should then hear the pump turn on.
- When it drops back down, make sure the pump turns off.
- Also check that the float moves freely, and that it isn’t rubbing against the hull or hose.
For an electronic or solid-state switch
- If the maker’s test method is known, follow that first
- Slowly add clean water to the bilge until the switch triggers
- Then wait a moment and make sure the pump shuts off after the water level drops
When automatic mode stops working, BoatUS guidance and other marine maintenance sources usually point to the same kinds of problems: jammed switches, corroded wire ends, loose mounts, and similar faults. That’s a pretty common pattern, honestly.
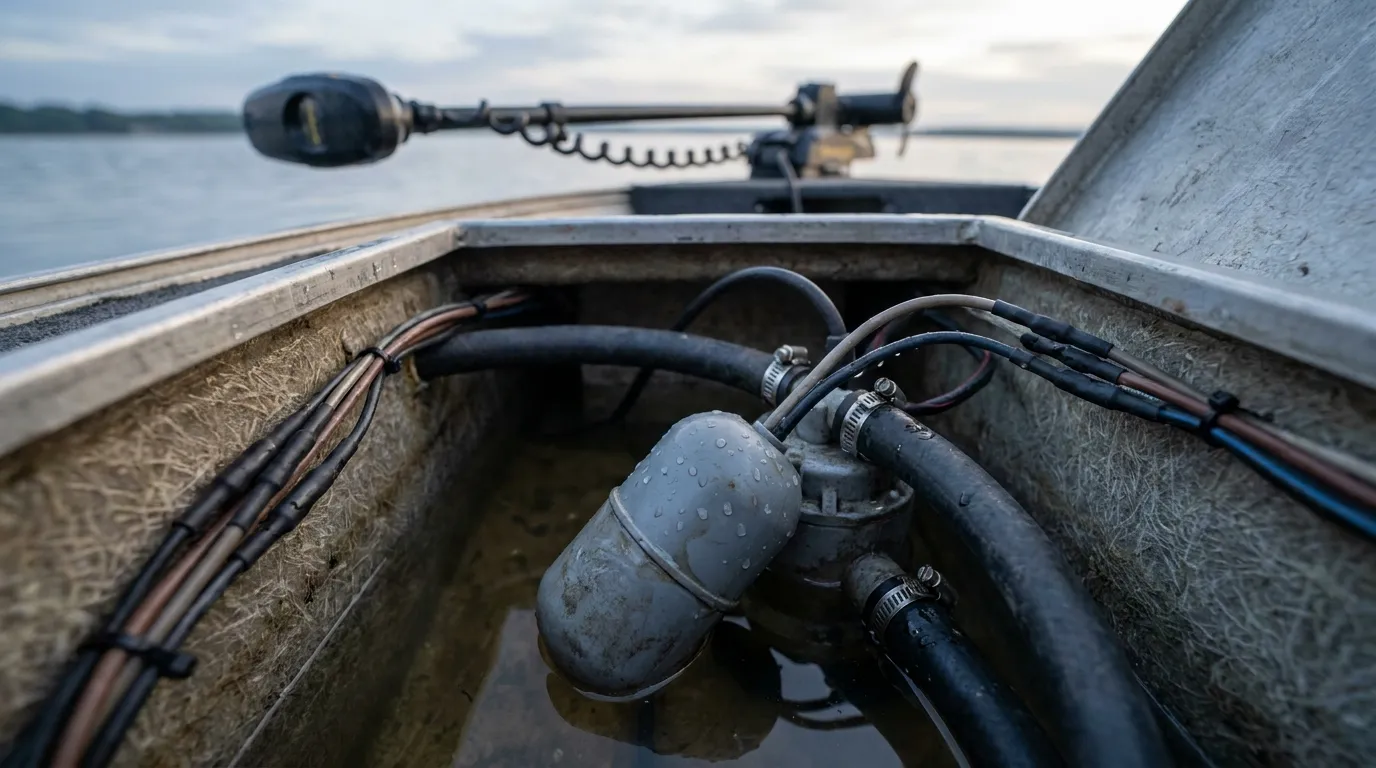
It also helps to check how the switch is mounted. A loose or cracked base can change the float angle, which happens more often than you’d think. In many cases, that keeps the switch from triggering the way it should. A wider look at automatic system design and common failure points was covered here: Automatic Bilge Pumps vs Manual: Real Failure Scenarios & Redundant Design.
Step 5: Confirm the pump actually moves water overboard
A motor that spins is not enough by itself. What matters is whether the bilge water is actually being pushed out through the hull.
One useful way to check that is to pour water into the bilge with a bucket or hose until the pump turns on. Then look at the hull discharge outlet for a steady stream. That is often the quickest way to tell whether the system is really doing its job.
If the pump runs but the discharge is weak, or nothing comes out, check these points in order:
- Debris blocking the strainer
- Sludge clogging the pump intake
- A kinked hose
- A crushed hose hidden behind panels or gear
- A hose loop that sits too high for the pump’s actual capacity
- Backflow caused by a bad check valve or poor routing
- In some setups, an air leak on the suction side
Practical Sailor says a larger backup pump and its float switch should be mounted 4 to 6 inches higher than the primary unit, above the main pump in the bilge. That usually helps when the primary pump is running but still cannot keep up and the water level keeps rising.
Troubleshooting note: If the water only trickles out, disconnect the hose and flush it. But if a hose is old, stiff, or cracked, replacing it is the safer choice instead of trying to save it.
Step 6: Inspect wiring, terminals, and grounds for corrosion
A lot of those hard-to-find faults usually hide here, and this part is easy to miss.
Follow the full circuit from the battery feed to the fuse, switch, float switch, pump, and ground. You will often find trouble in loose crimp terminals, butt connectors with green corrosion inside clear insulation, broken strands near a crimp, heat damage, chafed insulation, wire that is too small left from old repairs, or a ground wire attached to a dirty or rusty spot on the hull or grounding point.
In this kind of circuit, small problems often cause more trouble than you would expect.
Clean light corrosion with marine-safe contact cleaner, but replace terminals that are badly corroded. When fixing the circuit, use marine-grade heat-shrink connectors. Also give each wire a gentle tug. If one comes free, that is probably the failure point.
Also check whether the switch wires are reversed or connected to the wrong terminal. That can cause odd behavior, such as a pump that works only in one mode or one that runs all the time, which is more common than it sounds.
This step is easy to overlook.
If a deeper maintenance checklist would help after repairs, that is covered in this bilge pumps maintenance checklist.
Step 7: Check alarms, indicators, and backup protection
Modern safety guidance puts more focus on alarms, not just pumps. A bilge pump switch can fail with little warning, so having backup protection in place is a smart move, because that extra layer often helps in exactly this kind of situation.
WorkBoat coverage of an NTSB safety finding brought that warning into focus:
Alarm or other notification systems should be configured such that crewmembers, even in accommodation spaces, are notified immediately in case of flooding or other emergency.
To test the high-water alarm, lift its float, or add water if the design allows safe testing. You’ll want to confirm the sound works and that the indicator light comes on too. On some larger vessels, regulations require high-water alarms to be both visual and audible, along with a visual indicator showing when an automatic bilge pump is running, usually at the helm or control panel.
Nuisance alarms should not be ignored. They often point to a real problem, so find the cause and fix it. Also check that the manual switch is left in the correct normal position, which is an easy detail to miss.
The switch should be left in the automatic position during normal operations, with the manual override only used in an emergency to by-pass the automatic function if that fails.
Step 8: Decide whether to repair, replace, or upgrade
Once you’ve found the failed part, the next step is choosing the fix most likely to give you a dependable result. It’s usually pretty simple.
Repairing the system makes sense when the problem is clear and usually easy to confirm, such as:
- Dirty float movement
- Loose terminal
- A blown fuse after a temporary overload
- Minor hose blockage
Replacement is often the safer choice when the issue points to parts that are worn out, damaged, or not likely to stay dependable, including:
- Cracked float switch housing
- Burned switch contacts
- A pump motor that draws power but won’t spin
- Brittle hose
- Badly corroded connectors
- Mounting base that won’t hold securely
An upgrade makes sense when the current setup is basic, but the boat’s actual use often asks more of it. That can mean adding a high-water alarm, installing a backup pump above the primary pump, or changing to an electronic switch if a mechanical float has been trouble-prone in the bilge. In most cases, the goal is simply to make the system more reliable for how the boat is really used.
Commercial operators and owners of larger boats should also compare their setup with vessel-class rules and best practices. That matters even more when engine spaces or unmanned compartments are involved, which usually affects this more than many people expect.
Frequently Asked Questions
Why does my bilge pump work on manual but not automatic?
That usually points to a bad float switch, blocked float movement, dirty sensor, or a wiring problem on the automatic side of the circuit. Start by cleaning the switch area, lifting the float by hand, and checking for voltage through the auto circuit.
How often should I test my bilge pump switch?
A good minimum is twice a year, but many boaters test before trips and during the season as part of regular checks. If you fish often, run offshore, or keep the boat in the water, test it more often because debris and corrosion build up fast.
Can a bilge pump run but still fail to remove water?
Yes. The motor may run while the intake is clogged, the hose is kinked, or the discharge line is blocked. That is why you should always confirm water is actually pumping overboard, not just listen for the motor.
Should I leave the bilge pump switch on auto all the time?
In normal use, yes, the switch should usually stay in the automatic position so the system can respond when water rises. Manual mode is mainly for testing or emergency override if the automatic function fails.
When should I replace the bilge pump switch instead of cleaning it?
Replace it if the housing is cracked, the float sticks after cleaning, the contacts fail repeated tests, or the wiring pigtail is badly corroded. If you need a replacement or want to compare switch options, First Choice Marine can be a practical place to look at marine maintenance and bilge system parts.
Is a backup bilge pump really worth it?
Yes, especially if you keep your boat in the water, run offshore, or carry family or crew in rough conditions. A second pump mounted higher than the primary gives you extra protection if the first pump, primary bilge pump switch, or discharge path fails.
Know your system before the next trip
The easiest way to fix common bilge pump problems is usually to check them one step at a time. Start with the symptom, then check power and the fuse first, followed by the switch, float, discharge, wiring, and alarms one by one. It’s a simple process, but it often stops people from wasting money on parts or overlooking the real issue, which happens more often than many expect.
A good basic check is pretty simple: the pump runs in manual mode, the automatic switch turns on when it should, water leaves the hull in a steady stream, and any alarm or indicator does what it should do. If all of that looks right, clean the bilge, secure the wiring, and note the test date. Why do that? Because it makes the next check easier before a trip, after heavy rain, after a rough pounding, or after storage, when it’s easy to miss something. In many cases, that quick routine can catch smaller problems early.
If there’s old wiring, switching that doesn’t feel reliable, or no backup warning, that’s usually a sign to upgrade sooner rather than later. A bilge system is something people hope never becomes important, but when water is coming in, it needs to work right away. So if you’re comparing reliable marine parts and maintenance items, First Choice Marine is a useful online retailer to keep on your shortlist.
