


Table of Contents
- Why Your Fuel Tank Pickup Tube Matters
- Signs Your Pickup Tube Needs Replacement
- Fuel Tank Pickup Tube Size and Compatibility
- How to Remove Your Old Pickup Tube
- Marine Fuel Pickup Tube with Strainer Selection
- Installation and Thread Fitting Setup
- Marine Fuel System Leak Test After Replacement
- Common Mistakes to Avoid
- Frequently Asked Questions
Last Updated: October 18, 2026
Why Your Fuel Tank Pickup Tube Matters
A fuel tank pickup tube draws gasoline from inside your tank up through the fuel line to your engine. It connects to the tank fitting, usually via an NPT threaded connection, and extends down into the tank to pull fuel as the engine runs.

Most boat owners ignore the pickup tube until it fails. A clogged, cracked, or missing tube starves the engine, causing rough idling, stalling, or complete fuel starvation that can strand you on the water.
A fuel tank pickup tube replacement is one of the most cost-effective DIY repairs: basic tools, a few hours, and the right part restore fuel flow.
Signs Your Pickup Tube Needs Replacement
Your pickup tube is failing if you notice any of these symptoms while operating your boat.
Engine stalls or hesitates under load. The tube can't deliver fuel fast enough for demand, so it sputters, loses power, or cuts out.
Rough idle or difficulty starting. A clogged strainer restricts fuel flow even at rest, making cold starts harder.
Visible fuel leaks near the tank fitting. A cracked tube or loose NPT connection lets fuel seep out, a safety hazard to address immediately.
Age and corrosion. If your boat is 15+ years old and the tube has never been replaced, it's likely corroded inside.
The fastest way to confirm the problem is to remove the old tube and inspect it.
Fuel Tank Pickup Tube Size and Compatibility
Before buying a replacement, match four things: tube length, fitting thread size, hose barb diameter, and strainer clearance. Get any one wrong and the tube won't reach the fuel, won't seal, or bottoms out, so measure first.
How to measure tank depth and tube length
Don't assume the old tube was the right length, a previous owner may have installed the wrong one. Measure the tank itself.
- Find the deepest point of the tank. With the tank empty and the old tube removed, drop a weighted tape measure or stiff wire through the pickup fitting until it touches the bottom. Note the depth from the top of the fitting to the tank floor.
- Subtract clearance. The pickup tube should stop roughly 1/4 to 1/2 inch above the tank bottom. Resting on the floor pulls sediment; sitting too high stops drawing fuel while usable fuel remains.
- Add the fitting height. Tube length is measured from the base of the fitting to the tip of the strainer. Add the fitting body height above the tank surface to your depth figure, then subtract the clearance.
Standard replacement lengths are 24, 30, 36, and 48 inches. Pick the closest length without going under your measurement; if between sizes, choose the longer tube only if it still leaves floor clearance, otherwise trim per the manufacturer's instructions.
Match the fitting thread size
Most marine fuel tanks use tapered National Pipe Thread (NPT) fittings, usually 3/8-inch or 1/4-inch NPT. NPT seals by wedging into the female fitting, which is why thread sealant matters.
Confirm your size by measuring the outside diameter of the old tube's male threads with calipers or a thread gauge. Don't guess from hose size: a 3/8-inch hose barb does not mean a 3/8-inch NPT thread.
Match the hose barb diameter
The barb is the ridged fitting the fuel hose slides over; standard inside diameters are 1/4 inch and 3/8 inch. Measure the inside of your existing hose, not the outside, too large slips off under pressure, too small leaks at the clamp.
Attwood-specific part identification
Pickup tubes are often sold by part number, which encodes the dimensions. Locate the model or part number stamped on your tank or old pickup assembly and cross-check it against the tank model rather than a generic "fits most tanks" listing. If the label is missing, contact the tank manufacturer with the tank's dimensions and fitting size.
The Attwood fuel tank products catalog lists compatible dimensions for their pickup tubes. If you are unsure about your tank's specs, contact the tank manufacturer directly, many publish dimension sheets online.
Strainer clearance and tank fit
Confirm the strainer will clear any internal baffles. On baffled tanks, the pickup must sit in the same compartment as the fuel draw point, and the strainer must not press against a baffle wall. If you can't see inside, a borescope or mirror and flashlight through the filler neck confirms clearance.
How to Remove Your Old Pickup Tube
Removing the old tube is straightforward but requires care to avoid fuel spills.
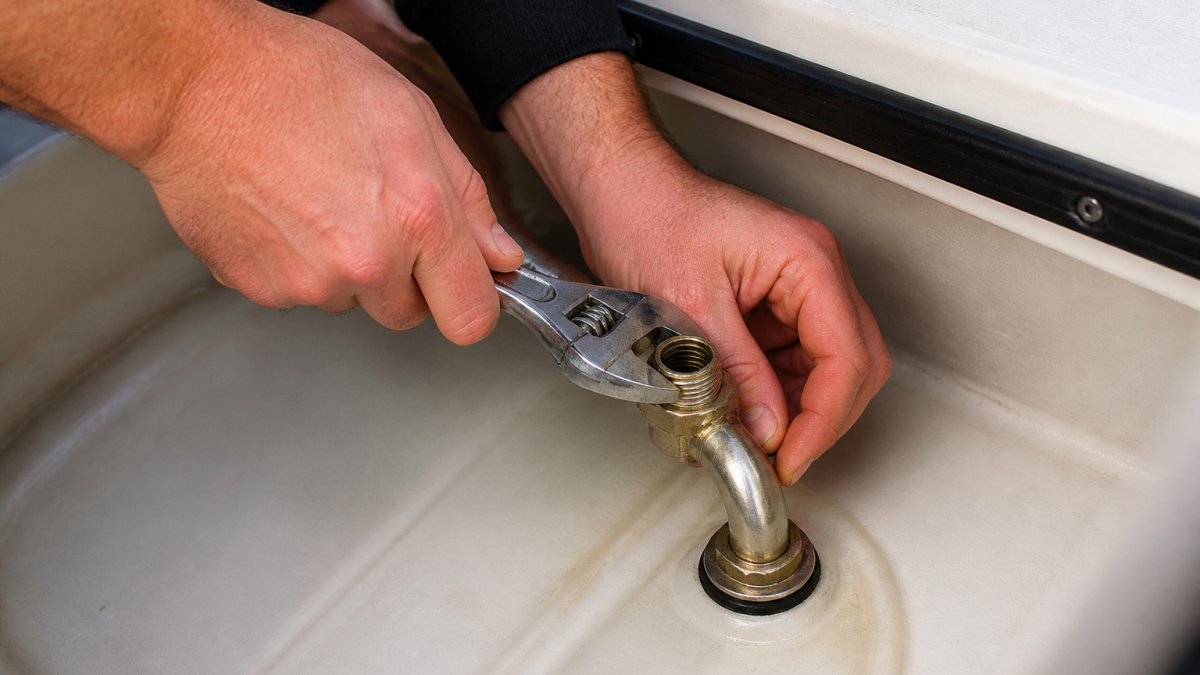
Step 2: Disconnect the fuel hose. Loosen the hose clamp at the pickup tube barb with a screwdriver or wrench, then slide the hose off.
Step 3: Unscrew the pickup tube from the tank fitting. Use a wrench on the fitting hex nut and turn counterclockwise.
Step 4: Inspect the tank fitting. Look inside for corrosion, debris, or damaged threads. Damaged threads mean the fitting must be replaced.
Step 5: Clean the fitting threads. Wipe the NPT threads with a clean cloth.
Marine Fuel Pickup Tube with Strainer Selection
Most pickup tubes include a strainer basket, a small mesh filter at the end that catches sediment and debris before it reaches your fuel line.
Moeller Pick Up 3/8" x 1/4" NPT 36" #033500-36 →
Strainer material is typically nylon mesh or stainless steel. Nylon is lighter and corrosion-resistant but wears faster. Stainless steel lasts longer in saltwater.
Mesh size affects flow and filtration: finer mesh catches more debris but restricts flow, coarser mesh flows better but passes more sediment. Most marine applications use 100-150 micron mesh.
When selecting a replacement pickup tube, verify that the strainer is included and intact. The marine fuel system maintenance guide recommends inspecting the strainer every season and replacing it if clogged.
If you're ordering from First Choice Marine, the Moeller Pick Up 3/8" x 1/4" NPT 36" (#033500-36) includes a built-in strainer and costs $54.59 with free shipping.

Installation and Thread Fitting Setup
Installing the new pickup tube is the reverse of removal. Precision matters, a loose fitting will leak.
Step 1: Apply thread sealant. Wrap the NPT male threads with thread seal tape (PTFE or plumber's tape), clockwise 3-4 times, to create a watertight seal.
Step 2: Screw the tube into the tank fitting. Start by hand to avoid cross-threading, then tighten the hex nut clockwise until snug.
Step 4: Verify the tube position. Confirm the pickup tube hangs vertically and the strainer sits above the tank bottom, submerged when full, but not resting on sediment.
Step 5: Refill the tank. Pour fuel slowly and watch the connection for leaks. If fuel drips, stop and tighten further.
Marine Fuel System Leak Test After Replacement
A fuel leak is a serious safety hazard, and an air leak is just as damaging, it lets the engine draw air instead of fuel, causing lean running, hard starting, and stalling. Test liquid leaks first, then air leaks and flow problems.
Stage 1: Liquid leak checks
Work with the engine off and the tank partially filled so there is fuel at the pickup.
- Static check. Wipe the NPT connection and hose clamp dry, wait several minutes, and look for fresh wetness or a fuel sheen. Any seepage means the connection is not sealed.
- Running check. Start the engine and let it idle 2-3 minutes while watching the NPT connection and hose clamp. Stop immediately if you see drips.
- Smell check. Shut off the engine, let it sit five minutes, and smell around the tank and fuel line. A strong fuel odor points to a leak, trace it before restarting.
If fuel weeps at the NPT joint, the thread sealant was insufficient or the fitting is cross-threaded. If it weeps at the hose clamp, the clamp is loose or the hose is the wrong diameter for the barb.
Stage 2: Air leak and flow checks
An air leak will not show as wet fuel, so test for it separately.
- Restricted-flow symptoms. Rough idle, hesitation under load, or an engine that dies at speed can mean the strainer is clogged, the tube is too long and bottoming out, or the tube is not submerged.
- Air-in-fuel check. If your engine has a clear inline fuel filter or a primer bulb, watch for bubbles or a bulb that won't stay firm, a soft or collapsing bulb suggests the pickup is drawing air or is restricted.
- Pressure check. If your boat has a fuel pressure gauge, confirm steady pressure within the manufacturer's spec. Fluctuating pressure suggests an air leak or a clogged strainer.
- No-start or rough-start check. Verify the tube is submerged, the strainer is clear, and the hose connections are tight before assuming an engine fault.
Stage 3: Confirm after operation
Run the engine about 30 minutes, then shut down and inspect again. New installations sometimes develop small seeps as thread sealant cures and fittings settle, so a second inspection confirms the repair holds.
When to stop and get help
If the tank fitting threads are damaged, the fitting is cracked, or you cannot achieve a leak-free seal after resealing, stop. Thread repair or fitting replacement on a fuel tank is a job for a qualified technician, and a compromised tank fitting is a safety issue that should not be patched.
Common Mistakes to Avoid
Most pickup tube replacement problems come from overlooking these details.
Ordering the wrong length. A 30-inch tube in a 36-inch tank won't reach the fuel; a 48-inch tube will bottom out and restrict flow.
Forgetting thread sealant. NPT threads are tapered but not self-sealing. Without thread seal tape, fuel will weep from the connection.
Over-tightening the fitting. Snug is enough. Excess force can crack aluminum fittings or strip nylon threads.
Ignoring a clogged strainer. If the old strainer is packed with sediment, your new tube will clog within weeks unless the tank is cleaned.
Frequently Asked Questions
How do I know if my boat fuel tank pickup tube needs replacement?
Signs include fuel starvation (engine sputtering at high throttle), visible corrosion or cracking on the tube, fuel leaking from the tank fitting, or difficulty starting after the engine has been sitting. If your fuel filter clogs repeatedly despite recent changes, the pickup strainer may be clogged or damaged. A fuel tank pickup tube that has been in service for 10+ years should be inspected for degradation, especially if made from vinyl or older nylon materials.
What size fuel tank pickup tube do I need for my Attwood tank?
Attwood pickup tubes come in standard configurations: 3/8-inch outside diameter with 1/4-inch NPT threads is common for most recreational marine engines. Verify your tank model number and check the original tube specifications before ordering. Measure the existing tube's length (typically 24 to 36 inches) and confirm both the male and female thread sizes. The Moeller Pick Up 3/8" x 1/4" NPT 36" at $54.59 qualifies for free shipping and works with compatible Attwood installations.
Do I need a strainer on my marine fuel pickup tube?
Yes. A fuel strainer on your pickup tube prevents sediment, rust, and debris from entering the fuel line and clogging your fuel filter or carburetor. Most marine fuel pickup tubes include a pickup strainer basket at the tank end. If your replacement tube lacks one, install a separate fuel strainer inline between the tank and engine to protect your fuel system and extend engine life.
How do I test for leaks after replacing my pickup tube?
After installation, turn on the fuel pump (or prime the engine) and visually inspect all fittings and connections for drips. Check where the pickup tube connects to the tank fitting and where the fuel hose attaches. Run the engine at idle for 5 minutes, then turn it off and wait 10 minutes to see if fuel pools form. Address any leaks immediately before taking the boat on the water.
Fuel tank pickup tube replacement is a repair you can handle yourself with the right part and careful attention to detail. First Choice Marine carries compatible replacement tubes from trusted manufacturers like Moeller and EVM, all with free shipping and the specifications you need for your tank. Measure your tank, order the correct size, and follow these steps to restore reliable fuel flow to your engine.
