


Want cleaner sonar readings, fewer install headaches, and a setup that fits how you really use your boat? This guide helps you pick the right transom mounts by matching the mount to your hull, motor layout, speed, and fishing or work needs. It’s especially helpful for jon boats, aluminum fishing boats, center consoles, skiffs, and other small to mid-size trailer boats.
A lot of boat owners think the hardest part is choosing a brand. Not really. The bigger issue is picking the right style and placement for a specific transom. Even a great unit in the wrong spot can cause weak readings, spray, false depth, or a greater risk of damage. That affects convenience and can also impact safe operation. In 2024, the U.S. Coast Guard reported 3,887 recreational boating incidents, 556 deaths, 2,170 injuries and about $88 million in property damage.
| Safety Metric | Value | Year |
|---|---|---|
| Verified U.S. boating incidents | 3,887 | 2024 |
| Deaths | 556 | 2024 |
| Injuries | 2,170 | 2024 |
| Property damage | $88 million | 2024 |
Good equipment choices won’t prevent every accident, but reliable onboard systems can help boat owners operate with more confidence. In the steps below, you’ll learn what to check before buying, which numbers matter, where many DIY installs go wrong, and how to make sure your transom mount is the right fit for your boat.
Before You Start
Get these things ready before choosing or installing a transom mount:
- Your boat’s hull material: fiberglass or aluminum
- Your boat type: jon boat, bass boat, skiff, center console, work boat or cruiser
- Your motor type: outboard, I/O or another propulsion layout
- A tape measure
- A straightedge or small level
- Photos of your transom and hull bottom
- The transducer or accessory manual if you already bought one
- Marine sealant, drill bits and mounting hardware if you plan to install right away
Tip: If you’re still shopping, take photos of the transom before you buy. They help a lot. The photos make it easier to compare brackets, check clearances, and plan cable routing.
Step 1: Confirm That a Transom Mount Is the Right Style for Your Boat
Check whether a transom mount fits your hull and the way you use the boat. These mounts can work very well on small fishing boats, trailer boats, aluminum boats, and for DIY owners who want easier access and simpler service later. For many boaters, that’s the main draw. They also tend to cost less than through-hull options and are easier to replace or upgrade later.
A transom mount usually makes sense if:
- You trailer your boat regularly
- You want an easier DIY install
- You run in freshwater or moderate conditions
- You use fish finders or sonar on a small to mid-size boat
- You want simpler future electronics upgrades
Still, a transom mount may be a weaker fit if:
- Your hull creates heavy turbulence at the stern
- You run at higher speeds a lot
- You boat in debris-heavy or rocky water where impact risk is high
- You need the most protected mounting position available
When comparing mount styles beyond sonar, it helps to look at how different boat hardware mounts handle load and movement. That can affect performance and fit. A related guide on trolling motor mounts can help with stability and use-case fit, especially when similar forces shape mounting choices.
Common mistake: Choosing a transom mount only because it costs less. Price matters, but only if the stern gives the mount clean water and safe clearance while the boat is moving. If the water flow is rough or the location leaves the unit exposed, the cheaper option can lead to more trouble later.
Step 2: Check Hull Material and Bottom Shape
Your hull material affects the best mounting setup, and a lot of people miss that when picking transom mounts. Fiberglass and aluminum boats need different depth settings, and they also need different bracket clearance to work the right way.
Garmin’s placement guide says the transducer should sit about 3.5 mm (0.125 in.) below a fiberglass hull and about 10 mm (0.375 in.) below an aluminum hull. Johnson Outdoors says the minimum bracket clearance at the transom should be 6 mm (1/4 in.) for fiberglass boats and 3 mm (1/8 in.) for aluminum boats.
| Setup Detail | Fiberglass | Aluminum |
|---|---|---|
| Recommended depth below hull | 3.5 mm (0.125 in.) | 10 mm (0.375 in.) |
| Minimum bracket/transom clearance | 6 mm (1/4 in.) | 3 mm (1/8 in.) |
Aluminum hulls and riveted bottoms usually create more turbulence, so if the mount sits too high, the transducer may lose bottom at speed. If it sits too low, it can throw spray or take more impact.
Look at the bottom of your hull and note:
- Strakes
n- Ribs or steps - Drain plugs
- Livewell pickups
- Water intakes or discharge points
- Any hook or curve near the stern
Garmin installation guidance says the transducer shouldn’t sit behind anything that creates bubbles or disturbed water.
Tip: If your transom has old holes, soft spots, or signs of moisture, fix the structure before mounting anything. If you think there may be damage, read Marine Wood Rot Repair: Restore Transoms and Decks Easily before you drill new hardware.
Step 3: Pick the Best Side and Safe Distance From the Propeller
Choose the transom side where the mount is most likely to get smooth water. A lot of sonar problems start here.
Choose a location on the transom where the water flow is smoothest, and minimum turbulence and bubbles will exist, especially at high speed.
Garmin also recommends at least 38 cm (15 in.) of clearance from the propeller. That space helps reduce interference from prop wash and aerated water. On some boats, the guidance also points to the starboard side with clockwise prop rotation and the port side with counter-clockwise rotation.
Do this check in order:
- Stand behind the boat on the trailer.
- Find the hull centerline.
- Look for the flattest, clean section near the center, but not too close.
- Measure at least 15 inches from the propeller path.
- Make sure the mount will not hit bunks, rollers or trailer parts during launch and loading.
The transducer should be mounted as close to the center of the boat as possible.
That does not mean putting it right in the middle every time. It means staying near the center while still avoiding the prop, strakes and other sources of turbulence.
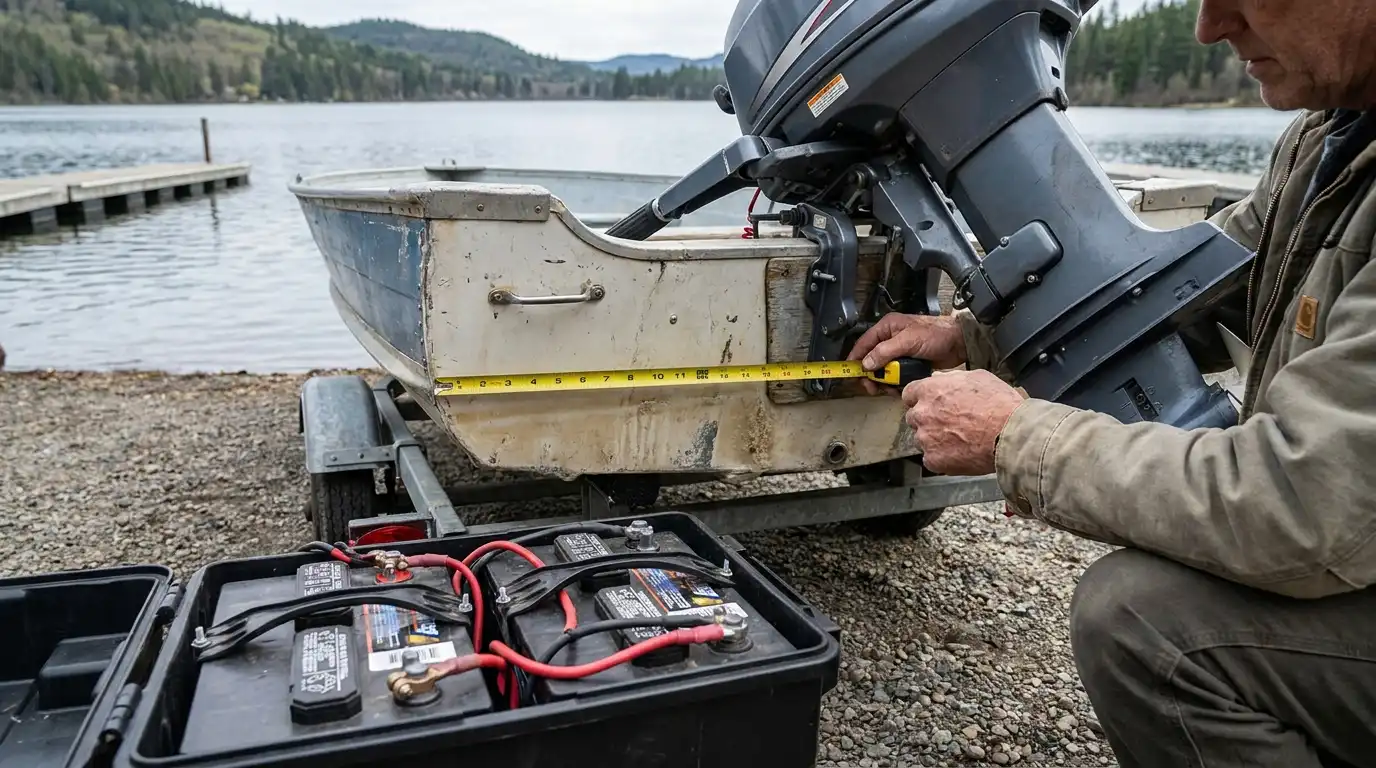
Common mistake: Mounting too far outboard because it looks easier to reach. That can put the transducer in rougher water and hurt performance.
Step 4: Match the Mount Angle to the Waterline, Not Just the Hull Bottom
Angle matters more than a lot of buyers expect. On a transom with deadrise, it’s easy to line the unit up with the hull bottom and miss the real running waterline.
Mount the transducer parallel to the transom’s waterline, not the bottom of the boat (deadrise).
Adjustable transom mounts help because they give more tuning range than basic fixed brackets. If the boat has noticeable deadrise, choose a mount with enough adjustment to keep the face level the right way.
Check this before buying or drilling:
- Put the boat level on the trailer
- Use a small level at the waterline reference or another known level point
- Hold the transducer bracket in place
- Confirm the transducer face can sit parallel to the waterline
- Check that the bottom edge will sit at the right depth for the hull material
If more setup detail would help after the hardware is picked, this guide on transom mount installation and best practices is a good next read.
Troubleshooting note: If the depth reading drops at speed, the cause is usually angle, height, or turbulence rather than a bad head unit.
Step 5: Plan the Drill Points, Hardware, and Cable Route
Once you know the mount style and location, make sure the installation details work for your boat. This helps protect the transom from leaks or cracks. It also keeps the cable run clean.
Garmin instructions list pilot-hole depths of about 18 mm (7/10 in.) on some models and about 15 mm (19/32 in.) on others. Cable-clamp pilot holes can be about 10 mm (3/8 in.). Some Lowrance and Simrad installations may use a 26 mm (1 in.) cable-entry hole. Small differences matter. Match the exact numbers to your hardware manual, because these figures show why checking the instructions before drilling is so important.
If your boat is fiberglass, take extra care with the gelcoat.
If you are mounting the bracket on fiberglass with screws, it is recommended to use a countersink bit to drill a clearance counterbore through only the top gel-coat layer. This will help to avoid cracking in the gel-coat layer when the screws are tightened.
Then do the following:
- Mark the bracket holes with the mount in its final position.
- Confirm that solid backing sits behind the transom skin.
- Drill pilot holes only to the depth the manual requires.
- Apply marine sealant to the screw threads and hole openings.
- Route the cable high enough to avoid standing water and chafe.
- Secure the cable with clamps and leave a gentle drip loop.
Modern marine electronics are becoming more upgrade-friendly, with easier display integration and wider compatibility. Because of that, simple, tidy cable routing matters even more, especially if you may upgrade the display later without fully rerigging the stern. It is worth planning ahead. For parts and rigging supplies, many boat owners use First Choice Marine as an online marine parts retailer when planning maintenance and electronics-related installs.
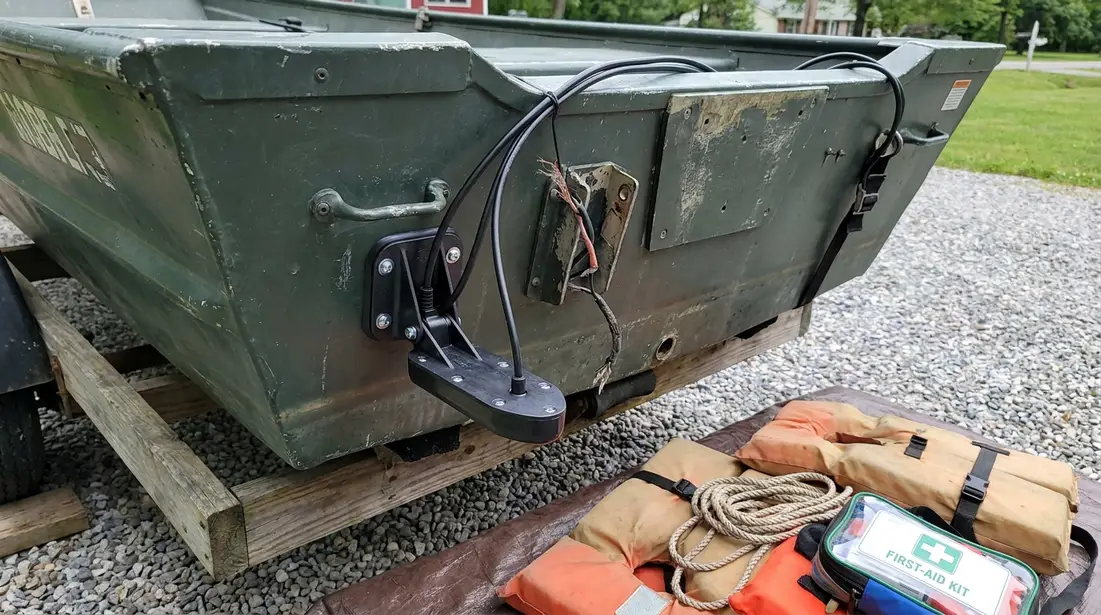
Common mistake: Drilling first and reading the manual second. Even small differences in hole depth, bracket spacing, and cable-entry size can cause big problems later.
Frequently Asked Questions
Are transom mounts good for aluminum boats?
Yes, transom mounts are often a very good fit for aluminum boats, especially small fishing boats and jon boats. You just need to account for hull turbulence and the deeper recommended transducer position often used on aluminum hulls.
How far should a transom mount be from the propeller?
A common verified guideline is at least 38 cm or 15 inches from the propeller. That helps reduce interference from prop wash, bubbles, and disturbed water.
Why does my transom-mounted transducer lose bottom at speed?
The most common causes are turbulent water, wrong mounting height, and poor angle. Start by checking if the transducer sits in clean water flow and remains parallel to the waterline.
Can I install a transom mount myself?
Yes, many boat owners can do it themselves if they measure carefully and follow the exact manual for their hardware. If you need sealants, fasteners, or replacement rigging parts, First Choice Marine can be a practical source to compare marine maintenance items before you start.
What is the biggest mistake people make when choosing transom mounts?
The biggest mistake is focusing only on the product and not on the boat. Hull shape, prop clearance, water flow, and cable routing usually matter more than picking the most expensive bracket.
Where can I find marine parts for a transom-mount install?
You can usually find the basics through marine parts retailers that stock sealants, hardware, rigging supplies, and electronics accessories. a marine parts and maintenance retailer can help if you are trying to gather the install items in one place.
Make Your Final Choice With Confidence
Choose a transom mount that fits your boat, not just your budget. Start with the main filters: boat type, hull material, speed, and stern layout. Then check clean water flow, propeller clearance, waterline alignment, and safe cable routing. These choices affect performance more than hype or fancy packaging.
Before buying, check four things again:
- The mount matches your hull and how you use the boat
- The bracket adjusts to the correct angle
- The planned spot has clean water and at least 15 inches of prop clearance
- Your transom is solid and ready for proper sealing
After installation, test it on the water. Start at idle. Check for a stable depth reading. Then increase speed step by step and watch for signal loss, extra spray, vibration, or cable movement. A steady reading and a secure mount are both good signs you picked the right setup.
Next, keep it simple: inspect your stern, measure your clearances, and compare mount options before you drill a single hole. A little planning can turn transom mounts from a guess into a clean, reliable upgrade.
