


Quick Summary
A secondary bilge pump is a backup that takes over when your primary pump fails or gets overwhelmed. Install it at the lowest point of the bilge, on its own fuse and circuit, with its own float switch and a separate discharge hose.
- Mount the secondary pump at the lowest point of the bilge and the primary a little higher.
- Give the secondary pump its own fuse or breaker and run it back to the battery independently.
- Route the discharge hose with a continuous rise so water cannot siphon back into the boat.
- Test the backup alone with the primary pump switched off before you leave the dock.
Table of Contents
- What a Secondary Bilge Pump Does and When You Need One
- Choosing the Right Secondary Pump and Capacity
- Positioning the Pump and Mounting It Securely
- Bilge Pump Float Switch Installation
- Secondary Bilge Pump Wiring Diagram and Electrical Protection
- Bilge Pump Discharge Hose Installation and Backflow Prevention
- Bilge Pump Installation Checklist and Testing Your Setup
- Frequently Asked Questions
How to Install a Secondary Bilge Pump System Step by Step
Last Updated: October 30, 2026
What a Secondary Bilge Pump Does and When You Need One
A secondary bilge pump is a backup that takes over when your primary pump fails or gets overwhelmed. A single pump is a single point of failure, so a backup is worth considering for any boat that spends time away from the dock.
You need one if your boat carries valuable electronics, sleeps people overnight, or sits on a mooring where a slow leak could go unnoticed for days.
Watch out: A second pump wired to the same switch and fuse as the first gives you no real backup.
Choosing the Right Secondary Pump and Capacity
Pick a pump that can move more water than the primary, not less.
For a practical starting point, consider the Bilge-B-Dry Dual Pump 12v DC #BBD-2025-122, a dual-pump setup for 12-volt power.

Check three things before you buy:
- Voltage: Match the pump to your boat's 12-volt or 24-volt system.
- Flow rate: Gallons per hour, as listed on the pump's specification sheet.
- Physical size: The pump must fit the lowest point of your bilge with room for the strainer.
The T-H Marine Standard Bilge Pump 800 GPH (#PMP-BLG8-DP) and the 600 GPH model (#PMP-BLG6-DP) are available from First Choice Marine, priced at $58.28 and $44.09.
The three checks to make before buying a secondary pump are summarised below.
| Check | What to confirm | Why it matters |
|---|---|---|
| Voltage | Matches the boat's 12-volt or 24-volt system | Wrong voltage means the pump will not run correctly |
| Flow rate | Gallons per hour on the spec sheet | The pump must move more water than the primary |
| Physical size | Fits the lowest bilge point with room for the strainer | The pump must reach where water collects |
Positioning the Pump and Mounting It Securely
Place the secondary pump at the lowest point of the bilge so it collects water before the primary pump's strainer does.
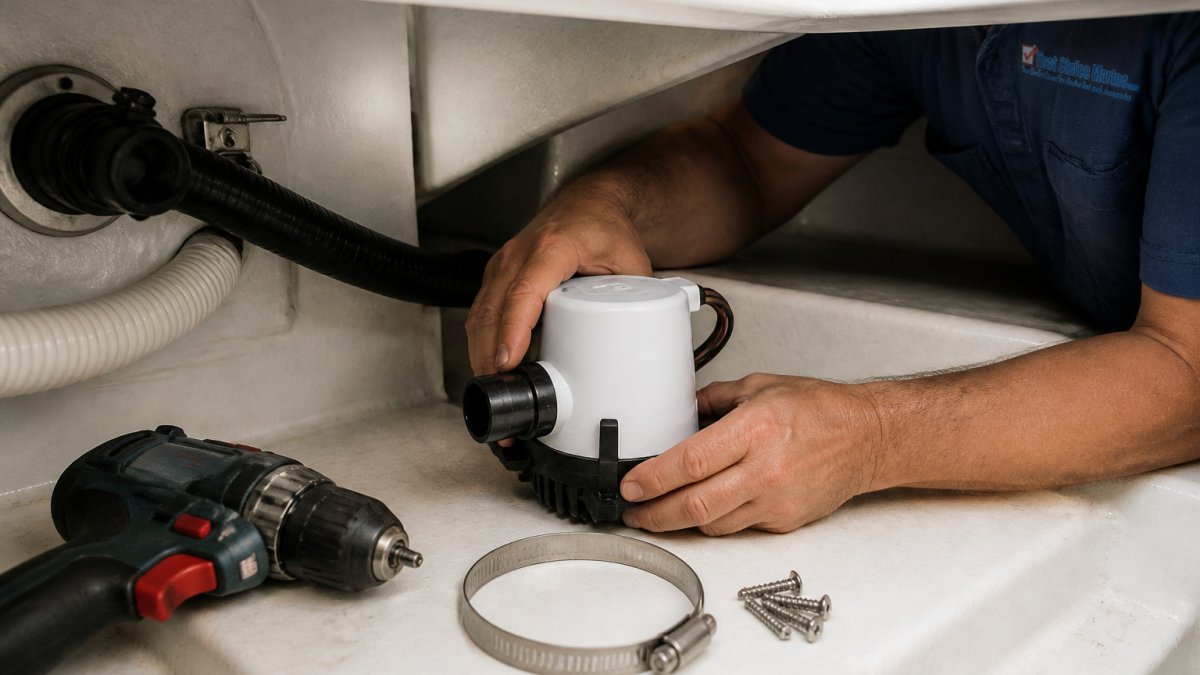
Follow these steps:
- Clean the bilge. Remove debris, oil, and standing residue from the mounting area.
- Mark the mounting holes. Hold the pump in position and mark through the base.
- Drill pilot holes. Use a bit slightly smaller than the mounting screws.
- Secure the pump. Fasten it firmly so vibration cannot loosen it over time.
- Attach the strainer. Make sure nothing blocks the intake.
A dry run before you finish lets you confirm the pump sits where water will actually reach it.
Picture the job: a boat owner's hands reach into a cramped engine bilge, fitting a compact electric pump onto a clean fiberglass floor next to a stainless-steel hose clamp and a drill.
Bilge Pump Float Switch Installation
A float switch turns the pump on when water rises and off when it drops. Without one, the pump runs only when someone flips a manual switch, which defeats the purpose of a backup.
Install the float at the height where you want the pump to start, and make sure the arm moves freely and cannot snag on hoses or wiring. If the float misbehaves after installation, see the troubleshooting guide for marine bilge pump float switches.
Expected result: The pump starts when water reaches the float and stops once the level falls.
Bilge-B-Dry Dual Pump 12v DC #BBD-2025-122 →
Secondary Bilge Pump Wiring Diagram and Electrical Protection
A backup pump is only a backup if its electrical path is independent of the primary. That means its own fuse or breaker, its own run of wire, and its own connection at the battery or battery switch. If both pumps share a fuse, a single short or corroded terminal can take out both at once.
Sizing the fuse or breaker
Start with the pump's rated current draw, which is printed on the pump label or spec sheet and is usually listed at 12 volts and at 24 volts. A common pattern is to size the fuse at roughly 1.5 to 2 times the rated running current so the pump can handle startup surge without nuisance blowing, while still protecting the wire. Do not exceed the amperage rating printed on the pump itself; that number is the manufacturer's ceiling for the circuit.
Choosing wire gauge
The fuse protects the wire, so the wire has to be large enough for the round-trip length of the run. Use the pump manufacturer's wire-size chart or a standard marine DC voltage-drop table to size the wire for the run. Undersized wire causes two problems: the pump spins slower and delivers less flow than its rating, and the wire runs hot. Marine-grade wire is the appropriate choice for a wet bilge.
A typical independent circuit
- Positive feed: Battery positive (or the battery-side terminal of the battery switch) to an inline fuse or a dedicated breaker in the panel.
- Control: Fuse output to the float switch, then from the float switch to the pump positive. If you want a manual override, wire a three-position switch (Off / Auto / Manual) so the float and the manual position feed the pump through separate paths.
- Negative return: Pump negative directly back to the battery negative or the engine block ground, not daisy-chained through the primary pump's ground.
- Labeling: Label both ends of every wire and note the fuse size on the label.
Connections and corrosion
Use adhesive-lined heat-shrink crimp connectors, not twist-on connectors or electrical tape, at every joint. Keep the fuse holder above the highest expected bilge water level and out of the spray path. A common failure pattern is a fuse holder mounted low in the bilge that corrodes and opens the circuit silently; mount it high and dry, and inspect it at the start of each season.
Testing the circuit
Before you trust the backup, verify it end to end: pull the fuse and confirm the pump stops, replace it and confirm the pump restarts, and check voltage at the pump terminals while it is running. A reading well below battery voltage points to undersized wire or a bad connection.
Bilge Pump Discharge Hose Installation and Backflow Prevention
Give the secondary pump its own discharge hose and its own through-hull outlet wherever the hull allows. Sharing a discharge line creates a path for water to flow back into the bilge, and it lets one pump's failure or one clogged line affect the other. The discharge system is where most backup installations quietly fail, so design it deliberately.
Match hose size to the pump outlet
Use the hose diameter the pump manufacturer specifies, usually the same as the pump's outlet port. A smaller hose adds back pressure and cuts delivered flow; a larger hose on a small pump is harmless but unnecessary. Keep the run as short and as straight as practical, and avoid sharp bends, which cost flow the same way a long run does. Every foot of lift, every bend, and every foot of hose reduces the gallons per hour the pump actually delivers compared with its advertised rating.
Route for a siphon break, not a siphon
A discharge hose that dips below the waterline and then rises to the outlet can siphon water back into the boat when the pump stops. Route the hose so it rises continuously from the pump to the outlet, with the outlet above the waterline at the boat's maximum heel and load. If the outlet must sit low, install a siphon break (a small vented fitting at the high point of the loop) so air enters the line and breaks the siphon when the pump stops.
Check valves: when they help and when they hurt
A check valve keeps water in the line from draining back into the bilge after the pump stops, which reduces cycling. But a check valve also adds restriction, can jam open with debris, and can trap water in the line where it freezes or stagnates. Many installers avoid check valves on a bilge discharge and instead rely on a continuously rising hose and an outlet above the waterline.
Y-fittings and shared outlets
Some owners route both pumps through a Y-fitting with check valves to save a through-hull. That approach is possible, but it adds points of failure and makes it harder to tell which pump is moving water during a test. Keep discharge lines separate where the hull allows; if you must share an outlet, use a Y-fitting rated for the combined flow and service the check valves on a schedule.
Steps for a clean installation
- Measure the run from the pump outlet to the through-hull, including the rise to the outlet.
- Cut the hose to length, leaving a gentle continuous rise with no kinks or low spots.
- Connect with stainless-steel hose clamps, two per connection where the fitting allows.
- Confirm the outlet sits above the waterline at rest, under load, and at maximum heel.
- If the outlet is low, install a siphon break at the high point of the loop.
- Test flow at the outlet with the primary pump off to confirm the backup moves water on its own.
Bilge Pump Installation Checklist and Testing Your Setup
Before you leave the dock, run through this checklist:
- Secondary pump sits at the lowest point of the bilge
- Primary and secondary pumps mount at different heights
- Secondary pump has its own fuse and circuit
- Wiring uses marine-grade wire, with every connection labeled
- Float switch moves freely and starts the pump at the right level
- Discharge hose is separate, free of kinks, and clamped at both ends
- Outlet sits above the waterline
Then test the system. Fill a bucket with water, place it near the float, and watch the pump start and stop. Repeat with the primary pump switched off to confirm the secondary works alone.
Check the installation every few months, and after heavy rain or a long trip. Clear the strainers, inspect the hoses for wear, and confirm the float still moves freely.
Frequently Asked Questions
Should you have two bilge pumps?
Many boat owners install a second pump as backup, especially on boats that spend time unattended or in rough water. A secondary pump with its own float switch and discharge hose keeps water moving if the primary pump fails, clogs or loses power. Choose a second pump sized to handle your expected water intrusion, and keep its wiring and discharge path separate from the primary system so one failure does not take out both.
Should a backup bilge pump have a separate float switch?
Yes. A separate float switch lets the backup pump activate independently if the primary pump or its switch fails. Mount the backup pump's float switch at the bilge's lowest point, and make sure it is wired so it cannot be disabled by the primary system's controls. Test the switch by lifting it manually after installation to confirm the pump starts and stops as expected.
Can two bilge pumps share one discharge hose?
Sharing one discharge hose is not recommended. Separate discharge hoses and through-hull outlets prevent backflow, where water from one pump flows back through the other pump's line. Some boaters use a Y-fitting with check valves as an alternative, but this adds points of failure. Running each pump to its own outlet is the simpler and safer arrangement.
How do you test a secondary bilge pump after installation?
Clean the bilge, then fill it with a few gallons of fresh water so the float switch lifts and the pump runs. Confirm the pump starts, moves water through the discharge hose and shuts off when the water drops. Check every hose clamp for leaks, and verify the fuse or breaker is sized correctly for the pump. Repeat the test on the primary pump to confirm both systems work independently.

