


Last Updated: October 28, 2026
Quick Summary
To clean bilge pump debris, first turn off and isolate the pump, then remove the strainer and clear out hair, line and grit. Inspect the impeller and discharge hose, then reassemble, restore power and run a function test. A clean bilge pump strainer and clear intake help the pump keep working reliably.
- Turn the pump off and tape over the switch before touching the strainer.
- Remove debris from the strainer and check the impeller for wrapped hair or line.
- Test the pump on manual, then with the float switch using clean water.
- If the pump keeps failing, replace the strainer with a stronger stainless model.
Table of Contents
- Why Bilge Pump Debris Builds Up and Why It Matters
- Bilge Pump Cleaning Tools and Supplies You Need
- Disconnect Power and Prepare the Bilge Area Safely
- How to Clean the Bilge Pump Strainer Step by Step
- Flushing the Bilge and Applying a Bilge Cleaner
- How to Test a Bilge Pump After Cleaning
- How to Unclog a Bilge Pump That Keeps Failing
- Set Your Next Inspection Date and Keep the Bilge Clear
- Frequently Asked Questions
Why Bilge Pump Debris Builds Up and Why It Matters
Bilge pump debris, dirt, food scraps, hair, fine grit and oily residue, collects in the lowest part of your boat's hull. A bilge pump clears standing water, but not what settles around its strainer.
Regular cleaning is one way to maintain the bilge pump strainer and bilge area.
Watch out: never reach into the bilge while the pump's power is on. A pump can start without warning, especially if the float switch is set to automatic.
Bilge Pump Cleaning Tools and Supplies You Need
Gather everything before you start so you are not working in a dirty bilge longer than necessary.
- Rubber or nitrile gloves
- Safety glasses
- A stiff brush and a small detail brush
- A plastic bucket or tray for debris
- Shop rags or paper towels
- A marine-safe bilge cleaner
- A replacement strainer, if the old one is cracked or worn
Star Brite Bilge Cleaner is one option. It disperses and loosens sludge and grime in the bilge so it can be pumped out.
The Rule Stainless Debris Strainer #70 adds protection for use on round-based Rule pumps up to 3700 GPH and installs directly into the existing strainer. It filters out excess debris and helps prevent jamming and failure.
The table below lists the cleaning tools and supplies covered in this section, along with what each one is used for.
| Item | Purpose | Note |
|---|---|---|
| Rubber or nitrile gloves | Hand protection | Wear before touching debris |
| Safety glasses | Eye protection | Guards against splashes |
| Stiff and detail brushes | Scrubbing the strainer | Use the small brush for tight spots |
| Plastic bucket or tray | Catching debris | Keeps loose debris out of the bilge |
| Shop rags or paper towels | Wiping and drying | Catches drips |
| Marine-safe bilge cleaner | Loosening sludge and grime | Pump out after use |
| Replacement strainer | Swapping a damaged strainer | Use if the old one is cracked or worn |
Disconnect Power and Prepare the Bilge Area Safely
Turn off the bilge pump switch at the panel, then disconnect power at the battery or breaker. Tape over the switch or leave a note so no one turns it back on during cleaning.
Open the hatch and run the blower for several minutes. Put on gloves and safety glasses before touching anything.
Move tools, cords and gear out of the way so you have room to work, and lay a rag or mat down to catch drips.
How to Clean the Bilge Pump Strainer Step by Step
Cleaning the strainer is the core of this job. Work slowly, keep the pump isolated, and note how every part sits before removing it.
Isolate the pump before you open anything
Before touching the strainer:
Rule Stainless Debris Strainer #70 →
- Turn the pump switch to OFF at the helm panel.
- Pull the pump's fuse or trip its dedicated breaker at the battery switch panel.
- If the pump has a separate automatic float circuit, disconnect that lead too.
- Tape a note over the switch reading "PUMP OFF, DO NOT ENERGIZE."
Open the strainer the right way for your pump style
- Snap-on strainers (common on Rule and similar round-base pumps) pull straight up off the base. Grip the base, not the screen, and lift evenly.
- Threaded strainers twist counterclockwise. If it will not budge, do not use pliers on the screen, apply penetrating oil to the threads and wait.
- Screw-mounted strainers have a single screw or clip. Back it out fully and keep the screw in your bucket so it does not fall into the bilge.
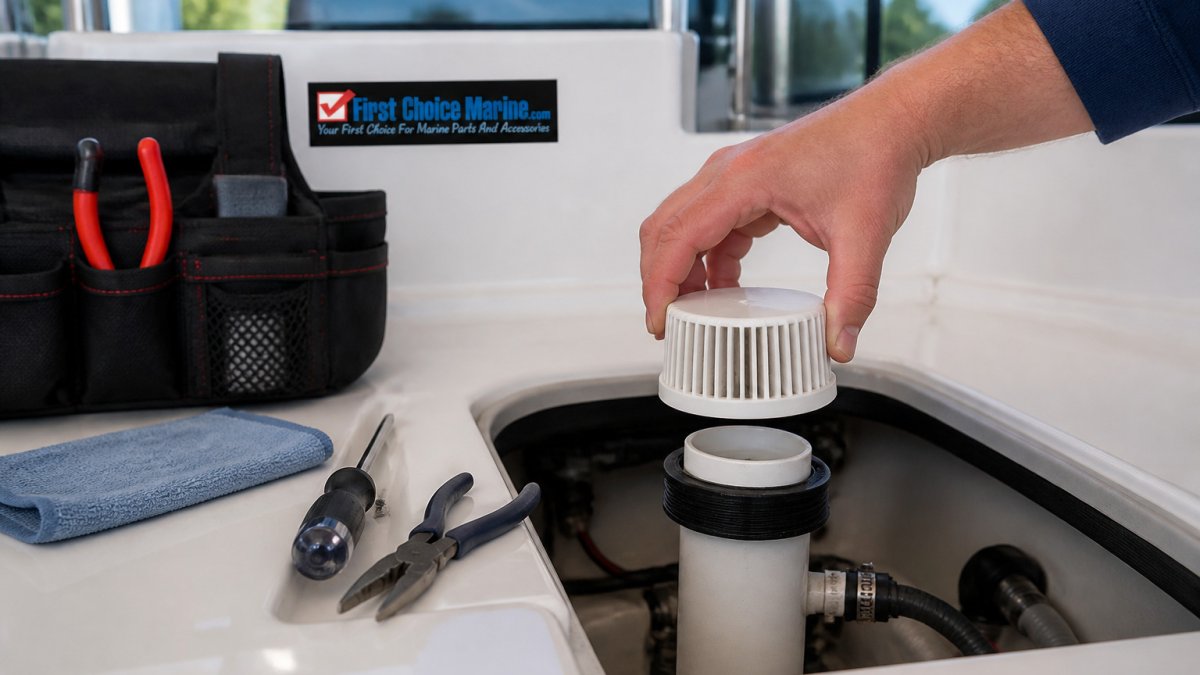
Remove debris in the right order
- Lift the strainer and set it in your bucket, screen-side up, so loosened debris does not fall back into the bilge.
- Pull large debris by hand. Hair, fishing line, wrappers and leaves come out with gloved fingers.
Inspect the impeller and intake while the strainer is off
- Look for wrapped debris. Hair and line wrap around the impeller shaft and stall the pump even when the screen looks clean.
- Check for grit and sediment packed into the inlet. Flush it with clean water; do not poke a screwdriver into the impeller.
- Spin the impeller gently with a gloved finger if the manufacturer allows access. It should turn freely with a slight magnetic resistance. A stiff or gritty feel points to a worn impeller or a failing shaft seal.
- Inspect the outlet and discharge hose for kinks, cracks or a clogged check valve. A blocked discharge makes a healthy pump look weak.
Reassemble and confirm the seal
Before flushing the bilge:
- Reseat the strainer and confirm it sits flush with no gap at the base.
- Reconnect the discharge hose and tighten any clamps you loosened.
- Leave the power isolated until the function test at the end of the job.
A clean strainer on a partly blocked intake or kinked hose will still fail, so treat the intake, impeller and discharge as one system.
Flushing the Bilge and Applying a Bilge Cleaner
Star Brite Bilge Cleaner directions say to pour the contents into the bilge, allow it to remain there while running the boat for a minimum of one hour, then drain or pump it out in accordance with local regulations. You can also get a Boatlife Bilge Cleaner designed for this flushing step.
After running the boat, drain or pump out the bilge cleaner in accordance with local regulations.
How to Test a Bilge Pump After Cleaning
A pump that runs is not the same as a pump that works. The function test confirms three things: the pump moves water, the float switch triggers it automatically, and the discharge path is clear. Do it before you button up the bilge.
Restore power in the right order
- Reconnect the float-switch lead first, then the main pump lead.
- Replace the fuse or reset the breaker.
- Turn the helm switch to the AUTO position, not MANUAL, so the float controls the pump.
Test the manual override first
Most panels have a MANUAL or TEST position. Flip to MANUAL and confirm the pump runs. This isolates the pump from the float circuit, if it runs on manual but not on auto, the problem is the float switch or its wiring, not the pump.
Test the float switch with clean water
- Pour clean water into the bilge until the float rises to its trip point. Use a bucket, not a hose, so you control the level.
- The pump should start before the water reaches the top of the strainer.
- Confirm water is actually leaving the boat, check the discharge thru-hull, not just the pump. A pump that runs but moves little water usually has a blocked intake, kinked hose, or stuck check valve.
- Let the water level fall. The float should drop and the pump should shut off on its own; if it keeps running, the float is stuck or the switch is misadjusted.
Listen and feel for problems
- Grinding or rattling points to debris still in the impeller or a worn bearing.
- A pump that hums but does not move water is usually air-locked or blocked at the intake.
- A pump that cycles on and off rapidly suggests a float set too low or a check valve that is leaking back.
- A hot pump body after a short run means it is working against a restriction, shut it off and recheck the discharge line.
If the pump fails the test
Work back through the system in order rather than replacing parts blindly:
- Recheck the strainer and intake for missed debris.
- Check the discharge hose and thru-hull for kinks, a closed seacock, or a clogged check valve.
- Test the float switch by hand, lift it gently and confirm it clicks and the pump responds. A gritty or sticking float needs cleaning or replacement.
- Confirm the fuse and connections are tight and corrosion-free; a loose ground commonly causes intermittent running.
- If the pump still moves little water, the impeller is likely worn. Have it serviced or replaced per the maker's instructions.
Log the date, what you cleaned, and whether the test passed so the next inspection starts from a known baseline.
How to Unclog a Bilge Pump That Keeps Failing
If the problem continues, replace the strainer with a stronger model. A stainless debris strainer filters out more debris and helps prevent jamming. Repeated failures may also mean the pump itself is worn out, and a professional should look at it.
Set Your Next Inspection Date and Keep the Bilge Clear
Regular checks catch small problems before they become pump failures. Keep your spare strainer, bilge cleaner and gloves in one place so the next cleaning goes faster. A clean bilge and a working pump protect your boat on the water.
Frequently Asked Questions
How do you clean debris out of a bilge pump?
Disconnect power first, then remove the strainer and clear visible debris by hand or with a soft brush. Rinse the pump housing with fresh water, check the impeller for trapped material, and reassemble. Dispose of any oily or contaminated water through an approved facility rather than pumping it overboard. Reconnect power only after the pump is fully reassembled and dry.
What tools do you need to clean a bilge pump?
A Rule Stainless Debris Strainer #70 is listed for use on round-based Rule pumps up to 3700 GPH and filters out excess debris. A Jabsco Bilge Pumpgard Strainer #46200-0000 protects electric diaphragm bilge pumps from particles in the water.
How do you test a bilge pump after cleaning it?
Reconnect power, then lift the float switch manually to confirm the pump starts and runs. Watch for smooth discharge through the outlet hose and listen for unusual noise or vibration. If the pump runs slowly or stops, shut it off and recheck the strainer and impeller for remaining debris before retesting.
What should you do if a bilge pump is still clogged after cleaning?
Repeat the strainer and housing cleaning, paying close attention to the impeller vanes and inlet passages. Check that the hose is not kinked or blocked and that the discharge through-hull is clear. If the pump still fails to run or runs weakly after a thorough cleaning, the motor or switch may need replacement.

