


Table of Contents
- What You'll Need Before Starting
- How to Test Bilge Pump Float Switch Manually
- How to Test Bilge Pump with Multimeter
- Why Your Bilge Pump Keeps Running
- Identifying Debris and Wiring Problems
- Best Marine Bilge Pump Float Switch Options
- Common Mistakes to Avoid
- Preventative Maintenance for Float Switches
- Frequently Asked Questions
Last Updated: September 23, 2026
What You'll Need Before Starting
Before you troubleshoot a marine bilge pump float switch, gather a few basic tools. You'll need a digital multimeter to test electrical continuity and voltage. A flashlight helps you see into the bilge compartment clearly. Have some clean rags or paper towels ready to wipe away debris and corrosion. A small wire brush works well for cleaning corroded terminals.

Safety comes first. Disconnect the battery before starting any electrical work. This prevents accidental shorts or electrical shocks while you're testing components. Wear gloves to protect your hands from sharp edges and corroded metal. If you're working in a confined bilge space, ensure good ventilation and take breaks as needed.
Keep your boat's electrical schematic nearby if you have one. This shows you exactly where wires connect and helps you understand the circuit. Most importantly, stay patient. Troubleshooting takes time, but you'll save hundreds in service calls once you master these basics.
How to Test Bilge Pump Float Switch Manually
The simplest way to test your bilge pump float switch is the manual lift test. Reach into the bilge and manually lift the float switch arm upward. The pump should activate instantly. If nothing happens, you've found a problem.

Here's what this test tells you:
- Pump fires immediately: Your switch is likely working. The issue may be elsewhere in the electrical system.
- Pump doesn't fire: The switch itself has failed, or the wiring connection is broken.
- Pump runs but won't stop: The switch may be stuck in the "on" position, or the float arm is jammed.
After lifting the float, manually push it back down. The pump should shut off. If it keeps running, you're dealing with a stuck switch or a wiring fault. Write down exactly what happens. This information guides your next diagnostic steps.
How to Test Bilge Pump with Multimeter
A digital multimeter reveals what's happening inside your float switch circuit. Set your multimeter to the continuity setting. This tests whether electrical current can flow through the switch contacts.

Checking Continuity Across the Switch
Locate the two wire terminals on your float switch. These are typically marked or color-coded. Set your multimeter to continuity mode. Touch one probe to each terminal.
When the float arm is down, the switch should be open. Your multimeter will show no continuity (usually displayed as infinity or a blank reading). Now manually lift the float arm upward. The switch should close, and your multimeter will beep or show zero resistance, indicating continuity.
If the switch shows continuity in both positions (up and down), it's stuck closed. If it shows no continuity in either position, the internal contacts are broken. Either way, the switch needs replacement.
Testing Voltage at the Switch Terminals
Voltage testing shows whether power is reaching your switch. Set your multimeter to DC voltage mode. Most boat electrical systems run 12 volts, though some larger vessels use 24 volts.
Connect your multimeter probes to the switch terminals with the battery connected. You should see voltage present at the switch input. If you see zero volts, the problem is upstream in your wiring or battery system, not in the switch itself.
Now activate the pump manually (by lifting the float). Voltage should drop slightly as current flows through the switch. If voltage stays the same or disappears completely, the switch contacts aren't conducting properly.
Test both the power input and the ground wire. Ground connections corrode frequently in marine environments. A corroded ground wire blocks current flow even if the switch itself works fine.
Why Your Bilge Pump Keeps Running
A bilge pump that won't shut off is annoying and dangerous. It drains your battery and can damage the pump motor. Several issues cause continuous running.
The most common culprit is a stuck float switch. Debris, corrosion, or mineral buildup prevents the float arm from dropping back down after it rises. When the water level drops, the float should descend and open the switch contacts, stopping the pump. If the float is stuck in the raised position, the pump keeps running indefinitely.
A second cause is a shorted switch circuit. Water intrusion or corroded contacts inside the switch create a permanent electrical path. Current flows continuously, and the pump won't stop. This usually requires switch replacement.
Rule Super Switch Float Switch with →
Check your wiring for pinches or damage. A damaged wire can short to ground, completing the circuit even when the switch is open. Trace the entire run from the switch to the pump and control panel. Look for cuts, abrasions, or areas where the insulation has worn away.
Identifying Debris and Wiring Problems
Bilge compartments collect debris. Sediment, fiberglass particles, and organic growth accumulate around the float switch. Over time, debris prevents the float from moving freely.
Inspect the float assembly visually. Look for visible particles, slime, or corrosion around the float arm. Remove any loose debris by hand or with tweezers. Rinse the float mechanism with fresh water if possible. A small wire brush cleans light corrosion from the float surface.
Check all wiring connections next. Marine environments create corrosion rapidly. Terminal oxidation turns copper connections green or white. These corroded connections resist current flow, weakening the signal to your pump.
Disconnect each wire at the switch terminals. Wipe away corrosion with a small wire brush or fine sandpaper. Clean the terminal surfaces until they shine. Reconnect the wires firmly. Loose connections generate heat and increase resistance.
Inspect the wiring harness for damage. Water intrusion, UV exposure, and vibration wear through insulation. Look for cracks, pinches, or areas where the outer jacket is missing. Damaged insulation creates shorts and electrical faults.
According to [BoatUS expert guidance on bilge pump(/blogs/ship-shape/how-to-troubleshoot-common-bilge-pump-issues) maintenance | boatus.com], ensuring all bilge pump and float switch components remain easily accessible for future inspection prevents many common failures. Poor access leads to neglected maintenance, which accelerates corrosion and debris buildup.
Best Marine Bilge Pump Float Switch Options
When your float switch fails, replacement is straightforward. First Choice Marine stocks several reliable options that work with most automatic bilge pump systems.
The Rule Super Switch Float Switch with Removable Base (#37A) is our top pick for durability and ease of service. This switch handles pumps drawing up to 20 amps and works with 12, 24, or 36-volt systems. The removable base design lets you service the switch without disconnecting all the wiring. It includes a 5-year warranty and uses marine-grade 14-gauge blocked wire. At $76.18, it's a solid investment for long-term reliability.
The Rule A-Matic Plus Float Switch (#40A) offers excellent value at $67.91.
| Switch Model | Price | Max Amps | Voltage | Warranty | Best For |
|---|---|---|---|---|---|
| Rule Super Switch #37A | $76.18 | 20A | 12/24/36V | 5 years | Reliability and serviceability |
| Rule A-Matic Plus #40A | $67.91 | 20A | 12V | 2 years | Built-in test feature |
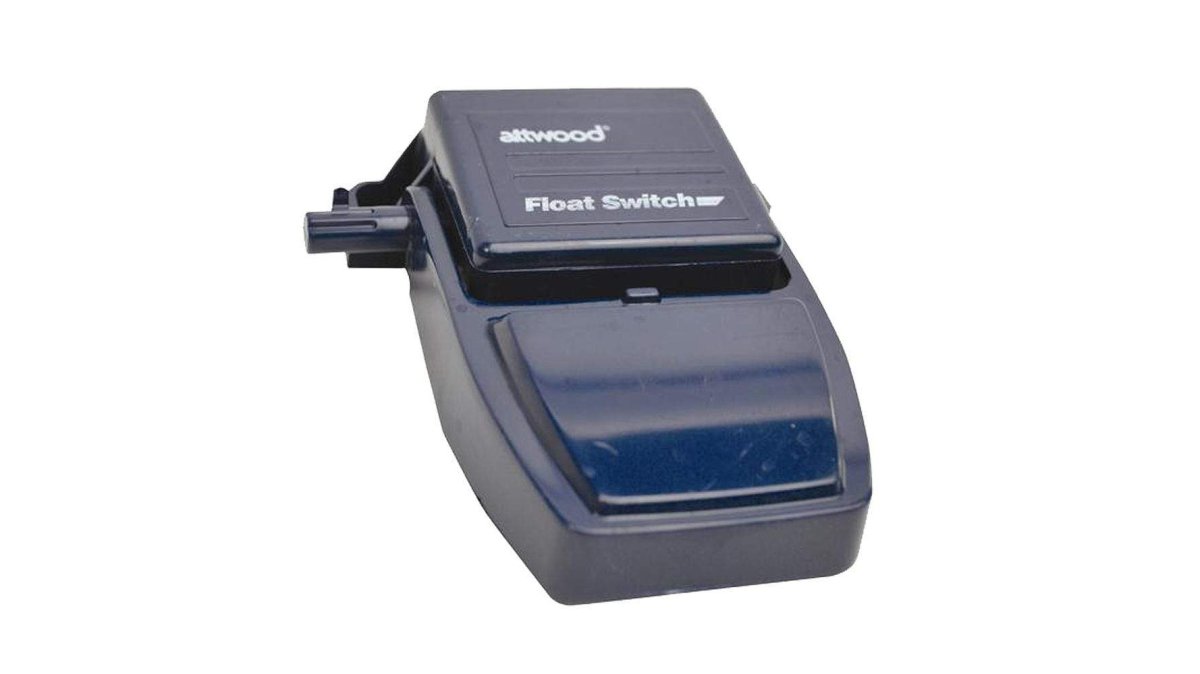
| Attwood #4202-7 | $31.43 | 12A | 12/24V | Included | Tight spaces, budget |
| Seachoice #19403 | $24.38 | 15A | 12V | 3 years | Cost-effective, ABYC rated |
Common Mistakes to Avoid
Don't overtighten wire terminals when reconnecting. Copper is soft and over-tightening can crack the connector. Tighten until snug, then stop.
Preventative Maintenance for Float Switches
Regular maintenance prevents most bilge pump failures. Develop a simple routine and stick to it.
Frequently Asked Questions
How do I know if my bilge pump float switch is bad?
A faulty float switch typically fails to activate the pump when water rises in the bilge, or it runs continuously without stopping. Manual testing is the fastest way to confirm: reach into the bilge and lift the float arm by hand. The pump should activate instantly. If nothing happens, the switch or power supply has failed. You can also use a multimeter to test continuity across the switch terminals, a good switch shows resistance change when the float moves, while a bad one shows no change or zero continuity in both positions.
Why does my bilge pump keep running continuously?
A bilge pump that runs nonstop usually indicates a stuck float switch that remains in the 'on' position. This happens when debris, corrosion, or sediment jams the float arm or internal switch mechanism. Water level may also be genuinely high due to a leak elsewhere on the boat. First, manually lift the float to see if the pump stops, if it does, debris is the culprit. If the pump continues running even with the float raised, the switch contacts are stuck closed and the switch needs replacement. Check for visible corrosion around the terminal block and clean connections with a wire brush.
Can you bypass a bilge pump float switch to test it?
Yes, you can temporarily bypass the switch to test if the pump itself works. Locate the two switch wires at the pump's power input or control panel and touch them together briefly to complete the circuit, this simulates the switch closing. The pump should start immediately. If it does, the pump is functional and the switch is the problem. If the pump doesn't start, the issue is in the power supply, wiring, or pump itself. Never leave the switch bypassed permanently; always restore proper switch operation for safety and automatic bilge protection.
What causes a bilge pump float switch to fail?
Common causes include sediment and debris jamming the float arm, corrosion on electrical terminals preventing good contact, water intrusion damaging the switch mechanism, and electrical spikes that burn out internal contacts. The harsh bilge environment, salt spray, oil residue, and constant movement, accelerates wear. Regular inspection and cleaning of the float arm and terminal block, plus ensuring adequate bilge accessibility, reduce failure rates significantly.
