


Quick Summary
The automatic bilge pump float switch vs electronic sensor choice depends on whether you prefer a low-cost, easy-to-inspect design or a no-moving-parts one. A float switch uses a rising arm or ball to close a contact, while an electronic sensor detects water through electrical changes. Float switches are cheaper and can be tested by hand, but their moving parts can stick or corrode.
- Float switches are cheaper, with the Attwood 4202-7 listed at $31.43 at First Choice Marine.
- Electronic sensors have no moving parts to stick or wear out, though upfront cost is higher.
- A float can stick from debris, leaving the pump off silently until water is already in the bilge.
- Add a high-water alarm on its own circuit as a backup for either switch type.
- Lift a float or use the sensor's test feature at every outing to confirm the pump runs and shuts off.
Table of Contents
- How Float Switches and Electronic Sensors Control a Bilge Pump
- Side-by-Side Comparison: Float Switch vs Electronic Sensor
- Reliability, Moving Parts and Failure Modes
- Bilge Bundle Options: Integrated Automatic Pumps and Separate Switches
- Bilge Pump Float Switch Installation and Wiring Diagram
- Bilge Pump Switch Troubleshooting Checklist
- Choose the Right Bilge Pump Switch for Your Boat
- Frequently Asked Questions
Last Updated: November 9, 2026
Choosing the right automatic bilge pump float switch vs electronic sensor comes down to one question: which will reliably turn your pump on when water rises and keep working for years in a damp, salty engine compartment?
Both designs do the same job but fail in different ways. Float switches are simple, inexpensive and easy to check, though their mechanical parts can stick or corrode.
How Float Switches and Electronic Sensors Control a Bilge Pump
A float switch is a mechanical device.
Electronic sensors detect water through a change in an electric field or in electrical conductivity rather than a moving float.
Some electronic designs are built into the pump itself. The Rule 1100 GPH Electronic Sensing 12v Bilbe Pump #27SA works on impeller resistance: it runs briefly at intervals to check for water and keeps running while water is present.
Side-by-Side Comparison: Float Switch vs Electronic Sensor
The table below summarizes the main differences between the two switch types, using the products First Choice Marine carries.
| Feature | Mechanical Float Switch | Electronic Sensor |
|---|---|---|
| Operation | Moving float closes a contact | Detects water via electric field or resistance |
| Moving parts | Yes (float arm or ball) | No, in solid-state designs |
| Example from our catalog | Attwood Automatic Float Switch Only 12v #4202-7 ($31.43) | Johnson Pump Ultima Switch #36303 ($69.63) |
| Price range in our catalog | $31.43 to $67.91 | $69.63 to $156.54 (sensor-based pumps and switches) |
| Typical weak point | Stuck float, corrosion, debris | Wiring errors, sensor fouling, dependence on electronics |
| Best for | Simple, low-cost, easy-to-inspect systems | Boats that need no-moving-parts reliability |
Pros of float switches
- Lower cost. The Attwood switch sells for $31.43 at First Choice Marine.
- Easy to test by hand. The Attwood 4202-7 includes a test knob.
Cons of float switches
- The float can stick, especially where debris collects.
- The moving parts are exposed to corrosion over time.
Pros of electronic sensors
- No moving parts to stick or wear out.
- Sealed, solid-state electronics. The Ultima switch, for example, is totally sealed and its detector cells never touch the water.
- Some designs eliminate the separate switch altogether, which reduces the number of parts.
Cons of electronic sensors
- Higher upfront cost.
- Fault diagnosis can be harder, since failures are electronic rather than visible.
- Performance varies between designs, so check the product specification before buying.
Reliability, Moving Parts and Failure Modes
How a float switch fails
A float switch depends on a buoyant arm or ball moving freely through its full travel. In a damp bilge, several things can work against that:
- Binding and debris. Slime, hair, fishing line, and hull chips collect around the pivot or cage. The float can no longer rise far enough to close the contact, so the pump never starts. This is the classic "silent" failure: nothing looks wrong until water is already in the bilge.
- Sticking closed. The same debris, or corrosion on the pivot, can hold the float up after the water drops. The pump then runs continuously, draining a battery in hours and burning out a motor running dry.
- Contact corrosion. The internal switch contacts sit in a humid, salty environment. Over time they can pit or film over, so the switch closes intermittently or not at all.
A float failure is usually visible if you look.
How an electronic sensor fails
Electronic switches remove the moving float but replace a mechanical failure with an electrical one, and electrical failures are often quieter:
- Fouling of the sensing area. Oil film, foam, or a coating of bilge grime can insulate the sensing cell or change its electric field, so the sensor either misses water or triggers when there is none. Capacitance and conductivity designs are affected differently, which is why the product specification matters more than the marketing label.
- Wiring and connection faults. A loose ground, a corroded terminal, or a wire run through a wet bilge can make a sensor behave erratically. Because the sensor is powered continuously to sense water, a bad connection can look like a dead sensor.
- Stuck-on output. If the electronics latch on, the pump runs continuously, with the same battery-drain and dry-run consequences as a stuck float.
Many electronic switches add a short time delay to reject false triggers from sloshing or spray; the Johnson Pump Ultima Switch, for example, waits a few seconds before acting.
What each failure costs you
The practical difference is not which design fails less often, but which failure you are more likely to catch.
Practical backup and alarm recommendations
Because both designs can fail silently in the "off" direction, treat the switch as one layer, not the whole system:
- Add a high-water alarm. A separate float or sensor mounted above the normal pump-on level gives an audible warning if the primary switch fails to start the pump. This is the single most effective backup for either design.
- Keep a second, independent pump circuit. A second pump with its own switch and its own fuse means one failed switch cannot leave the bilge unprotected.
- Test on a schedule. Lift a float by hand, or use the sensor's test feature, at every outing or at least monthly, and confirm the pump actually runs and then shuts off.
Watch out: a high-water alarm wired to the same fuse as the pump will go silent at the exact moment the fuse blows, so give the alarm its own circuit.
Bilge Bundle Options: Integrated Automatic Pumps and Separate Switches
You can build an automatic bilge system in two ways. An integrated automatic pump contains its own water sensing, the Rule Mate 1100 and Rule 1100 GPH Electronic Sensing pumps are examples, and is simpler to install because there is no separate switch to mount or wire.
The second option is a separate pump paired with a switch, which lets you choose a switch independently of the pump. For example, pair a standard pump with the Rule A-Matic Plus Float Switch #40A ($67.91), designed for pumps drawing up to 20 amps and backed by a 2-year warranty, or with the Johnson Pump Ultima Switch #36303 for a no-moving-parts sensor.

Choose integrated pumps when you want the fewest parts and simplest wiring. Choose a separate switch when you already have a working pump, need a specific switch type, or want to replace only the switch when it wears out.
Bilge Pump Float Switch Installation and Wiring Diagram
Installation quality affects both switch types, and most switch "failures" traced by owners turn out to be wiring or placement problems.
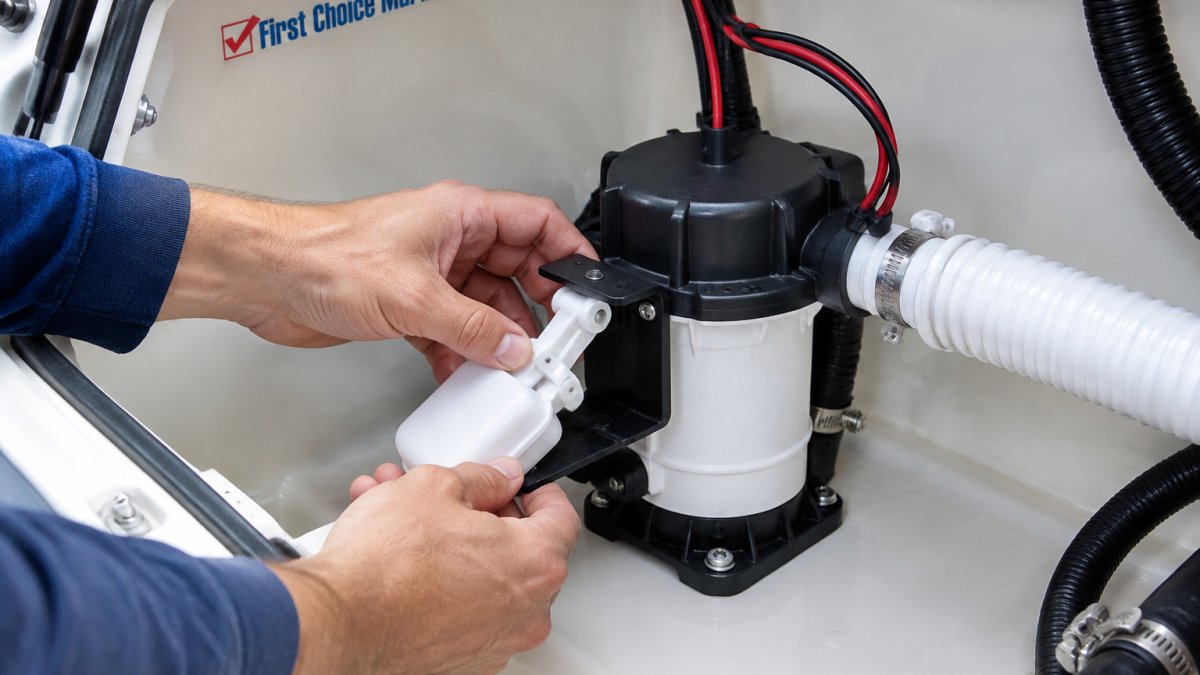
Placement and mounting clearances
- Mount the switch so the float or sensing area has full, unobstructed travel, with clearance on all sides so the float cannot rest against the hull, a stringer, a hose, or the pump body.
- Keep the switch off the very bottom of the bilge. A small standoff keeps the float out of the grit and oil that collects at the lowest point and lets the pump leave a shallow residual depth rather than running dry.
- Keep the switch away from the pump intake, where debris will collect around a nearby float or sensor.
Wiring path
A typical separate-switch circuit runs: battery positive → fuse or breaker → switch → pump positive; pump negative → ground.
For an integrated automatic pump, the pump's own sensing electronics handle the switching, so the wiring is simpler: fused positive to the pump, negative to ground, and the pump's built-in logic decides when to run.
Fuse and wire sizing
- Fuse to the pump, not the switch. Size the fuse or breaker to the pump's rated current, following the pump manual; a fuse sized for the switch will nuisance-blow or fail to protect the pump.
- Match wire gauge to run length and current. A short run to a small pump can use lighter wire; a long run or high-amp pump needs heavier wire to limit voltage drop. The Rule-A-Matic Plus float switch, for example, is supplied with 14-gauge marine-grade wire and is designed for pumps drawing up to 20 amps.
- Use marine-grade, tinned wire and adhesive-lined heat-shrink terminals. Learn the key risks of marine grade wiring vs automotive wire before you connect the pump. Plain automotive wire and crimp connectors corrode quickly in a bilge.
Setup checks before you trust it
- Confirm the fuse is the correct rating for the pump.
- With the pump dry, lift the float or trigger the sensor's test feature and confirm the pump starts.
- Lower the float or clear the sensor and confirm the pump stops.
- Fill the bilge with a hose until the switch activates, then watch the pump shut off as the water drops.
- Check that the float returns fully and the pump does not short-cycle.
- Tug each terminal to confirm it is seated, and confirm the ground connection is clean and tight.
Watch out: a float switch mounted where the float can catch on a stringer or hose may fail to start the pump or leave it running, so recheck free travel after every hose or component change in the bilge. Read the step-by-step guide to installing a secondary bilge pump system for the full install sequence.
Bilge Pump Switch Troubleshooting Checklist
When a bilge pump does not respond as expected, work through these checks before replacing parts:
- Confirm power reaches the switch and the pump with a meter.
- Test the switch by hand. For a float switch, lift the float; for an electronic switch, use the test feature if it has one.
- Inspect the float for debris, corrosion or binding.
If the pump runs continuously, the switch may be stuck closed, or the sensor may be detecting water that is not there. If the pump never starts, check power first, then the switch. Troubleshoot a marine bilge pump float switch for deeper diagnosis of a failing float.
Choose the Right Bilge Pump Switch for Your Boat
The right choice depends on how you use the boat and how much maintenance you want to do.
If you are unsure, start with the size and type of pump you already have and check whether it is compatible with the switch you are considering. First Choice Marine's product listings include the amperage, voltage and specifications needed for that check.
Frequently Asked Questions
Does an automatic bilge pump need a float switch?
Not always. Some automatic bilge pumps, such as the Rule-Mate 1100 at $148.30, include integrated water sensing and state no float switch is required. Others, like the Attwood Automatic Float Switch Only at $31.43, convert a standard pump to automatic operation by adding a mechanical float. Check the product listing before buying. If the pump is sold as a manual unit, you will need a separate float switch or electronic sensor to run it automatically.
What are the disadvantages of a bilge pump float switch?
A mechanical float switch has moving parts, so it can stick, collect debris, or fail from corrosion over time. The float may also sit in the wrong position if the mounting angle is off. Installation can be tight in cramped bilges. Replacement is usually inexpensive, such as the Rule A-Matic Plus at $67.91, but a stuck float can leave the bilge unpumped if it goes unnoticed. Regular testing and inspection reduce this risk.
Can an electronic bilge sensor replace a float switch?
Yes, for many setups. The Johnson Pump Ultima Switch at $69.63 uses field-effect detector cells with no moving parts and activates at a 50 mm (2 inch) fluid level. Electronic switches avoid mechanical sticking, but performance can vary between designs, so confirm the switch is rated for your pump's amperage (up to 20 amps for the Ultima). Keep the sensor clean and check that it turns the pump on and off as expected.
How do you test an automatic bilge pump switch?
Start by confirming the pump has power and the circuit breaker or fuse is intact. Many float switches include a test knob, such as the Attwood 4202-7, which runs the pump when pressed. For electronic sensors, add a small amount of water to the bilge to see whether the pump activates after the rated delay. Then remove the water and confirm the pump shuts off. A pump that runs continuously or never starts points to a switch or wiring fault.

