


Table of Contents
- Tools and Materials You'll Need
- How to Measure Your Boat Steering Cable Correctly
- Tracing and Disconnecting the Old Cable
- Removing the Helm Assembly and Engine Connection
- Fixing Stiff Boat Steering Cable Issues Before Replacement
- Installing Your New Steering Cable
- Lubrication and Maintenance with Best Marine Grease
- Mechanical vs. Hydraulic Steering Conversion
- Frequently Asked Questions
Last Updated: September 21, 2026
Tools and Materials You'll Need
To replace boat steering cable, you need the right equipment. Without proper tools, you'll waste time and risk damaging your helm assembly or cable fittings.
Start with basic hand tools. You'll need an adjustable wrench or socket set to disconnect the cable nut at both ends. A pair of slip-joint pliers helps remove cotter pins that secure the cable fittings. A screwdriver set (both Phillips and flathead) handles any fasteners holding cable conduit in place.
Next, gather measurement tools. A tape measure lets you determine the exact cable length you need. Many boat owners skip this step and order the wrong size. Write down your measurements before ordering.
Here's what else matters:
- Marine grease or penetrating oil (for seized steering components)
- Cable ties or clips (to secure new cable routing)
- Electrical tape or heat shrink tubing (for protecting connections)
- A flashlight or headlamp (steering cables run through tight spaces)
- Your boat's manual or service documentation (shows cable routing for your specific model)
First Choice Marine stocks quality steering cables designed for marine environments in multiple lengths. The Teleflex QCII Quick Connect Rotary Steering Cable 10' runs $147.51 and works with both threaded and quick-connect helms. If you need a longer run, the 20-foot Xtreme cable costs $195.62 and handles the demands of larger vessels.

Having the right materials prevents frustration. Order your replacement cable before you start disconnecting the old one.
How to Measure Your Boat Steering Cable Correctly
Getting the cable length wrong is the most common DIY mistake. An undersized cable won't reach your engine connection. An oversized one creates slack and poor steering response.
Measure from the helm assembly to the engine connection point. Start at the steering wheel attachment point on your helm. Trace the cable path along the inside of your boat to where it connects to the outboard motor or tilt tube. Don't measure straight lines, follow the actual route the cable takes.
Add 2-3 inches to your measurement for connection fittings. The cable needs room to bend at both ends without kinking. A kinked cable binds up and creates stiff steering that feels unresponsive.
Your boat type affects cable length. Center console boats often need shorter runs than cabin cruisers. Fishing boats with engines mounted high on the transom require longer cables than boats with inboard motors. Check your existing cable for length markings or consult your manual for the original specification.
Write down three measurements:
- Total distance from helm to engine
- Number of bends or turns in the routing path
- Any tight spaces the cable must navigate
These details help you select the right cable and avoid installation problems. Bill Higham Marine's steering cable removal guide shows detailed measurement techniques for different boat configurations. Properly securing your steering system often coincides with upgrading other electrical components, which makes understanding marine installation costs a practical step for any comprehensive vessel maintenance plan.
Tracing and Disconnecting the Old Cable
Before you remove anything, understand where your cable goes. The steering cable runs from your helm assembly through the boat's interior to the engine connection. It may pass through the cabin, under the deck, or along the gunwale depending on your boat's design.
Trace the cable's full path from start to finish. Note any tight bends, cable ties, or fasteners holding it in place. Take photos if you can, they help when routing the new cable later.
Start disconnecting at the helm. Locate the cable nut where the cable attaches to your steering wheel assembly. Use your wrench to loosen this connection. Some helms have a quick-connect feature that requires no tools, just pull and twist.
Next, work toward the engine. Follow the cable through your boat, removing any cable ties or clips securing it. Note how the cable is routed. Does it run along the starboard side or port side? Does it pass through any bulkheads or tight spaces? These details matter when installing the new cable.
At the engine end, disconnect the cable from the outboard motor or tilt tube. This connection typically uses a cable nut and cotter pin. Remove the cotter pin first with your pliers, then unscrew the cable nut. The cable end fitting should slide free.
Once both ends are disconnected, you can remove the old cable. Pull it out slowly and carefully. If the cable resists, apply penetrating oil and wait a few minutes. Forcing a stuck cable damages the cable jacket and can break fasteners.
Inspect the cable conduit (the protective tube the cable runs through). If it's cracked, corroded, or damaged, replace it. A damaged conduit allows water inside and accelerates corrosion of the new cable.
Removing the Helm Assembly and Engine Connection
Some steering systems require helm removal for cable replacement. Others allow cable swaps without touching the helm. Check your boat's manual first.
If your helm must come out, disconnect any electrical connections (most modern helms have no power, but some have trim controls). Remove the fasteners holding the helm to the dashboard, typically four bolts. Carefully pull the helm forward and set it aside on a soft surface.
Teleflex Xtreme NFB Rotary Steering →
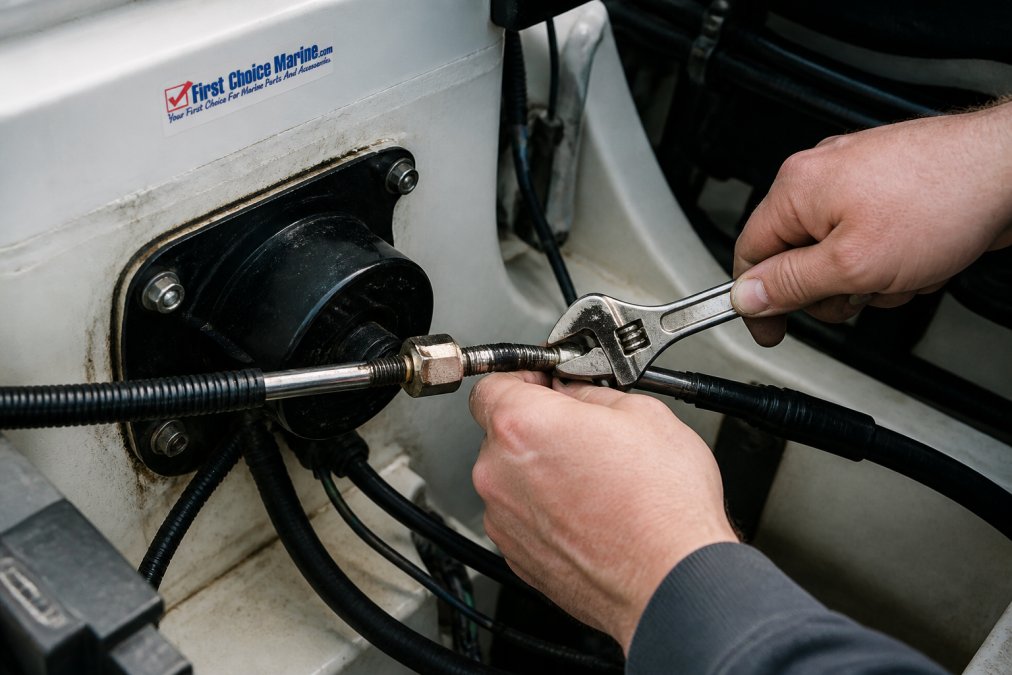
Now access the cable connection point. You'll see the cable nut and possibly a cotter pin or retaining clip. Remove the cotter pin if present. Unscrew the cable nut using your wrench. The cable end fitting should separate cleanly.
At the engine end, locate the steering link arm or tilt tube connection. This is where the cable connects to your outboard motor. Remove the cotter pin first. Then unscrew the cable nut. The end fitting slides off.
Some boats have both a helm connection AND an engine connection that require disconnection. Others have a single steering box mounted remotely. Understand your setup before you start.
If fasteners are seized or corroded, apply penetrating oil and let it soak for 15-30 minutes. Rust and corrosion are common in marine environments. Forcing a stuck fastener strips threads and creates bigger problems.
Fixing Stiff Boat Steering Cable Issues Before Replacement
Stiff steering doesn't always mean you need a new cable. Sometimes lubrication solves the problem.
A stiff steering cable usually indicates one of three issues: lack of lubrication, internal corrosion, or a kinked cable jacket. Before you replace it, try fixing it.
Apply marine grease to the cable at both connection points. Work the steering wheel back and forth slowly. The grease lubricates the inner core and reduces friction. If steering improves, you may extend the cable's life.
For seized steering, use penetrating oil instead of grease. Spray it into the cable connection points and around the cable jacket. Let it soak for several hours. Then work the steering wheel gently back and forth. Avoid forcing it, you can break the cable.
Check for visible kinks or bends in the cable jacket. A kinked cable has internal damage that lubrication won't fix. You need replacement in this case.
Measure the cable's range of motion. Turn the steering wheel from full left to full right and count the wheel rotations.
Installing Your New Steering Cable
When you replace boat steering cable, installation is the reverse of removal, but routing matters greatly.
Start at the helm. Insert the cable end fitting into the helm connection point. Align the fitting properly, it should slide in smoothly without forcing. Screw the cable nut hand-tight first, then use your wrench to finish tightening. Don't over-tighten, which can strip threads.
Now route the cable toward the engine. Follow the exact path your old cable took. This routing exists for a reason, it keeps the cable away from heat sources, sharp edges, and moving parts. Use cable ties to secure the new cable every 12-18 inches along its run.
Avoid sharp bends. The cable has a minimum bend radius, typically 4-6 inches depending on cable type. Bends tighter than this kink the inner core and damage steering response. If your routing requires a tight bend, add a cable conduit elbow to smooth the transition.
At the engine end, insert the cable fitting into the tilt tube or steering link arm connection.
Lubrication and Maintenance with Best Marine Grease
Proper lubrication keeps your new cable working smoothly for years.
| Maintenance Task | Frequency | What to Check |
|---|---|---|
| Apply marine grease | Every 50-100 hours | Smooth steering response |
| Inspect cable jacket | Annually | Cracks, corrosion, water damage |
| Check cable routing | Annually | Tight bends, rubbing, chafing |
| Verify steering tension | Seasonally | Loose or stiff steering feel |
Mechanical vs. Hydraulic Steering Conversion
Some boat owners upgrade from mechanical cable steering to hydraulic systems. Hydraulic steering offers smoother operation and better feedback, especially on larger boats.
Frequently Asked Questions
Can I replace a steering cable without removing the outboard motor?
Yes. While removing the outboard motor provides more space, alternative methods exist. You can cut the old cable in sections and remove it piece by piece, or shift the motor to create temporary clearance. These approaches work well if you have limited space or prefer to avoid motor removal. However, removing the motor entirely gives you the most room to work and reduces the risk of accidentally damaging the cable routing or transom area during installation.
What tools are needed to replace a boat steering cable?
Essential tools include an adjustable wrench or socket set, screwdrivers (both Phillips and flathead), a measuring tape, pliers for disconnecting end fittings, and a flashlight to see cable routing inside the helm assembly.
How do I know what length steering cable I need?
Measure from the steering wheel output shaft at the helm assembly to the connection point at the outboard motor or tilt tube. If your boat has an existing cable, you can remove it and measure its total length as a reference. When in doubt, choose the longer option rather than risk a cable that's too short.
How often should I replace my boat steering cable?
Signs of wear include stiff steering, kinked cable sections, corrosion around end fittings, or visible fraying of the cable jacket. Regular lubrication with marine grease extends cable life. If you notice increased steering effort when turning the wheel, have the cable inspected before it fails completely.
